
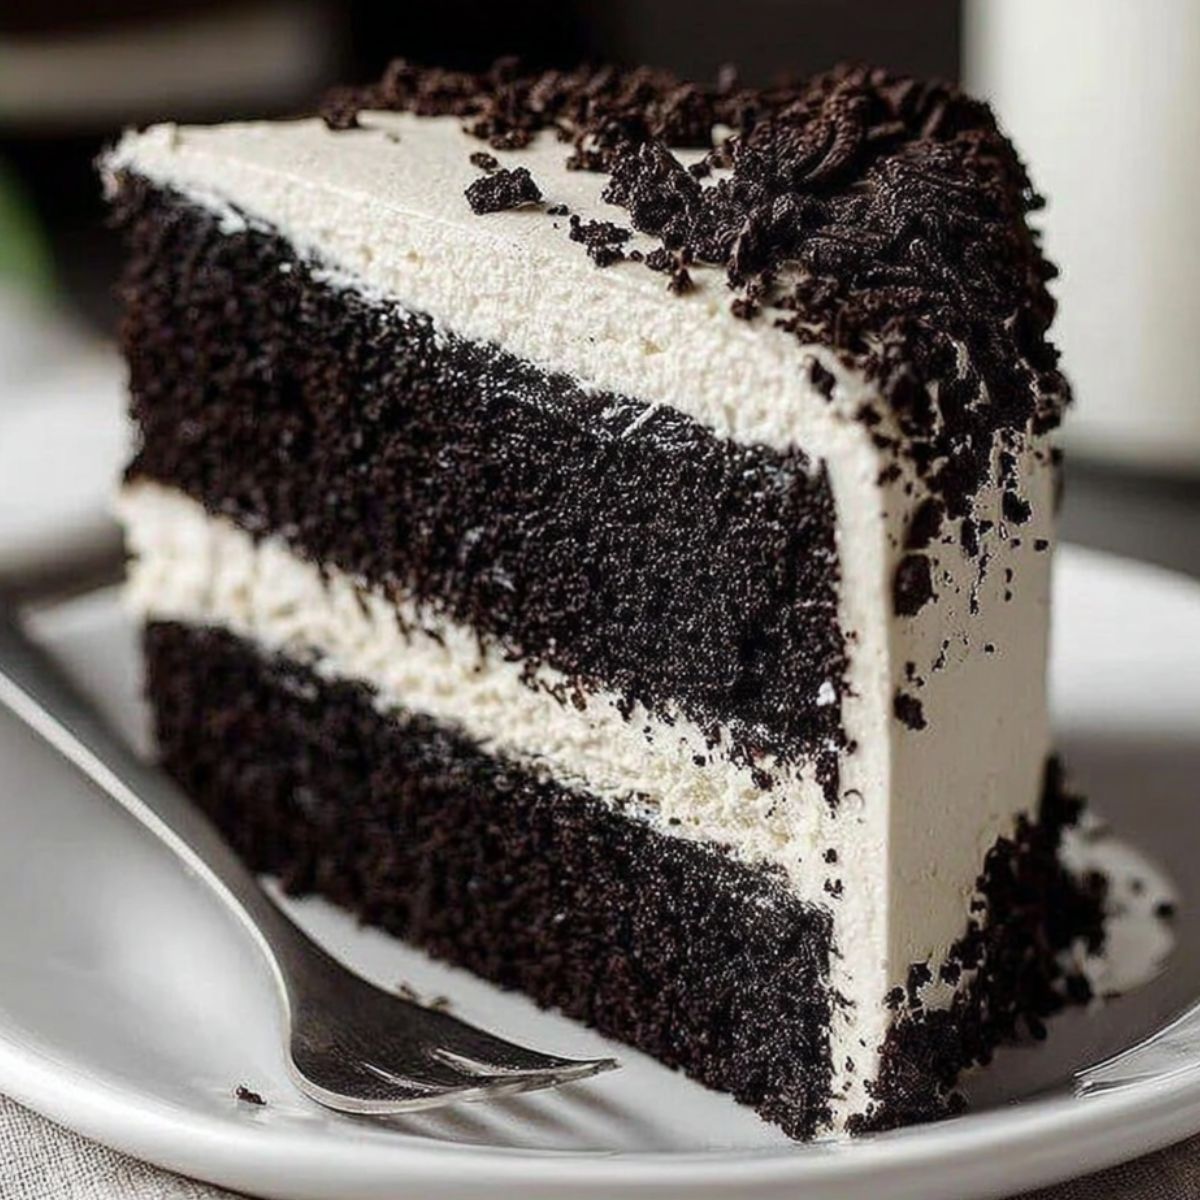
Creating the perfect black velvet cake transforms any ordinary gathering into an extraordinary celebration. This striking dessert combines the beloved flavors of traditional red velvet with a dramatic gothic twist that's perfect for Halloween parties, elegant weddings, or whenever you want to make a bold statement. My black velvet cake recipe delivers the same tender crumb and tangy cream cheese frosting you love, but with an intensely dark appearance that's absolutely mesmerizing.
What makes this black velvet cake so special is its perfect balance of rich cocoa flavor and velvety smooth texture. Unlike regular chocolate cake, this black velvet cake maintains that signature slight tang from buttermilk and vinegar, creating a complex flavor profile that keeps people coming back for more. The deep black color isn't just for show; it represents a sophisticated take on classic American baking that's sure to impress your guests.
Why This Black Velvet Cake Recipe Stands Out
This black velvet cake recipe has become my go-to dessert for special occasions because it delivers both visual impact and incredible taste. Traditional red velvet cake gets its signature color from red food coloring, but this black velvet cake uses high-quality black food coloring and extra cocoa powder to achieve its stunning appearance. The result is a cake that's not only Instagram-worthy but also packed with rich chocolate flavor that doesn't overwhelm the delicate velvet texture.
What sets this black velvet cake apart from other chocolate cakes is its unique preparation method and ingredient balance. The combination of buttermilk, vinegar, and baking soda creates a chemical reaction that produces the characteristic tender crumb, while the black food coloring and additional cocoa powder give it that dramatic appearance. This black velvet cake pairs beautifully with cream cheese frosting, fresh berries, or even a simple dusting of powdered sugar for more casual occasions.
Jump to:
Ingredients
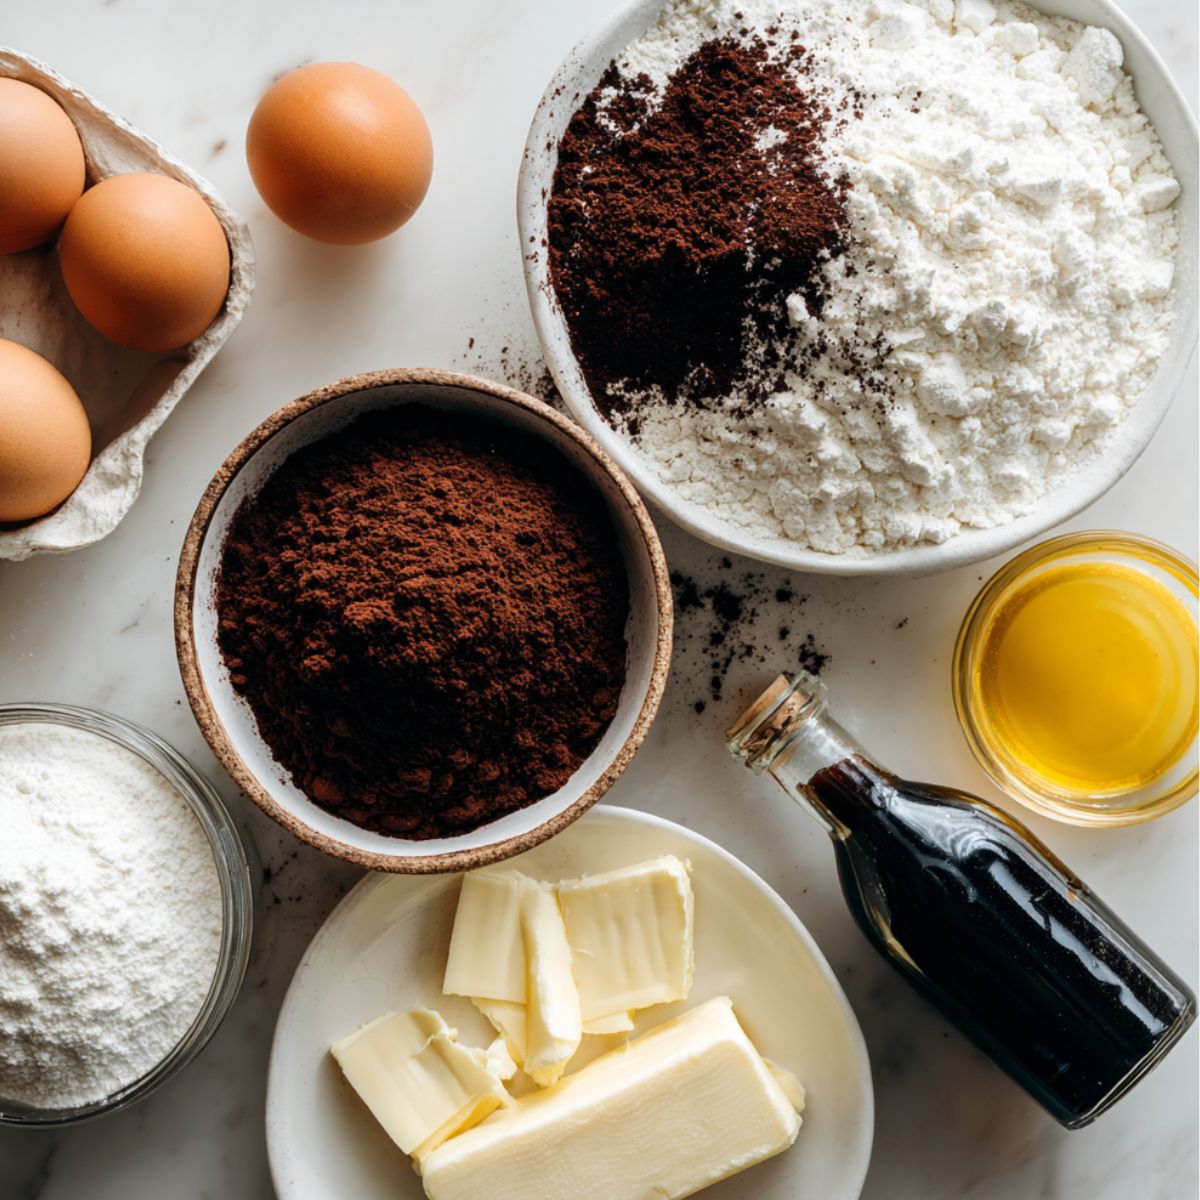
Cake Base
- All-purpose flour
- Granulated sugar
- Unsalted butter, softened
- Eggs
- Buttermilk
- Cocoa powder
- Black food coloring (gel works best)
- Vanilla extract
- White vinegar
- Baking soda
- Salt
Cream Cheese Frosting
- Cream cheese, softened
- Butter, softened
- Powdered sugar
- Vanilla extract
- Salt
See recipe card for quantities.
Instructions
Step 1: Prepare Your Kitchen Setup
- Preheat your oven to 350°F (175°C) and grease two 9-inch round cake pans.
- Line the bottom of each pan with parchment paper for easy removal.
- Dust the pans lightly with cocoa powder instead of flour for better color consistency.
Step 2: Mix the Wet Ingredients
- In a large mixing bowl, cream together softened butter and granulated sugar until light and fluffy (about 3-4 minutes).
- Add eggs one at a time, beating well after each addition.
- Mix in vanilla extract, then slowly add the black food coloring until you achieve your desired dark color.
- In a separate bowl, whisk together buttermilk and white vinegar; set aside.
Step 3: Combine Dry and Wet Components
- In another bowl, sift together flour, cocoa powder, and salt.
- Alternate adding the dry ingredients and buttermilk mixture to the butter mixture, beginning and ending with flour mixture.
- In a small bowl, mix baking soda with 1 tablespoon of hot water, then quickly fold into the batter.
Step 4: Bake to Perfection
- Divide batter evenly between prepared pans and smooth the tops.
- Bake for 25-30 minutes, or until a toothpick inserted in the center comes out with just a few moist crumbs.
- Cool in pans for 10 minutes, then turn out onto wire racks to cool completely before frosting.
Expert Cooking Tips
Getting your black velvet cake just right requires attention to a few key details that make all the difference. First, room temperature ingredients are crucial for proper mixing and texture. Take your eggs, butter, and cream cheese out of the refrigerator at least an hour before baking to ensure they blend smoothly without lumps.
Color Achievement Tips:
- Use gel food coloring rather than liquid for more intense color without thinning the batter
- Add coloring gradually; you can always add more but can't take it away
- Mix cocoa powder thoroughly to prevent lumps that could affect the final appearance
Texture Perfection:
- Don't overmix once you add the flour; this can make your cake tough
- The vinegar and baking soda reaction happens quickly, so work efficiently once combined
- Test for doneness carefully; black velvet cake should be moist but not underbaked
Professional Presentation:
- Level your cake layers with a serrated knife for professional-looking results
- Chill the cake layers for 30 minutes before frosting for easier handling
- Apply a thin crumb coat first, then chill before adding the final frosting layer
Recipe Variations & Substitutions
This versatile black velvet cake can be adapted for various dietary needs and flavor preferences. For a gluten-free version, substitute the all-purpose flour with a 1:1 gluten-free baking blend, though you may need to add an extra egg for binding. The cake maintains its signature texture beautifully with this simple swap.
Dairy-Free Options:
- Replace butter with vegan butter sticks (not margarine)
- Use dairy-free buttermilk made from plant milk plus lemon juice
- Substitute cream cheese frosting with cashew-based alternatives
Flavor Variations:
- Add espresso powder to enhance the chocolate notes
- Incorporate orange zest for a sophisticated citrus twist
- Try different extracts like almond or rum for unique flavor profiles
Size Modifications:
- Make cupcakes by dividing batter into 24 lined muffin cups; bake 18-20 minutes
- Create a sheet cake in a 9x13 pan; increase baking time to 35-40 minutes
- Make mini layer cakes using 6-inch pans for intimate gatherings
Equipment Recommendations
The right tools make creating this black velvet cake much easier and ensure consistent results every time. A stand mixer is invaluable for achieving the proper creamed butter texture and incorporating ingredients smoothly. If you only have a hand mixer, that works too, but allow extra time for creaming the butter and sugar mixture.
Essential Baking Tools:
- Two 9-inch round cake pans with 2-inch sides
- Electric mixer (stand or hand mixer)
- Wire cooling racks
- Offset spatula for frosting
- Measuring cups and spoons
- Fine-mesh sifter for dry ingredients
Helpful Additions:
- Kitchen scale for precise measurements
- Cake turntable for easier frosting application
- Bench scraper for smooth frosting sides
- Toothpicks for testing doneness
Storage & Meal Prep Tips
Proper storage keeps your black velvet cake fresh and delicious for several days. Once frosted, store the cake covered in the refrigerator for up to 5 days. The cream cheese frosting requires refrigeration, but bring the cake to room temperature about 30 minutes before serving for the best flavor and texture.
Make-Ahead Strategy:
- Bake cake layers up to 2 days in advance; wrap tightly and store at room temperature
- Freeze unfrosted layers for up to 3 months; thaw completely before frosting
- Prepare cream cheese frosting 1 day ahead; bring to room temperature and re-whip before using
Freezing Instructions:
- Wrap individual cake slices in plastic wrap, then aluminum foil
- Freeze for up to 3 months; thaw in refrigerator overnight
- Whole frosted cakes can be frozen but may lose some frosting texture
Serving Tips:
- Use a sharp knife dipped in warm water for clean slices
- Wipe the knife between cuts for neat presentation
- Garnish with fresh berries or edible flowers for special occasions
Secret Recipe Success Tips
The key to an absolutely perfect black velvet cake lies in understanding the science behind the ingredients and timing your preparation correctly. Many bakers don't realize that the chemical reaction between the vinegar, baking soda, and buttermilk is what creates that signature tender crumb texture. This reaction begins immediately upon mixing, so work quickly once you've combined these ingredients to ensure your black velvet cake rises properly and maintains its light texture.
Temperature control is another secret that separates good black velvet cake from extraordinary ones. Your oven temperature should be accurate (use an oven thermometer to verify), and resist the urge to open the oven door frequently during baking. The black velvet cake needs consistent heat to develop its structure properly, and temperature fluctuations can cause uneven rising or density issues that affect the final result.
FAQ
What is a black velvet cake?
Black velvet cake is a dramatic variation of traditional red velvet cake that uses black food coloring instead of red. It maintains the same tender, slightly tangy flavor profile with buttermilk and cream cheese frosting, but presents a striking dark appearance perfect for gothic themes or elegant celebrations.
What is the secret ingredient in black velvet cake?
The secret ingredient combination in black velvet cake is the reaction between buttermilk, white vinegar, and baking soda. This creates the characteristic tender, fine crumb texture that distinguishes velvet cakes from regular chocolate cakes, while the black food coloring provides the dramatic appearance.
What kind of food coloring is best for black velvet cake?
Gel or paste food coloring works best for black velvet cake because it provides intense color without adding excess liquid to the batter. Liquid food coloring requires too much volume to achieve true black, which can affect the cake's texture and flavor balance.
What flavor is blackout cake?
Blackout cake traditionally refers to a rich chocolate cake with chocolate pudding filling and chocolate crumb coating. However, black velvet cake has a more subtle chocolate flavor with tangy notes from buttermilk, creating a more complex and less intensely chocolate taste than traditional blackout cake.
Your Perfect Black Velvet Creation
This black velvet cake recipe brings together the best of classic American baking with a modern, dramatic twist that's perfect for any special occasion. The combination of rich cocoa flavors, tender crumb, and striking appearance makes this black velvet cake a showstopper that tastes as incredible as it looks. Whether you're planning a Halloween party, gothic wedding, or simply want to surprise your family with something extraordinary, this recipe delivers consistent, professional results every time.
Don't stop with just this amazing black velvet cake; explore other creative variations like Cheesecake Red Velvet Brownie for a decadent hybrid dessert, or try Red Velvet Pancakes Recipe for a breakfast twist on the classic flavor profile. These complementary recipes will help you master the art of velvet desserts and expand your baking repertoire with confidence.
Happy baking, and may your kitchen always smell like sweet success! - Viola
Related
Looking for other recipes like this? Try these:


Pairing
These are my favorite dishes to serve with this Black Velvet Cake Recipe:


Black Velvet Cake with Cream Cheese Frosting
Equipment
- 2 9-inch round cake pans
- 1 Electric mixer
- 2 Wire cooling racks
- 1 Offset spatula
- Measuring cups and spoons
- 1 Fine-mesh sifter
- Mixing bowls
Ingredients
Cake Base
- 2.5 cups All-purpose flour
- 1.5 cups Granulated sugar
- 1 cup Unsalted butter softened
- 2 large Eggs room temperature
- 1 cup Buttermilk
- 2 tablespoons Cocoa powder
- 1–2 bottles Black food coloring gel works best
- 1 teaspoon Vanilla extract
- 1 teaspoon White vinegar
- 1 teaspoon Baking soda
- 0.5 teaspoon Salt
Cream Cheese Frosting
- 8 oz Cream cheese softened
- 0.5 cup Butter softened
- 4 cups Powdered sugar
- 1 teaspoon Vanilla extract
- Salt Pinch
Instructions
- Preheat oven to 350°F (175°C), grease and line two 9-inch pans.
- Cream butter and sugar, add eggs, vanilla, and black coloring.
- Combine dry ingredients, alternate with buttermilk mixture, fold in baking soda mixture.
- Divide batter, bake 25–30 min, cool completely.
- Prepare frosting by beating cream cheese, butter, sugar, and vanilla.
- Frost cooled cake layers, chill briefly before serving.

Leave a Reply