
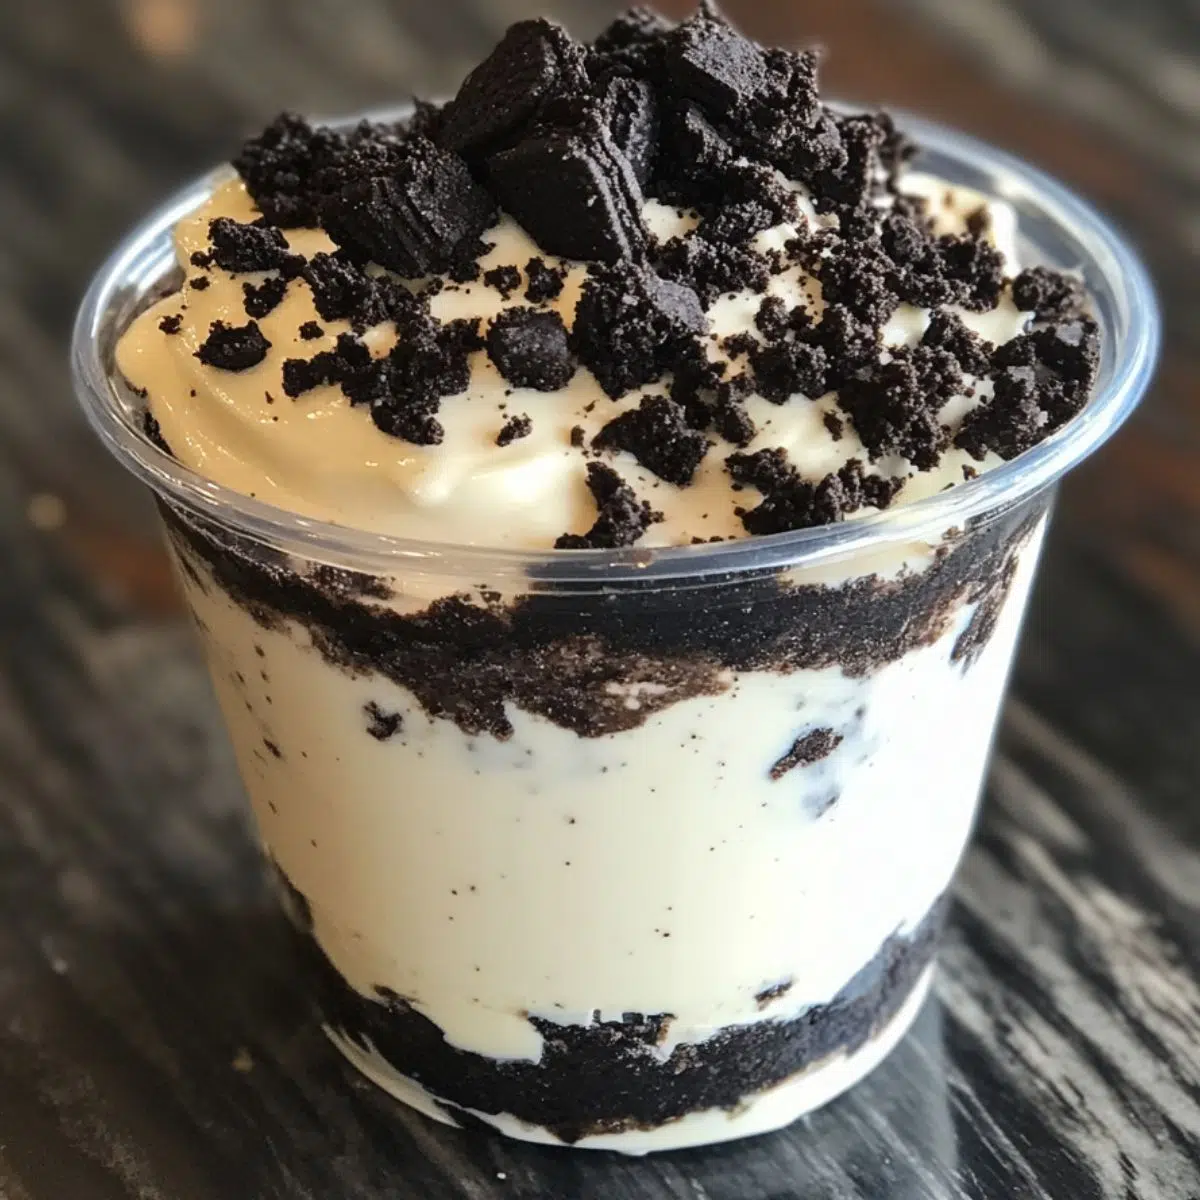
Craving something sweet but not in the mood to bake? Let me share one of my all-time favorite no-fuss desserts; these Oreo cheesecake cups are pure magic in a bite. They’re creamy; crunchy; and totally irresistible. If you’ve got 15 minutes and a few simple ingredients, you’re already halfway there. These Oreo cheesecake cups are the perfect blend of smooth cream cheese and that classic chocolate cookie crunch we all secretly (or not-so-secretly) love.
Whether you're new to the kitchen or just need a last-minute crowd-pleaser, Oreo cheesecake cups never disappoint. I’ve served them at gatherings, tucked them into lunchboxes, and yes, even enjoyed one (okay, two) straight from the fridge on a random Tuesday. Trust me; they’re that good—and yes, they’re that easy.
Why You’ll Fall in Love With These Oreo Cheesecake Cups
There’s just something irresistible about the way crunchy Oreo cookies and creamy cheesecake come together; it’s like they were meant to be. These individual Oreo cheesecake cups have been my go-to treat for everything from family birthdays to last-minute potlucks; they’re consistently a crowd favorite—and it’s easy to see why.
First off, Oreo cheesecake cups are a no-bake wonder; no oven required, which makes them the perfect dessert for hot summer days or when you’re simply not in the mood to bake. They come together in just 15 minutes (plus a little chill time) and give you just the right amount of indulgence in each portion.
They’re also:
- Ideal for portion control; no slicing or guessing needed
- Easily customizable; think fresh berries, chocolate drizzle, or a dollop of whipped cream
- A great make-ahead dessert; perfect when you want to prep in advance and still wow your guests
What I truly love about these no-bake Oreo cheesecake cups is how effortlessly elegant they look. With a few everyday ingredients and some clear dessert cups; you’ll end up with beautiful, layered treats that look gourmet—but take almost no effort at all. Even if you’re new to the kitchen, you’ll pull these off like a pro.
Jump to:
Ingredients
- Clear plastic or glass cups (small size works best)
- Oreo cookies (plus extra for topping)
- Unsalted butter, melted
- Cream cheese, softened to room temperature
- Powdered sugar
- Vanilla extract
- Heavy whipping cream, whipped to stiff peaks

See recipe card for quantities.
Ingredient Notes & Substitutions for Oreo Cheesecake Cups
- Oreo cookies: You really can’t go wrong with the classic version here; they bring that signature crunch and flavor we all love. Want a twist? Swap in any chocolate sandwich cookie you like. And if you use the double-stuffed kind; expect an extra creamy, dreamy crust—no complaints there.
- Cream cheese: For the creamiest texture and richest flavor, go with full-fat cream cheese. Light cream cheese can be used in a pinch, but just know it won’t be quite as indulgent.
- Heavy whipping cream: This is what gives Oreo cheesecake cups that light, fluffy filling. Short on time? You can absolutely sub in store-bought whipped topping; just grab an 8-ounce tub and call it a day.
- Powdered sugar: This one’s key for that silky smooth finish; granulated sugar just won’t dissolve the same way and might leave a gritty texture—so stick with powdered for best results.
- Vanilla extract: Adds a subtle warmth and depth to the filling. Pure vanilla extract is always a win, but if imitation is what you’ve got on hand, it’ll still do the trick.
- Butter: Melted butter binds the crust and helps everything hold together. For a dairy-free twist, coconut oil makes a great stand-in; it even adds a hint of extra flavor.
Instructions
Prepare The Oreo Crust
- Place 24 Oreo cookies in a food processor and pulse until you have fine crumbs. If you don't have a food processor, place cookies in a zip-top bag and crush with a rolling pin.
- Transfer the Oreo crumbs to a medium bowl and pour in the melted butter.
- Mix until the crumbs are evenly moistened and resemble wet sand.
- Divide the mixture evenly among your dessert cups, using about 2-3 tablespoons per cup.
- Press the crumbs firmly into the bottom of each cup using the back of a spoon or your fingers.
Make The Cheesecake Filling
- In a large bowl, beat the softened cream cheese with an electric mixer until smooth and fluffy, about 2 minutes.
- Add the powdered sugar and vanilla extract. Beat again until well combined and no lumps remain.
- Gently fold in the whipped cream using a rubber spatula. Mix just until combined - overmixing will deflate the cream.
- The filling should be light, fluffy, and hold its shape when you lift the spatula.
Assemble The Oreo Cheesecake Cups
- Spoon or pipe the cheesecake mixture over the Oreo crust in each cup. Fill to about ¾ of the cup, leaving room for toppings.
- Crush the remaining 6 Oreo cookies into chunks (not fine crumbs).
- Sprinkle the Oreo chunks over the top of each cup.
- Refrigerate for at least 2 hours, or up to 24 hours, until firm.
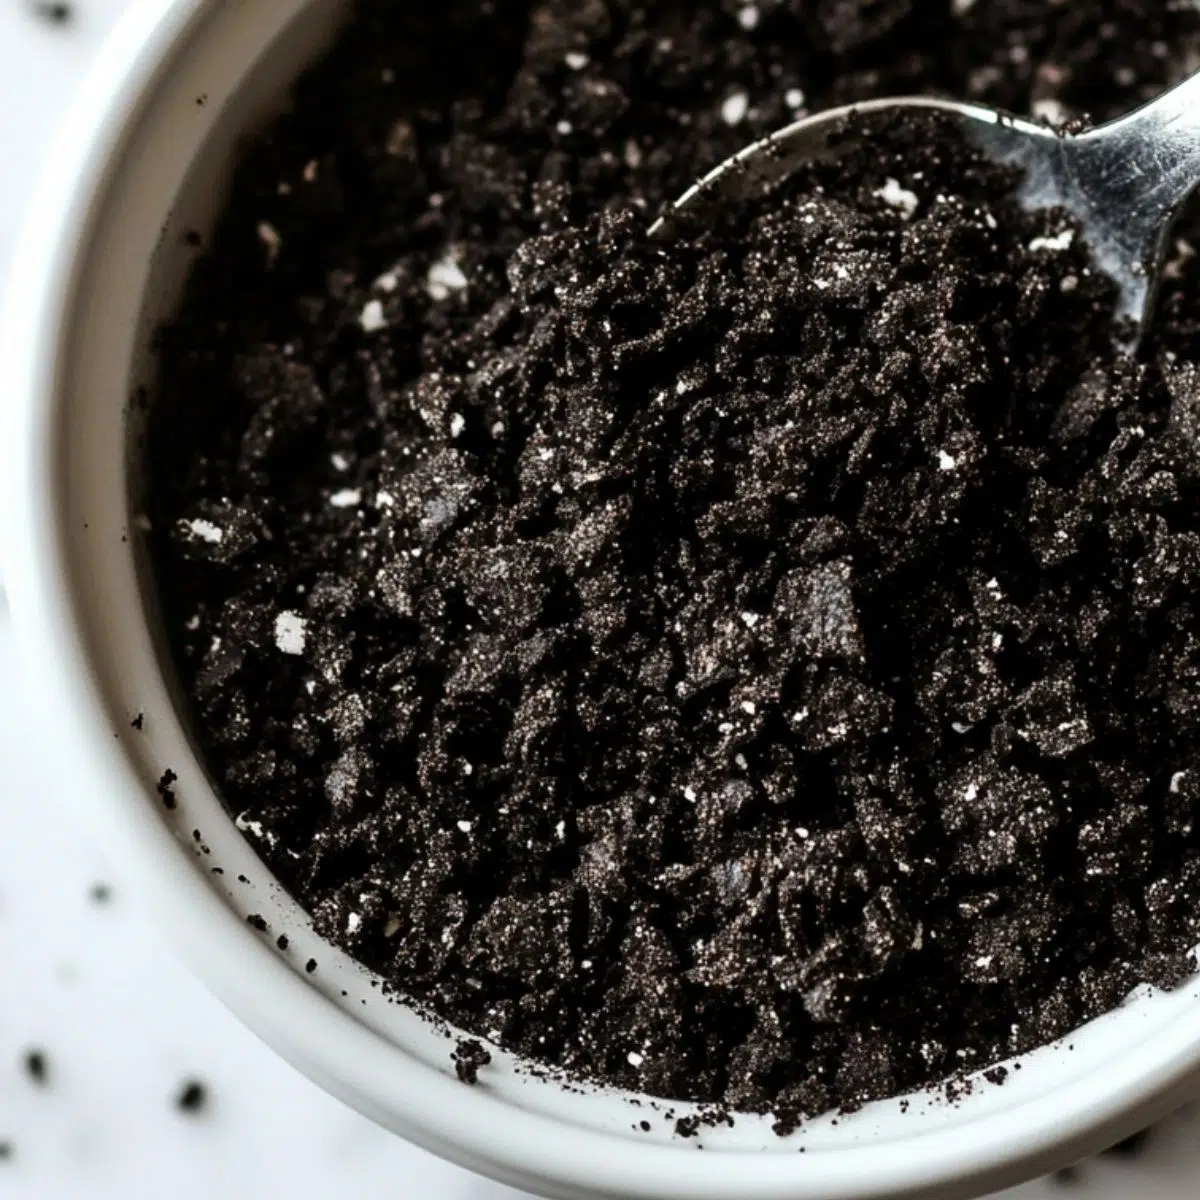
- Step 1:Prepare The Oreo Crust
Press crushed Oreo and butter mixture into the base of each cup.
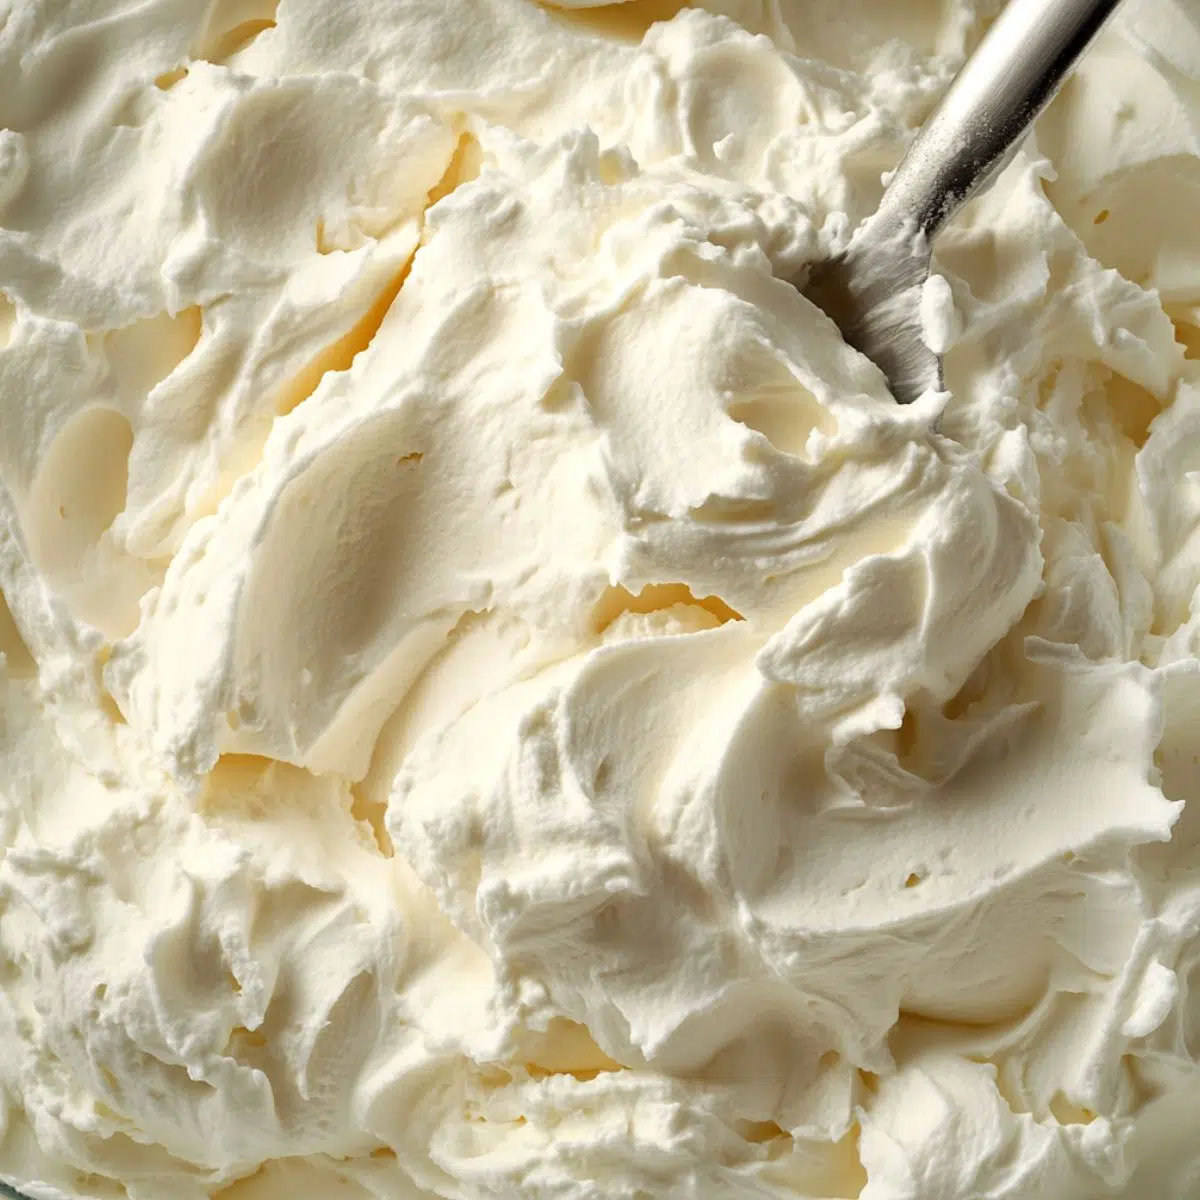
- Step 2: Make The Cheesecake Filling
Gently fold whipped cream into the cream cheese mixture until light and fluffy.
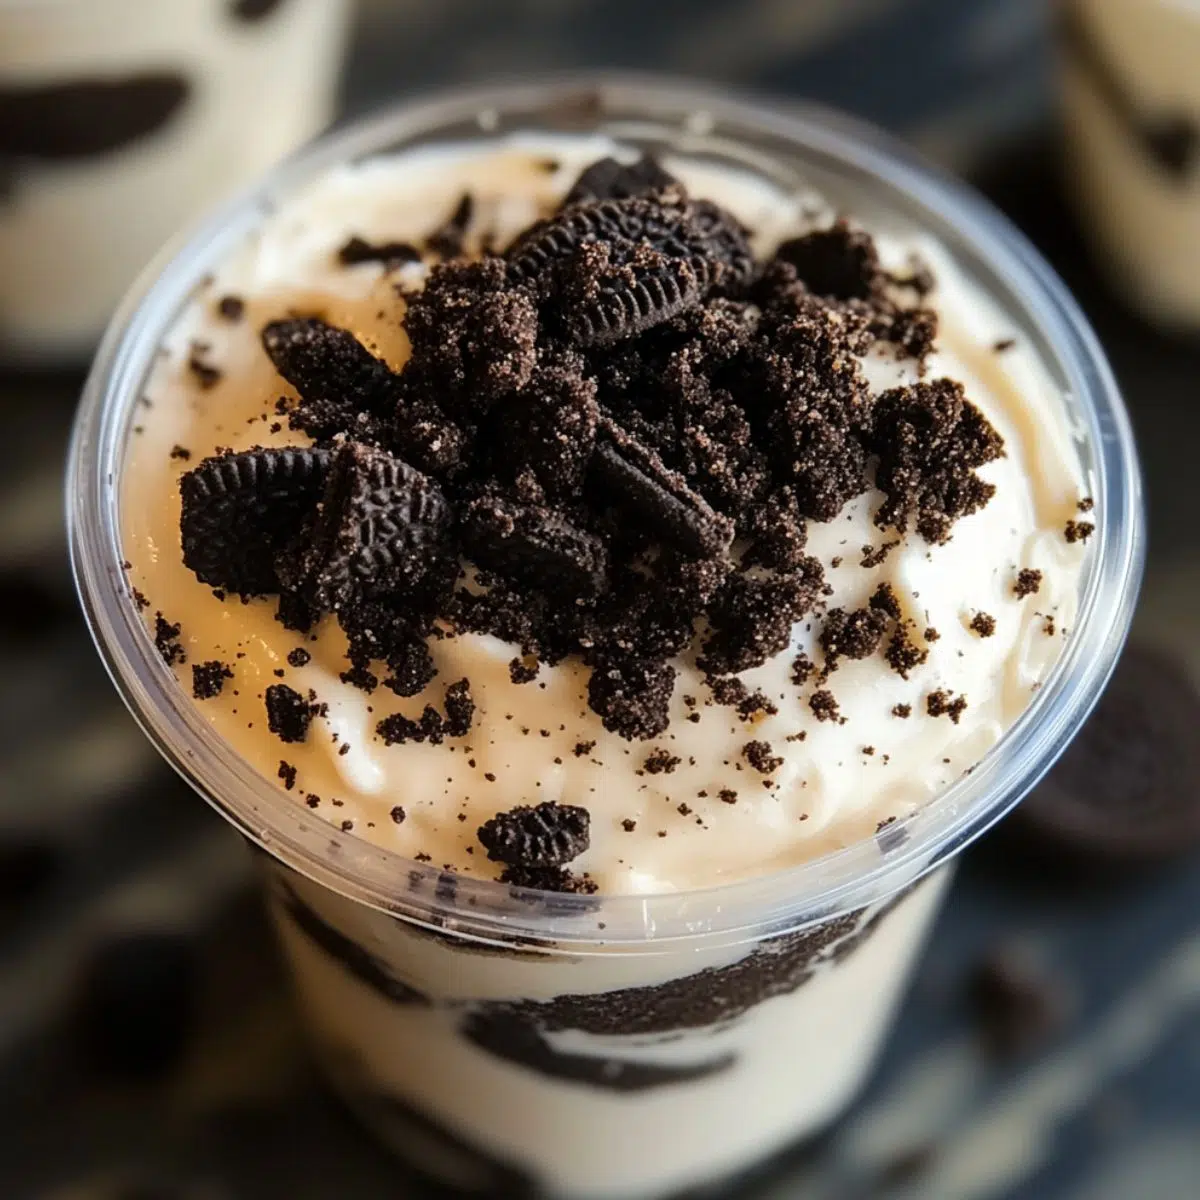
- Step 3: Assemble The Oreo Cheesecake Cups
Fill cups with cheesecake mix and top with extra Oreo chunks.
Expert Tips for Perfect Oreo Cheesecake Cups
- Start with room temperature cream cheese; trust me, it makes all the difference. Cold cream cheese won’t blend smoothly and can leave you with pesky little lumps in your filling, not the vibe we’re going for.
- Be gentle after adding the whipped cream; overmixing will deflate all that lovely fluffiness you worked so hard to achieve. Fold it in slowly and lovingly; your Oreo cheesecake cups will thank you.
- Want picture-perfect layers? Chill the crust for about 15 minutes before spooning in the cheesecake filling. It helps the layers stay defined and keeps things from turning into a delicious, but slightly messy—swirl.
- Go pro with a piping bag (or just use a zip-top bag with the corner snipped off). It’s the easiest way to fill the cups cleanly and neatly, especially if presentation is part of the plan.
- Mix up your cookie crush; finely crush some Oreos for a smoother base, and leave a few chunks for a surprise crunch. That little contrast in texture keeps each bite interesting, and extra satisfying.
Variations & Creative Twists
Once you’ve mastered the classic version, don’t be afraid to mix things up; Oreo cheesecake cups are incredibly versatile, and these fun variations prove it:
- Mint Oreo Cheesecake Cups
Feeling fresh? Add a dash (about ½ teaspoon) of mint extract to the filling and swap in Mint Oreos for both the crust and topping. It’s a cool twist that’s perfect for holidays or mint lovers. - Peanut Butter Oreo Cheesecake Cups
Craving that chocolate-peanut butter combo? Stir about ¼ cup of smooth peanut butter into the cheesecake filling and use Peanut Butter Oreos to double down on the flavor. - Golden Oreo Cheesecake Cups
Want a vanilla-forward version? Simply replace regular Oreos with Golden Oreos. You’ll get all the creamy goodness with a lighter, buttery twist.
Lightened-Up & Dietary Options
Whether you’re looking to cut back or accommodate dietary needs, these tweaks keep your Oreo cheesecake cups just as delicious:
- Lower-Calorie Option
Swap in Neufchâtel cheese (it’s ⅓ less fat than regular cream cheese) and use a light whipped topping. Same creamy texture, just a bit lighter on the indulgence. - Gluten-Free Oreo Cheesecake Cups
No gluten? No problem. Use gluten-free chocolate sandwich cookies like Glutino or KinniToos. You’ll get the same great flavor without the gluten. - Dairy-Free Variation
Going dairy-free? Substitute with dairy-free cream cheese, coconut-based whipped cream, and a plant-based butter alternative. These swaps work beautifully while keeping that same luscious texture.
Equipment
- Food processor: Optional but makes creating cookie crumbs much faster.
- Clear cups or jars: Glass mason jars or clear plastic dessert cups work best to show off the layers. Small ramekins work too, but you miss the visual impact.
- Hand mixer or stand mixer: Makes quick work of beating the cream cheese until smooth.
- Rubber spatula: Essential for folding in the whipped cream without deflating it.
Storage & Make-Ahead Tips
- Refrigerator Storage
Once assembled, cover each cup with plastic wrap and pop them in the fridge; they’ll stay fresh for up to 3 days. The crust might soften just a little as time goes on, but don’t worry—it’ll still taste amazing. - Freezer Instructions
Yes, Oreo cheesecake cups freeze like a dream. Just wrap each one tightly in plastic wrap, then give them an extra layer of protection with aluminum foil. You can keep them frozen for up to 1 month. When you’re ready to serve, let them thaw overnight in the fridge for the best texture. - Make-Ahead Tip
Planning ahead? These beauties are at their best when made about 24 hours in advance. That extra chill time gives the flavors a chance to mingle and really shine; plus, it makes dessert stress-free on the day of serving.
Mom’s Secret Oreo Cheesecake Magic
This little trick has been in our family for years; my mom used to whisper it like a sweet kitchen secret just between us. When making Oreo cheesecake cups, she’d always scoop out a bit of that creamy Oreo center before crushing the cookies for the crust.
Then—this is the magic part—she’d blend that extra Oreo filling right into the cheesecake mixture. The result? A richer, deeper Oreo flavor that somehow made every bite taste like childhood and chocolate dreams. Guests never knew what hit them; they just knew they wanted seconds (and the recipe).
So if you want your Oreo cheesecake cups to have that “what is that amazing flavor?” moment—now you know the secret. Just don’t tell my mom I spilled it.
FAQ
How do you make Oreo cheesecake without baking?
It’s easier than you think! To make Oreo cheesecake cups without baking, you’ll crush Oreos for the base and mix softened cream cheese, powdered sugar, vanilla, and whipped cream (or whipped topping) for the filling. No oven needed—just layer everything into cups, chill until set, and enjoy. The fridge does all the hard work for you.
Why is my no-bake cheesecake not firming up?
Ah, the dreaded soft set! This usually happens when the filling hasn’t chilled long enough or the ingredients weren’t mixed quite right. Be sure your whipped cream is beaten to stiff peaks and your cream cheese is fully softened for smooth blending. Let the Oreo cheesecake cups chill for at least 4 hours—overnight is even better.
How can I make Oreo cheesecake with just 4 ingredients?
Absolutely doable! For a simplified version, just use crushed Oreos, cream cheese, powdered sugar, and whipped topping. Crush some cookies for the crust, blend the other ingredients for the filling, layer them into cups, and chill. It’s fast, fun, and still delicious—with minimal fuss.
What sets a no-bake cheesecake?
In no-bake recipes like these Oreo cheesecake cups, it’s all about the chill. The combination of whipped cream (or whipped topping) and cream cheese firms up as it sits in the fridge. There's no gelatin or baking involved; just give it time, and the fridge will give you that perfect creamy-yet-sliceable texture.
Sweet, Simple, and Always a Hit
These no-bake Oreo cheesecake cups aren’t just a treat—they’re your secret weapon for turning everyday moments into something special. There’s just something magical about that mix of crunchy cookies and creamy filling that gets everyone smiling (and maybe sneaking back for seconds).
Whether you’re pulling together a last-minute dessert for a potluck, hosting a casual dinner with friends, or just surprising the family on a weekday evening, these little cups deliver big satisfaction without the stress. The best part? You can make them ahead, stash them in the fridge, and actually enjoy your get-together without fussing over dessert at the last minute.
And hey—if you’re on an Oreo roll, don’t stop here. Try whipping up my Simple 3-Ingredient Oreo Balls for a bite-sized chocolate fix, or cool things down with the Quick & Easy Oreo Milkshake Recipe, both are crowd-pleasers and just as fuss-free.
Give these Oreo cheesecake cups a try, then come back and let me know which variation won your family over. Can’t wait to hear how yours turned out!
Related
Looking for other recipes like this? Try these:


Pairing
These are my favorite dishes to serve with this No-Bake Oreo Cheesecake Cups recipe:


No-Bake Oreo Cheesecake Cups
Equipment
- 6 Clear cups or jars
- 1 Hand or stand mixer
- 1 Rubber spatula
- 1 Rubber spatula
Ingredients
- 24 Oreo cookies Plus 6 more for topping
- 4 tablespoon Unsalted butter Melted
- 16 oz Cream cheese Softened to room temperature
- 1 cup Powdered sugar
- 1 teaspoon Vanilla extract
- 1 cup Heavy whipping cream Whipped to stiff peaks
- 6–8 Clear plastic or glass cups 5–6 oz size works best
Instructions
- Crush Oreos and mix with melted butter
- Press crust into bottom of clear cups
- Beat cream cheese until fluffy
- Mix in powdered sugar and vanilla
- Gently fold in whipped cream
- Pipe or spoon filling into cups
- Top with crushed Oreo chunks
- Chill at least 2 hours before serving

Leave a Reply