Craving an appetizer that’s not just delicious but unforgettable? Let me introduce you to a true Italian classic that never fails to impress; Italian rice balls with meat. Also known as arancini, these golden, crispy bites are straight out of Sicily’s heart and soul, delivering rich, savory flavor in every single bite.
Now, I’ve made Italian rice balls with meat countless times for everything from family dinners to festive get-togethers, and trust me; people go wild for them. We’re talking a perfectly crunchy breadcrumb shell that gives way to creamy, cheesy risotto and a warm, hearty meat filling. It’s comfort food that’s elegant, fun to eat, and full of character.
What I love most? Italian rice balls with meat are easier to make than you’d think; and way better than any store-bought or restaurant version. You can prep them in advance, freeze them, and even switch up the filling to make them your own. Whether you’re hosting a dinner party or just want to treat yourself to something special, Italian rice balls with meat are the answer.

What Are Italian Rice Balls with Meat?
If you've never had Italian rice balls with meat, you're in for a real treat. Known in Italy as arancini, these little golden beauties are a beloved Sicilian street food with deep roots; dating all the way back to the 10th century! The name “arancini” actually comes from the Italian word arancia (orange), because these crispy-fried rice balls look like small oranges when finished.
While arancini come in many regional styles, the version packed with meat; called arancini al ragù; is hands-down the most iconic. Imagine creamy risotto wrapped around a rich center of seasoned ground beef, sweet peas, and gooey cheese, all coated in breadcrumbs and fried until perfectly crisp. That’s the magic of Italian rice balls with meat; they’re indulgent, comforting, and completely satisfying.
What really sets homemade Italian rice balls with meat apart from the frozen or pre-packaged kind is the texture: a beautifully crunchy shell giving way to a moist, flavorful filling. Each bite is layered with warmth and depth; the creaminess of the rice, the savory richness of the meat, and the irresistible crunch on the outside. It's a true labor of love, but one that pays off every single time.
Why This Italian Rice Balls Recipe Stands Out
This recipe doesn’t cut corners; and that’s a good thing. It sticks to traditional methods while still being achievable in your own kitchen. Here's what makes it special:
- Made with real risotto (not just plain rice!) for that authentic creamy texture
- Filled with a hearty, slow-cooked meat sauce for deep, robust flavor
- Offers smart tips for getting that perfect golden crust without crumbling
- Great use of leftover risotto if you want to prep over two days
- Can be baked or air-fried for a lighter twist that’s still full of flavor
Whether you’re making them as appetizers for a party or serving them up as a main course with a crisp green salad, Italian rice balls with meat are sure to be the highlight of any table. Perfect for holidays, game day, or when you just want to share something special with people you love.
Jump to:
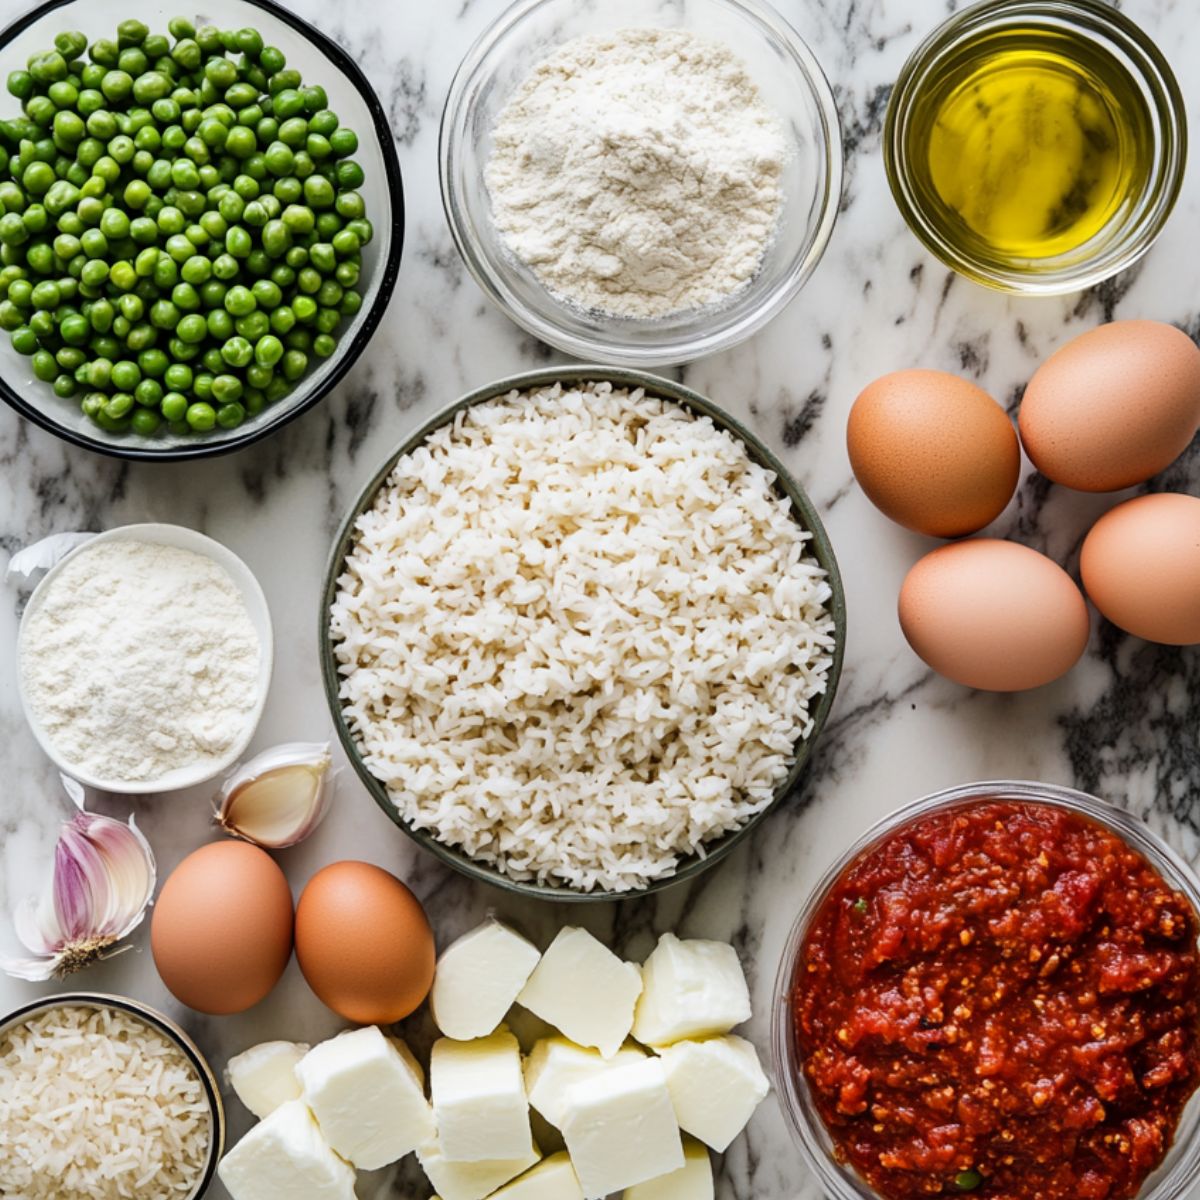
Ingredients
For the Risotto:
- Qrborio rice (carnaroli or vialone nano are also excellent choices)
- Chicken broth
- Onion, finely diced
- Butter
- Freshly grated Parmesan cheese
- Eggs
- Salt and pepper to taste
For the Meat Filling:
- Ground beef (80/20 for best flavor)
- Onion, finely chopped
- Garlic cloves, minced
- Olive oil
- Tomato sauce or passata
- Frozen peas, thawed
- Dried oregano
- Bay leaf
- Salt and black pepper to taste
For Assembly:
- Mozzarella cheese, cut into ½-inch cubes
- All-purpose flour
- Eggs, beaten
- Italian breadcrumbs
- Vegetable or canola oil for frying
- Fresh parsley for garnish
For Serving:
- Grated Parmesan cheese
- Warm marinara sauce
- Fresh basil leaves

See recipe card for quantities.
The secret to making perfect Italian rice balls with meat lies in choosing the right rice. Arborio rice is ideal thanks to its high starch content, which creates that signature creamy center while helping the rice balls hold their shape. If Arborio isn’t available, you can use another short-grain rice, though the texture might be slightly different.
For a lighter or allergy-friendly take on Italian rice balls with meat, feel free to swap in ground turkey instead of beef or use vegetable broth in place of chicken broth. And if you’re going gluten-free, gluten-free breadcrumbs make a great alternative for the crispy coating.
Instructions
Prepare the Risotto Base
- In a large saucepan, heat the chicken broth and keep it warm on low heat.
- In a separate heavy-bottomed pot, melt 2 tablespoons of butter over medium heat.
- Add the finely diced onion and sauté until translucent, about 3-4 minutes.
- Add the Arborio rice and stir for 2-3 minutes until the grains become translucent around the edges.
- Pour in the white wine (if using) and stir until completely absorbed.
- Add one ladle of warm broth to the rice, stirring constantly until the liquid is absorbed.
- Continue adding broth one ladle at a time, stirring frequently, and waiting until each addition is absorbed before adding more.
- Cook until the rice is creamy but still slightly firm to the bite (al dente), about 18-20 minutes.
- Remove from heat, stir in the remaining tablespoon of butter and Parmesan cheese.
- Spread the risotto on a large baking sheet to cool quickly, then refrigerate for at least 2 hours or overnight.
Make the Meat Filling
- Heat olive oil in a skillet over medium heat.
- Add the onion and cook until soft, about 3-4 minutes.
- Add the garlic and cook for another 30 seconds until fragrant.
- Add the ground beef, breaking it up with a wooden spoon, and cook until browned, about 5-6 minutes.
- Pour in the red wine (if using) and cook until evaporated.
- Add the tomato sauce, oregano, and bay leaf. Season with salt and pepper.
- Reduce heat to low and simmer, uncovered, for about 15-20 minutes until the sauce thickens.
- Add thawed peas in the last 5 minutes of cooking.
- Remove the bay leaf and let the mixture cool completely.
Assemble the Rice Balls
- Take the cooled risotto out of the refrigerator and mix in 2 beaten eggs to help bind the rice.
- Wet your hands slightly (this prevents sticking) and take about ¼ cup of the rice mixture.
- Flatten it in your palm to form a disc about ½-inch thick.
- Place a tablespoon of the meat filling and a cube of mozzarella in the center.
- Carefully bring the edges of the rice up and around the filling, sealing it completely and forming a ball about the size of a small orange (around 2½ inches in diameter).
- Place on a baking sheet and repeat with the remaining ingredients.
- Refrigerate the formed balls for 30 minutes to help them firm up.
Bread and Fry the Arancini
- Set up a breading station with three shallow bowls: one with flour, one with beaten eggs, and one with breadcrumbs.
- Roll each rice ball in flour, shaking off any excess.
- Dip in beaten eggs, then coat thoroughly with breadcrumbs, pressing gently to adhere.
- Heat oil in a heavy pot or deep fryer to 350°F (175°C). The oil should be about 3 inches deep.
- Carefully lower 2-3 rice balls into the hot oil at a time (don't overcrowd).
- Fry until golden brown on all sides, about 3-4 minutes, turning occasionally.
- Remove with a slotted spoon and drain on paper towels.
- Serve warm with marinara sauce for dipping.

- Step 1: Prepare the Risotto Base
Cook creamy risotto with arborio rice and allow it to cool completely before forming balls.

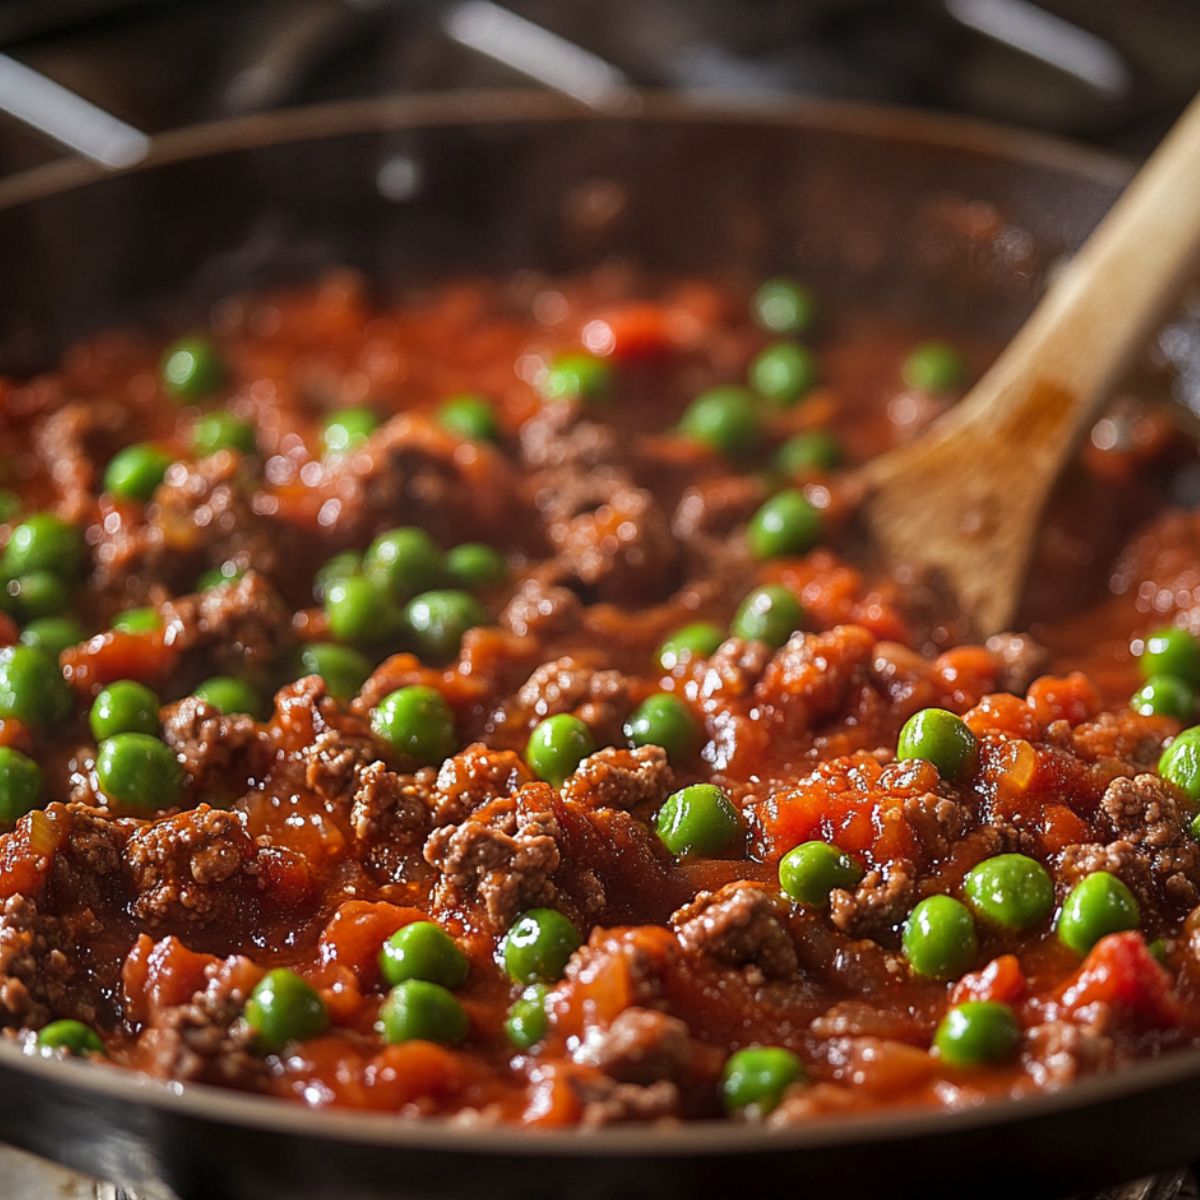
- Step 2: Make the Meat Filling
Sauté ground beef with onions, tomato sauce, peas, and seasonings for the rich arancini filling.

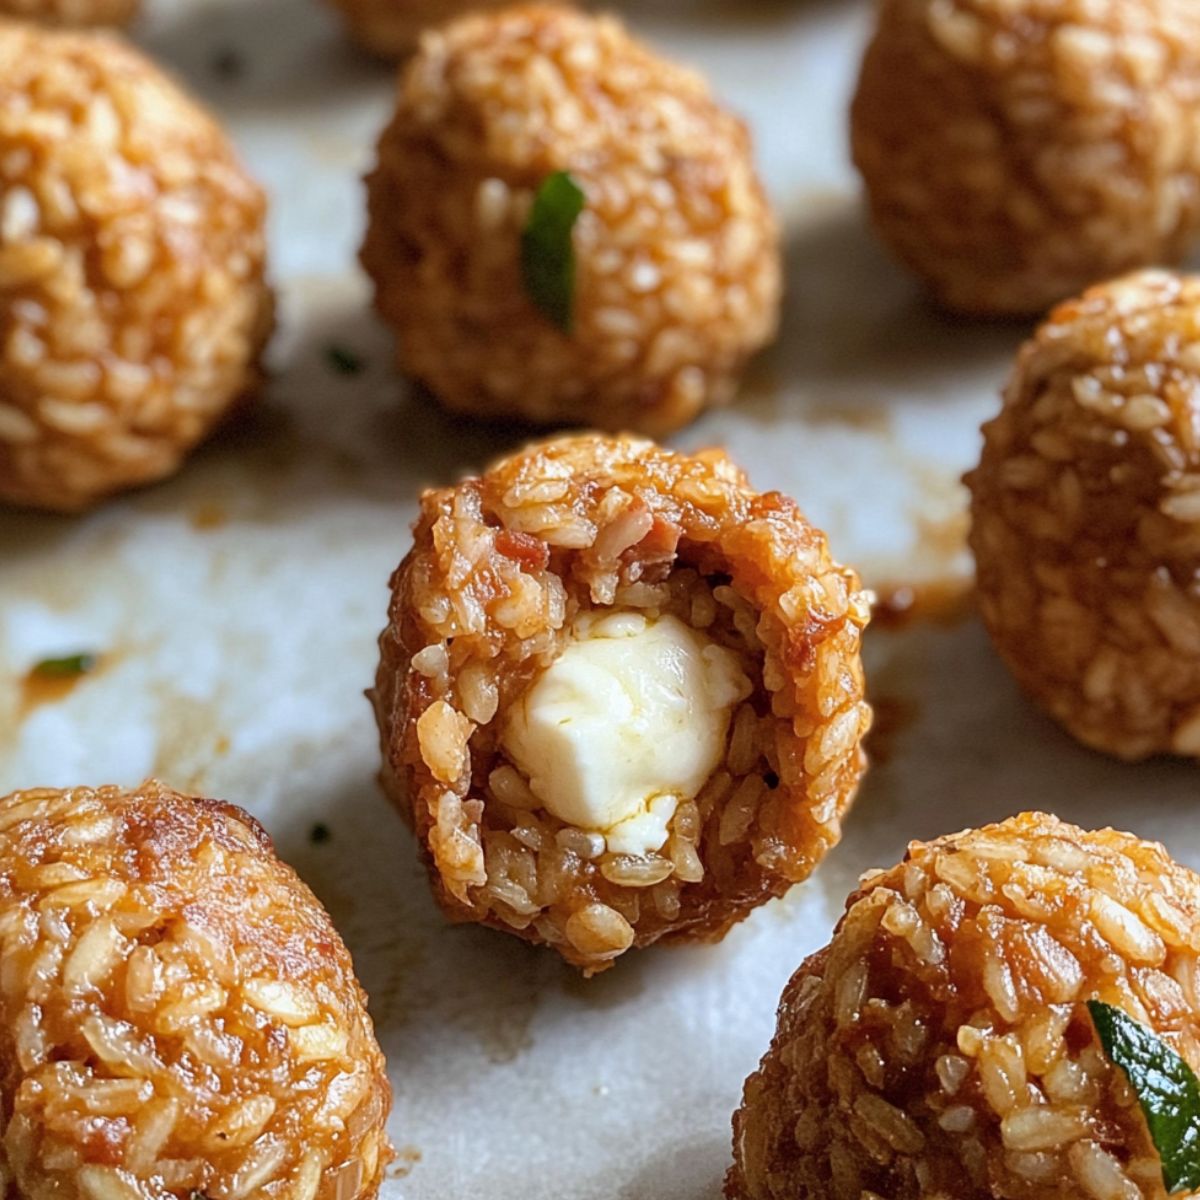
- Step 3: Assemble the Rice Balls
Shape the rice around the filling to form compact balls, then chill before breading.

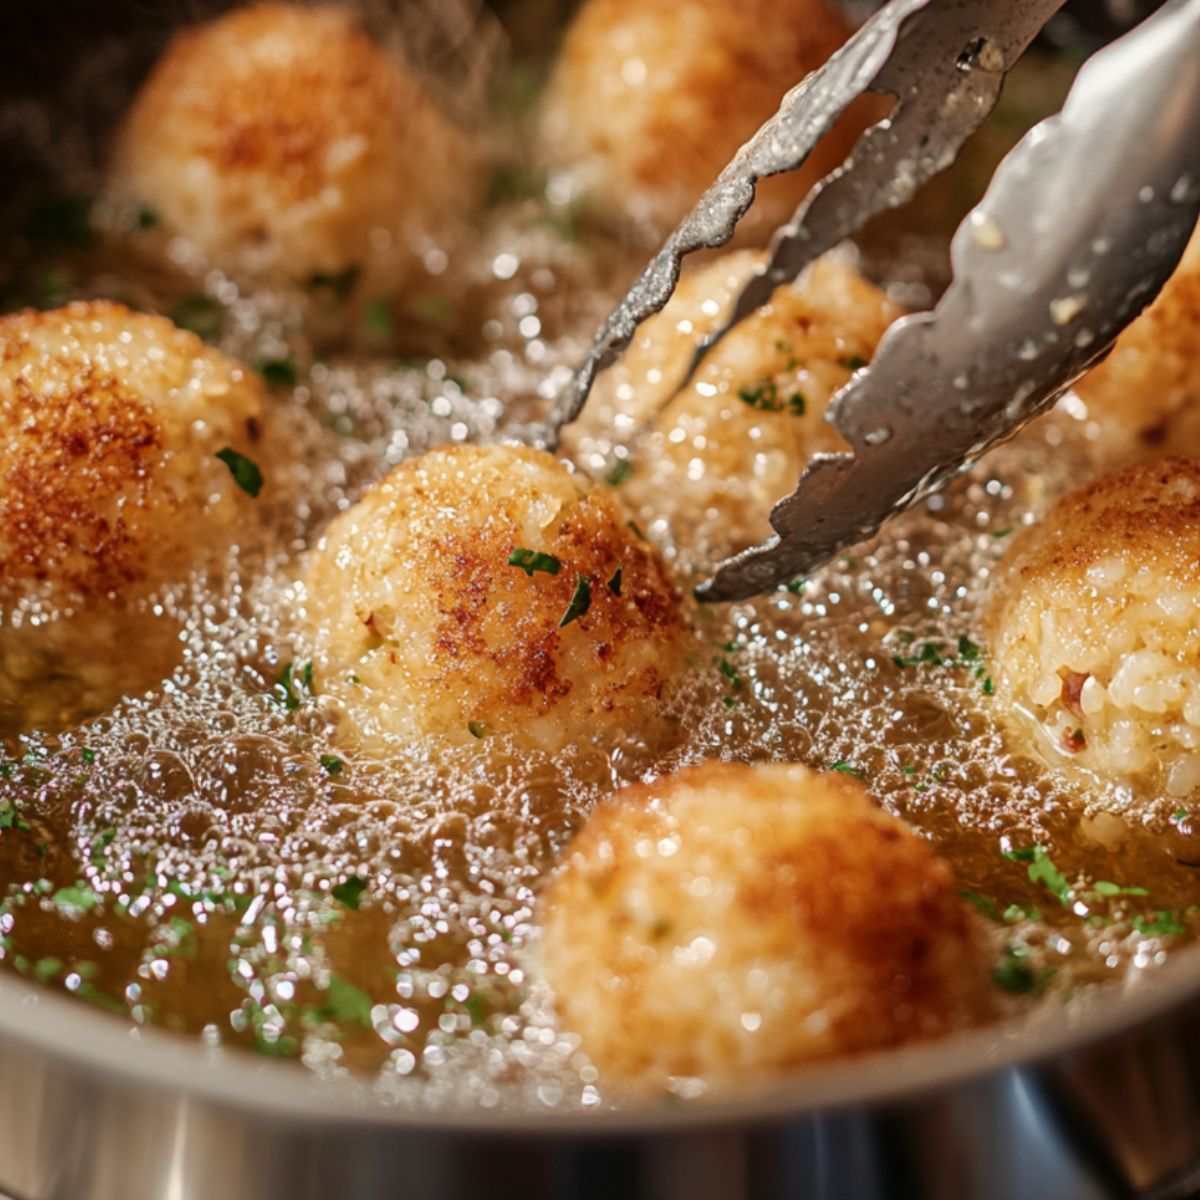
- Step 4: Bread and Fry the Arancini
Bread each rice ball and fry until golden, turning to cook evenly on all sides.
Hints & Expert Cooking Tips for Perfect Italian Rice Balls
- Make ahead: The risotto and meat filling can be prepared a day in advance and refrigerated, making assembly much easier.
- Cold risotto works best: Chilled risotto is easier to shape and holds together better during frying.
- Keep hands wet: Keep a bowl of water nearby and wet your hands between shaping each arancini to prevent the rice from sticking.
- Double-coating: For extra crispiness, you can double-dip the rice balls in egg and breadcrumbs.
- Test the oil: Drop a small piece of breadcrumb into the oil; if it sizzles immediately and floats to the top, the oil is ready.
- Don't crowd the pan: Fry just a few arancini at a time to maintain oil temperature and ensure even cooking.
- Keep them warm: Place fried arancini in a 200°F oven on a rack over a baking sheet to keep warm while frying the remaining balls.
Variations & Dietary Modifications
One of the things I love most about Italian rice balls with meat is how incredibly versatile they are. While the traditional arancini al ragù is a timeless favorite, there are so many fun and delicious ways to switch things up; whether you’re catering to different tastes or dietary needs.
Traditional Variations
If you're feeling adventurous or want to try different fillings beyond the classic Italian rice balls with meat, here are some traditional variations from across Italy:
- Arancini al burro – A creamy twist made with béchamel sauce, ham, and peas
- Arancini agli spinaci – A vegetarian-friendly version filled with sautéed spinach and cheese
- Arancini al ragù – The iconic meat-stuffed style most people think of when they hear "Italian rice balls with meat"
- Arancini con funghi – Earthy mushroom filling, often elevated with a touch of truffle oil
Dietary Adaptations
Want to enjoy Italian rice balls with meat but need to make some adjustments? No problem; here’s how to tailor them to your preferences:
- Gluten-Free: Swap in gluten-free breadcrumbs and flour for a crispy coating that still delivers crunch
- Vegetarian: Replace the meat with a tasty mix of mushrooms, bell peppers, and melty cheese
- Lighter Version: Bake at 400°F for 20–25 minutes, flipping halfway, until golden brown and crisp
- Air Fryer Method: Cook at 380°F for 10–12 minutes; give them a light spritz of oil for that perfect finish
And if you’re in the mood to put your own spin on things, try mixing in cheeses like smoked gouda or fontina instead of mozzarella, or stir fresh herbs like basil or rosemary into your risotto base. Little touches like these can take your Italian rice balls with meat to the next level; while still honoring the cozy, comforting heart of this traditional dish.
Equipment
- Heavy-bottomed pot: Essential for making proper risotto without burning
- Deep fry thermometer: Helps maintain the proper oil temperature
- Dutch oven or deep skillet: Provides even heat distribution for frying
- Spider strainer or slotted spoon: Makes removing the fried rice balls easy and safe
- Instant-read thermometer: Ensures the centers reach 165°F for food safety
If you don't have a deep fryer, a cast-iron Dutch oven works wonderfully for frying arancini. The heavy bottom maintains consistent heat, and the high sides prevent dangerous oil splatter.
Storage & Meal Prep Tips
Whether you're making a big batch of Italian rice balls with meat for a party or just planning ahead for easy weeknight dinners, storing and prepping them the right way makes all the difference. Here's how to keep them fresh, crispy, and absolutely delicious.
Fridge Storage
Cooked Italian rice balls with meat store beautifully in the fridge when handled properly:
- Let them cool completely, then store in an airtight container for up to 3 days
- To reheat, pop them in a 350°F oven for 10–15 minutes until warmed through and crispy
- Skip the microwave; it tends to make the breadcrumb coating soggy
Freezing Instructions
Want to freeze for later? You’ve got two great options; just decide whether you’re freezing before or after cooking:
- Uncooked: Bread the arancini, place them on a baking sheet, and freeze until solid. Then transfer to a freezer bag and store for up to 3 months. Fry straight from frozen; just add 1–2 extra minutes to the cook time
- Cooked: Cool completely, freeze, and reheat in a 375°F oven for about 20 minutes
Either way, you’ll have crispy, melty Italian rice balls with meat ready in no time!
Make-Ahead Options
Planning ahead? These make-ahead strategies will save you time without compromising flavor:
- 2 Days Ahead: Make the risotto and the meat filling and store them separately in the fridge
- 1 Day Ahead: Form and bread the arancini, cover, and refrigerate overnight
- Just Before Serving: Fry them fresh for that perfect golden crust and warm, cheesy center
With a little prep and planning, you can enjoy homemade Italian rice balls with meat anytime; fresh, hot, and full of that irresistible Sicilian charm.
The Little Secret That Makes All the Difference
Want to know the secret that took my Italian rice balls with meat from "pretty good" to restaurant-level amazing? I wasn’t even looking for it; just flipping through an old Sicilian cookbook passed down from my nonna’s neighbor (you know the kind: handwritten notes, sauce stains, pure gold). Tucked in the margins was this gem:
“A pinch of saffron in the risotto makes the arancini glow like the Sicilian sun.”
So I tried it. Just a little saffron stirred into the rice; and wow. The color was stunning, but the flavor? Delicate, warm, and subtly fragrant. It made my Italian rice balls with meat look and taste like something straight off a trattoria menu in Palermo.
Oh, and here’s one more insider tip I swear by: after shaping your rice balls, pop them in the freezer for about 15 minutes before breading. That little chill firms them up just enough to keep their shape while frying; no cracks, no leaks, just perfect golden orbs every time.
Try these tweaks next time you make Italian rice balls with meat; your guests will think you’ve got a Sicilian grandma whispering in your ear.
FAQ
What is the difference between rice balls and arancini?
Great question! While “rice balls” is a general term, arancini specifically refers to Italian rice balls with meat or other fillings that are coated in breadcrumbs and deep-fried. Arancini are a traditional Sicilian version of rice balls and are typically filled with ragù (meat sauce), cheese, and peas. So technically, all arancini are rice balls; but not all rice balls are arancini!
What are rice balls called in Italian?
In Italian, they’re called arancini (plural) or arancino/arancina (singular, depending on the region). The name comes from the word arancia, meaning orange, because the fried rice balls resemble little oranges in shape and color.
What's in a Sicilian rice ball?
A classic Sicilian rice ball, or arancini al ragù, typically features creamy risotto rice wrapped around a savory filling of ground beef, tomato sauce, green peas, and mozzarella or provolone cheese. The whole ball is then coated in breadcrumbs and fried until golden and crispy. This traditional version is what most people think of when they picture Italian rice balls with meat.
What sauce goes with Italian rice balls?
The most popular dipping sauce for Italian rice balls with meat is a simple marinara or tomato sauce. The tangy acidity of the tomatoes pairs perfectly with the rich, cheesy, and meaty center of the arancini. You can also try garlic aioli, pesto, or even a creamy parmesan sauce for a fun twist!
Enjoy Your Homemade Italian Rice Balls!
These Italian rice balls with meat aren't just a dish; they're a taste of Sicilian tradition that brings comfort, flavor, and a bit of magic to the table. Whether you're serving them as a standout appetizer or as a satisfying main course, homemade arancini are guaranteed to impress and earn a spot in your regular rotation.
The crispy breadcrumb coating, creamy risotto, and rich meat filling create a balance that’s truly irresistible. And while they do take a little time to make, the process is completely worth it; especially since you can break it up over a couple of days to fit your schedule.
If you’re on a roll with rice-based recipes, be sure to check out my Easy Cauliflower Fried Rice Recipe for a lighter, veggie-packed option, or try the flavor-packed Street Corn Chicken Rice Bowl Recipe for something bold, fresh, and satisfying.
Have you made Italian rice balls with meat before? I’d love to hear about your experience or any creative variations you've tried; drop a comment below and let’s chat food. Buon appetito!
Related
Looking for other recipes like this? Try these:
Pairing
These are my favorite dishes to serve with this Italian rice balls with meat recipe:

Italian Rice Balls with Meat Recipe
Equipment
- Heavy-bottomed pot
- Skillet
- Wooden spoon
- Large saucepan
- Slotted spoon or spider strainer
- Three shallow bowls (for breading)
- Dutch oven or deep fryer
- Baking sheet
- Thermometer (optional but recommended)
Ingredients
For the Risotto:
- 2 cups Arborio rice Or carnaroli or vialone nano
- 5–6 cups Chicken broth Warm
- 1 small Onion Finely diced
- 3 tablespoon Butter Divided
- ½ cup Chicken broth Additional
- ½ cup Parmesan cheese Freshly grated
- 2 Large Eggs
- Salt and pepper to taste
For the Meat Filling:
- ½ lb Ground beef 80/20 recommended
- 1 small Onion Finely chopped
- 2 Garlic cloves Minced
- 2 tablespoon Olive oil
- ½ cup Tomato sauce Or passata
- ½ cup Frozen peas Thawed
- ¼ cup Beef broth
- 1 teaspoon Dried oregano
- 1 Bay leaf
- Salt and pepper to taste
For Assembly:
- 8 oz Mozzarella cheese Cut into ½-inch cubes
- 1 cup All-purpose flour
- 3 Eggs Beaten
- 2 cups Italian breadcrumbs
- as needed Vegetable oil For frying
- to garnish Fresh parsley Optional
For Serving:
- Marinara sauce Warm for dipping
- Fresh basil Optional garnish
- Parmesan cheese For topping
Instructions
- Cook rice slowly with broth, onion, butter, and cheese until creamy.
- Spread on baking sheet and refrigerate for at least 2 hours.
- Brown beef, add peas, tomato sauce, and seasonings. Simmer.
- Stuff rice with meat and mozzarella, then shape into balls.
- Place formed rice balls in fridge for 30 minutes.
- Roll in flour, egg, then breadcrumbs.
- Deep fry until golden and crispy.
- With marinara sauce, parmesan, and herbs if desired.


Leave a Reply