
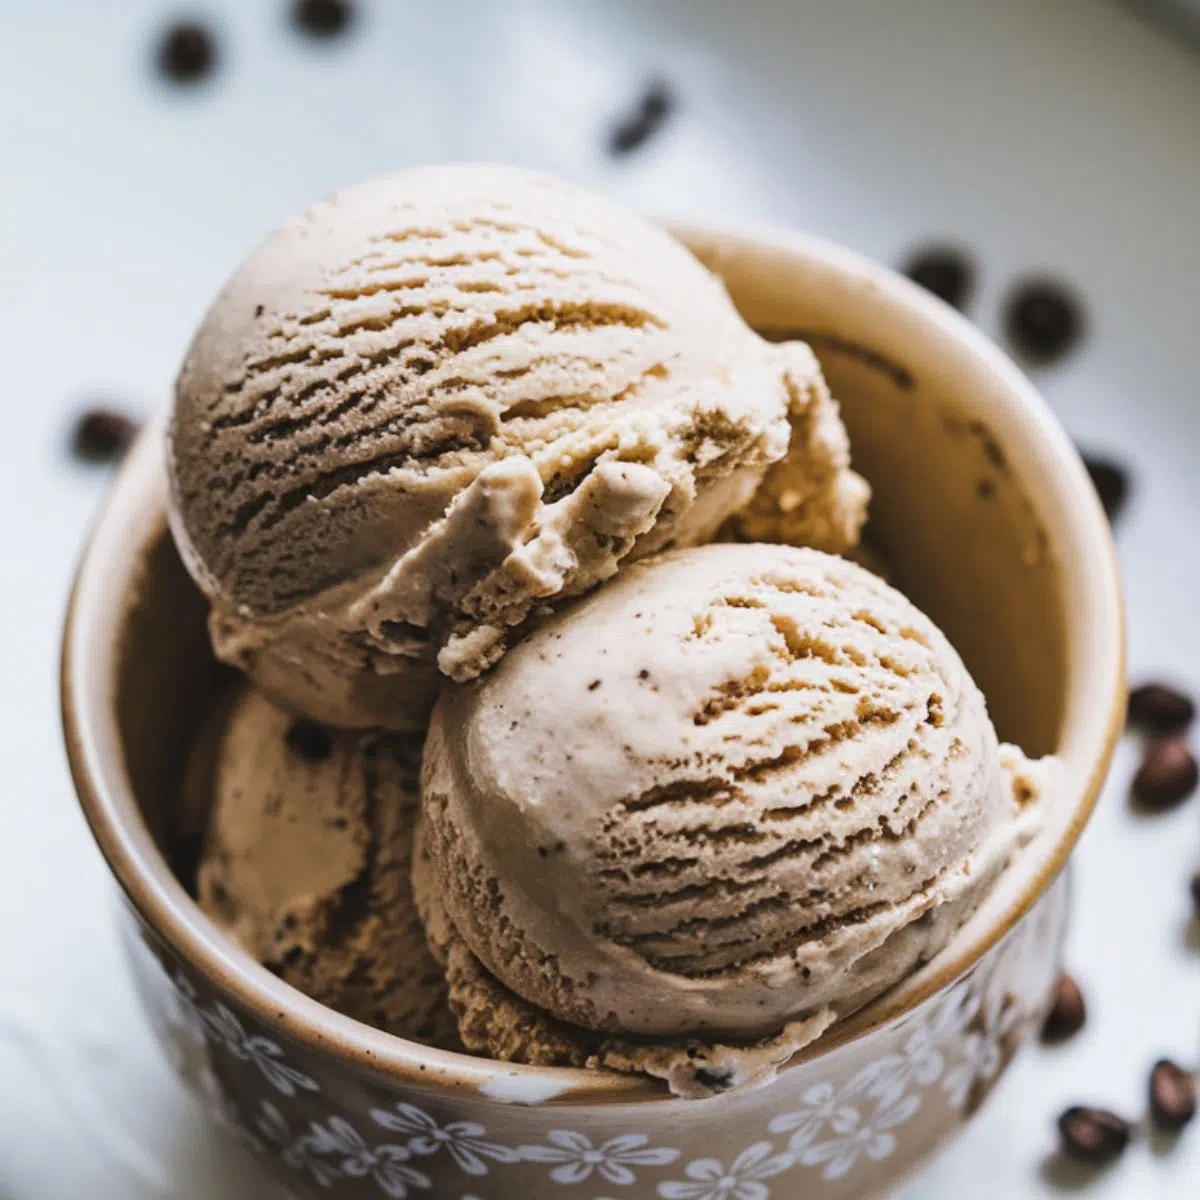
Imagine a dessert that perfectly blends bold coffee flavors with smooth, velvety ice cream. This homemade coffee ice cream recipe delivers deep, roasted notes and a creamy texture using simple, high-quality ingredients. Whether you're a coffee lover or enjoy unique flavors, making your own lets you control sweetness and intensity. Get ready to elevate your dessert game with this irresistible treat!
Why Coffee Ice Cream Is Worth Making at Home
Coffee ice cream is the perfect blend of bold, aromatic coffee and rich, creamy sweetness—a match made in dessert heaven. While store-bought options are convenient, they often contain preservatives and artificial flavors that take away from the authentic experience. By making coffee ice cream at home, you have complete control over the coffee strength, sweetness, and overall quality, ensuring every scoop is crafted to perfection.
Using real, freshly brewed coffee or espresso enhances the deep, roasted flavors, creating a coffee ice cream that’s far superior to anything you’ll find in stores. Plus, homemade ice cream isn’t just about great taste—it’s also a fun and rewarding activity the whole family can enjoy. From selecting the best ingredients to churning the perfect texture, the process of making coffee ice cream at home turns a simple dessert into a delightful experience.
Jump to:
Ingredients
- Heavy cream
- Whole milk
- Granulated sugar
- Brown sugar (adds depth to the coffee flavor)
- Freshly ground coffee beans (medium-dark roast works best)
- Instant espresso powder (for extra coffee punch)
- Salt
- Vanilla extract
- Optional: Chocolate chips or coffee beans covered in chocolate
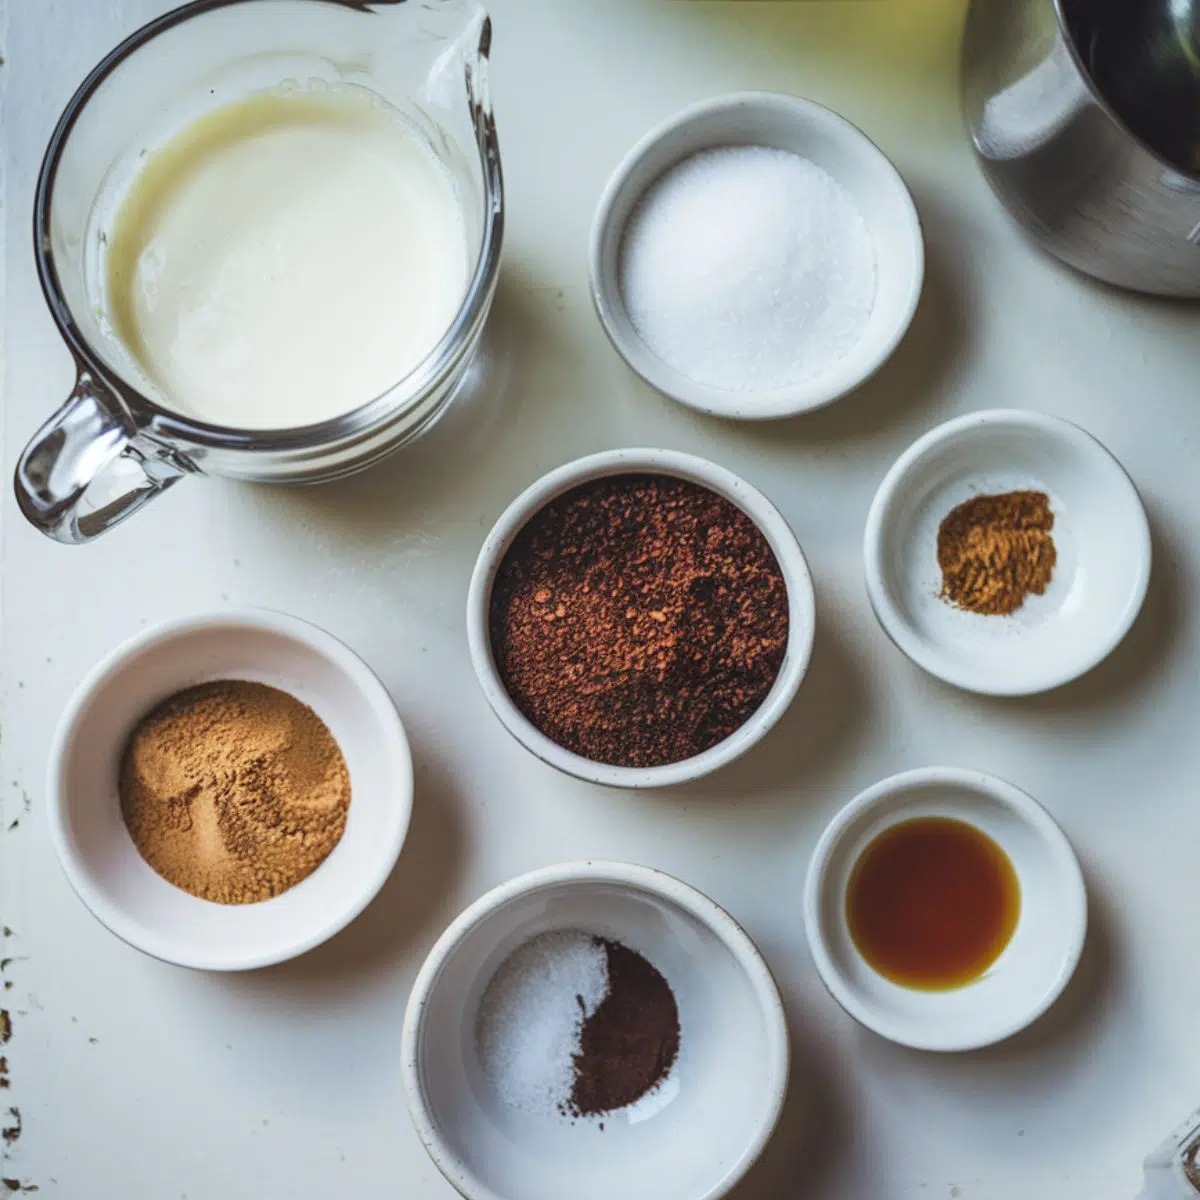
See recipe card for quantities.
Understanding Your Ingredients
- Heavy cream and whole milk: The fat content creates that rich, creamy texture. For a lighter version, you can use half-and-half instead of heavy cream.
- Coffee grounds: Freshly ground coffee gives the best flavor. The coarseness matters - too fine and your ice cream might be gritty, too coarse and you won't extract enough flavor.
- Instant espresso powder: This boosts the coffee flavor without adding more liquid to the base. If unavailable, you can use very strong brewed coffee and reduce the milk slightly.
- Salt: Just a pinch enhances all the other flavors, especially the coffee. Don't skip it!
- Vanilla extract: Complements the coffee flavor beautifully.
Ingredient Substitutions
- Dairy-free option: Replace heavy cream and milk with full-fat coconut milk and coconut cream for a vegan coffee ice cream.
- Sugar alternatives: Maple syrup or honey can replace white sugar (use ¾ the amount as they're sweeter).
- Decaf option: Use decaffeinated coffee beans if you're sensitive to caffeine or want to enjoy this treat in the evening.
Instructions
Infuse the Cream with Coffee
- In a medium saucepan, combine the heavy cream, milk, and ground coffee.
- Heat the mixture over medium heat until it begins to simmer (small bubbles appear around the edges), but don't let it boil.
- Remove from heat, cover, and let steep for 45 minutes to extract maximum coffee flavor.
Strain and Sweeten
- Place a fine-mesh strainer over a large bowl and strain the coffee-cream mixture to remove the grounds.
- Press on the grounds with a spoon to extract all the infused cream.
- Return the strained mixture to the saucepan and add both sugars and salt.
- Heat over medium-low, stirring constantly until the sugar completely dissolves (about 3-5 minutes).
- Remove from heat and stir in the instant espresso powder until fully dissolved.
Cool the Mixture
- Add the vanilla extract to the warm mixture and stir to combine.
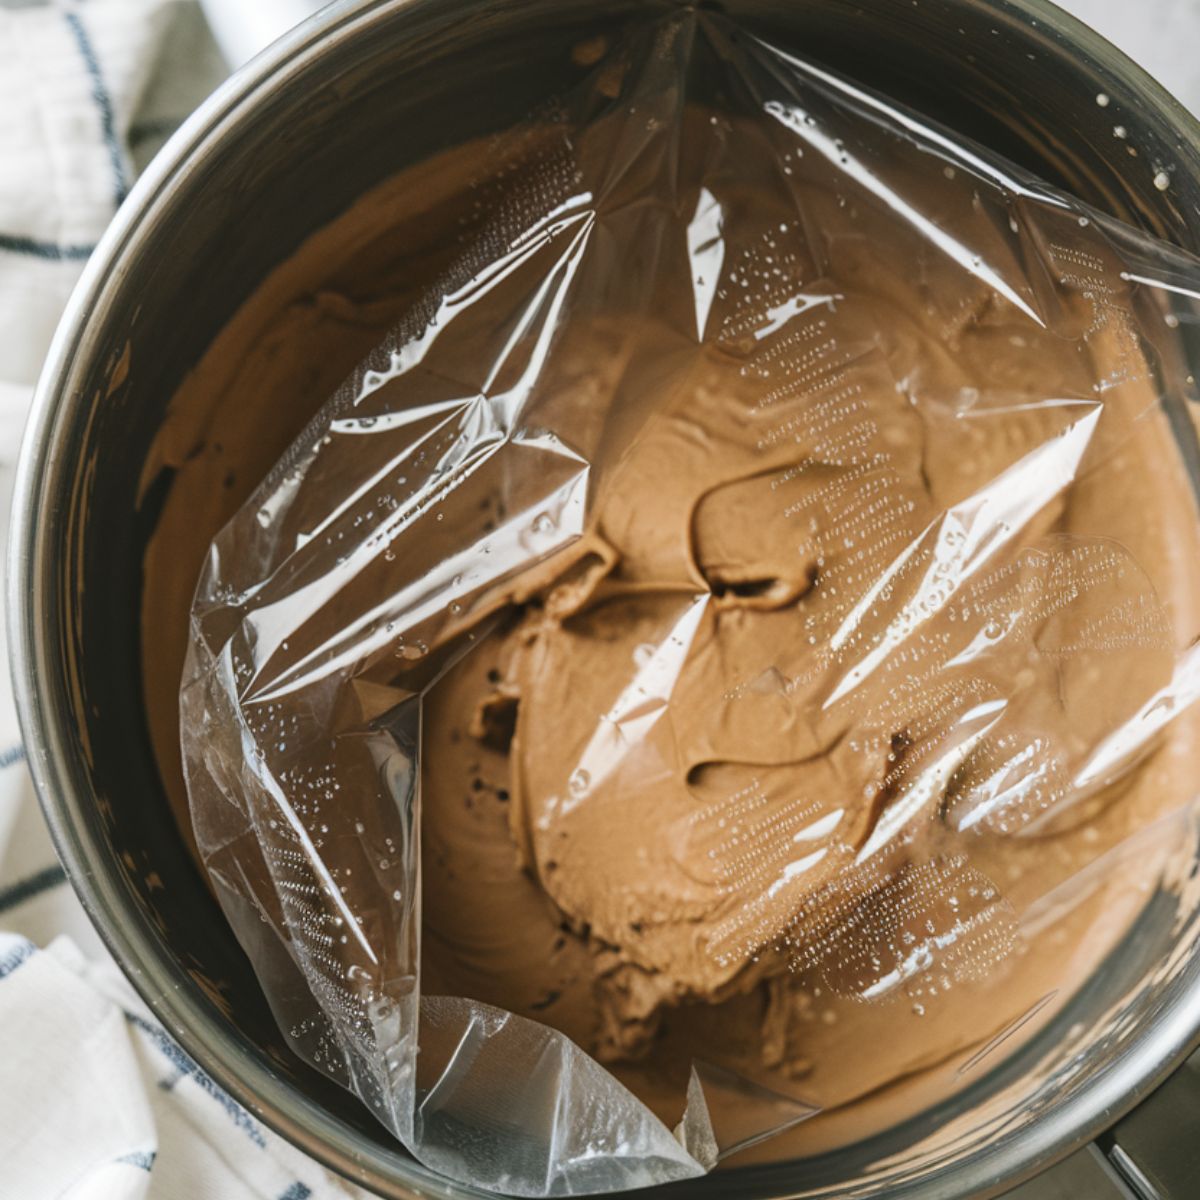
- Transfer the mixture to a clean bowl and cover with plastic wrap, pressing it directly onto the surface to prevent a skin from forming.
- Refrigerate for at least 4 hours or overnight. The colder your base is, the better your ice cream will turn out.
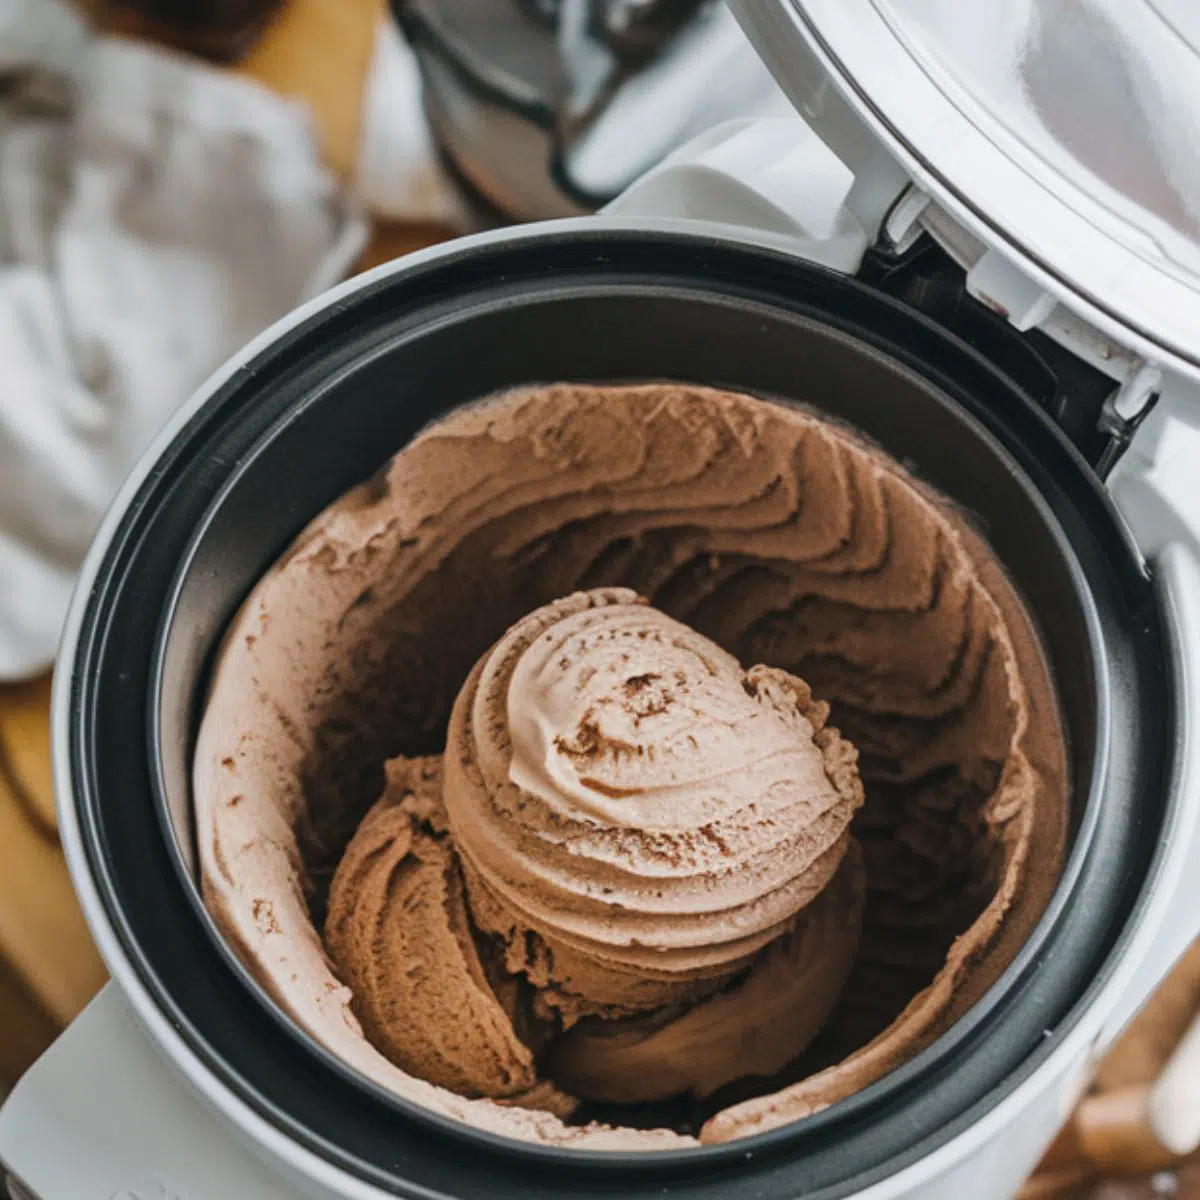
Churn the Ice Cream
- Remove the chilled base from the refrigerator and give it a quick stir.
- Pour into your ice cream maker and churn according to the manufacturer's instructions (usually 20-25 minutes).
- If adding chocolate chips, pour them in during the final 2 minutes of churning.
- The ice cream will have a soft-serve consistency when done churning.
Freeze for the Perfect Texture
- Freeze for at least 4 hours before serving for that perfect scoopable consistency.
- Transfer the churned ice cream to an airtight container.
- Cover with parchment paper or plastic wrap directly on the surface to prevent ice crystals.
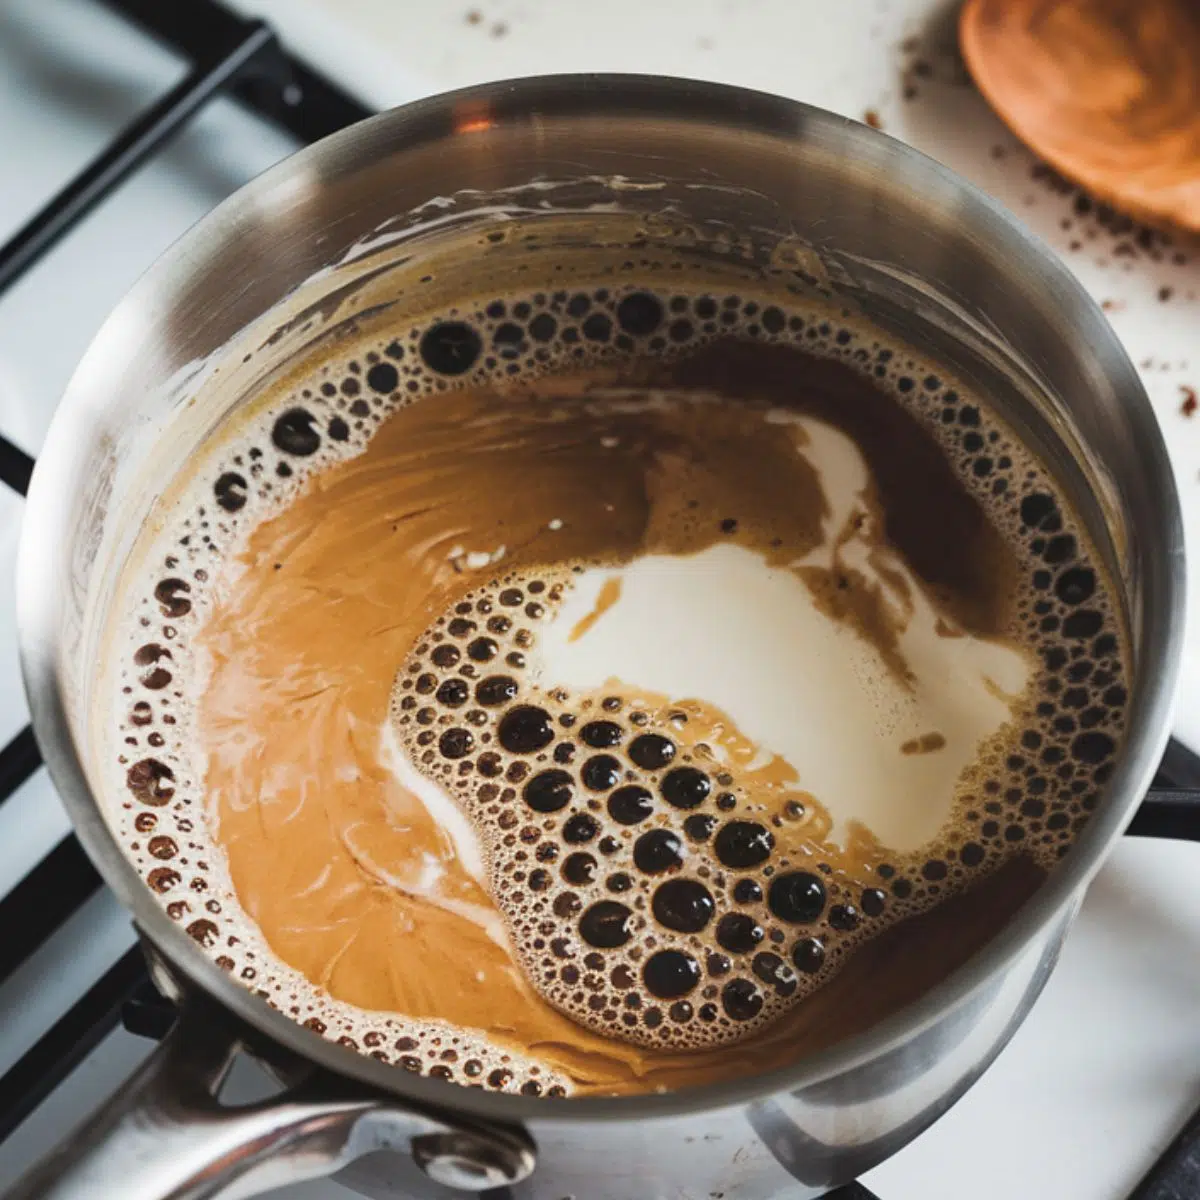
- Step 1: Infuse the Cream with Coffee
Heat the heavy cream and coffee grounds over medium heat until it starts to simmer, then let it steep for maximum flavor.
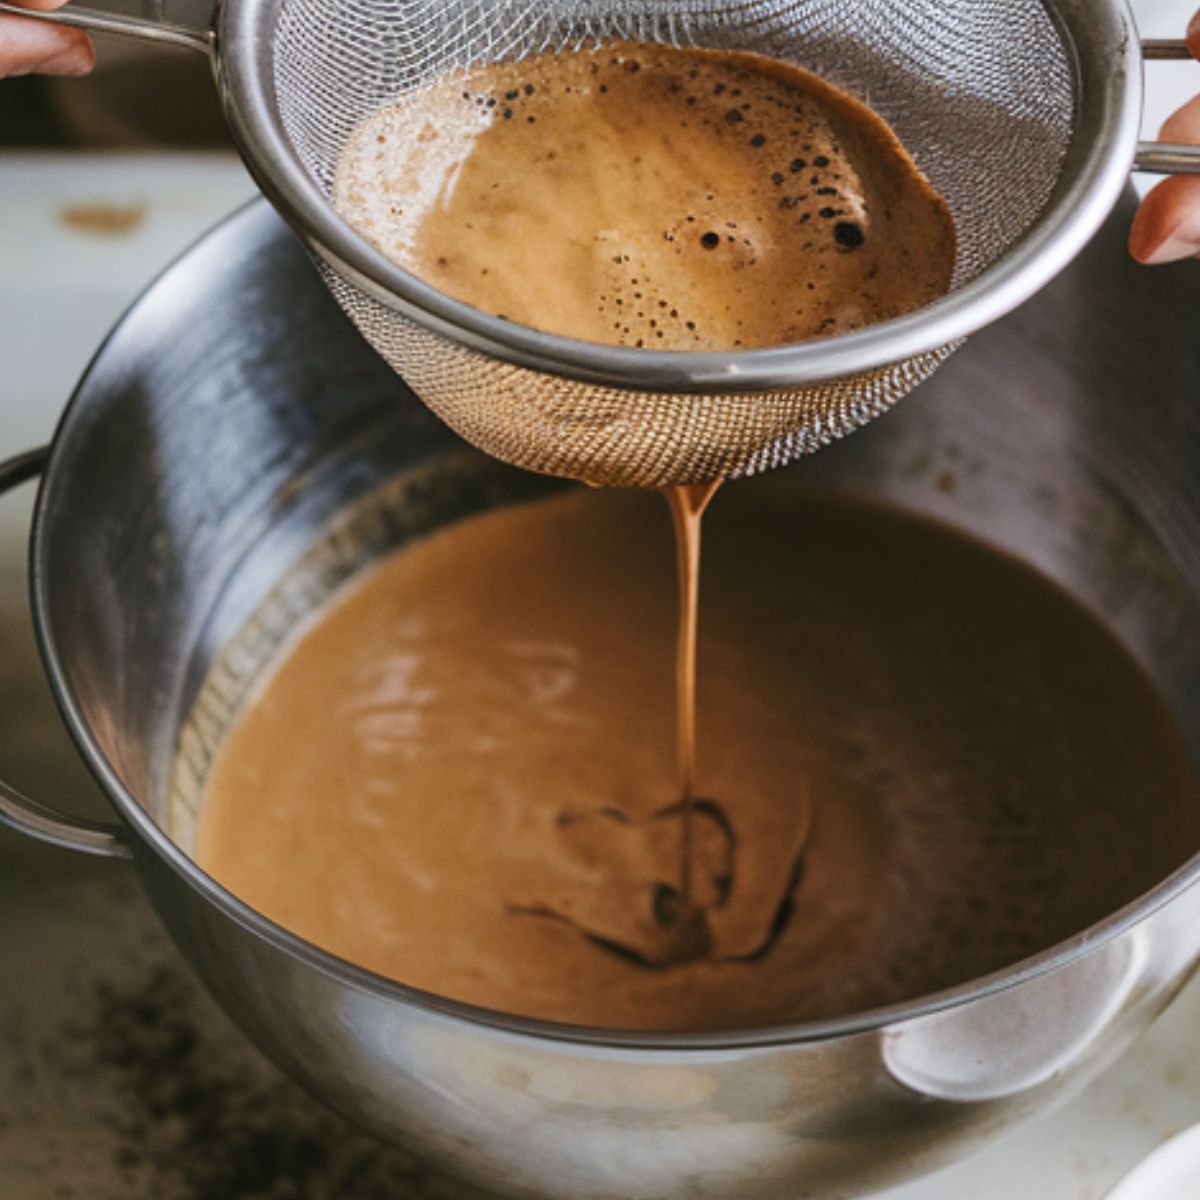
- Step 2: Cool the Mixture
Remove coffee grounds by straining the mixture, then stir in sugar and espresso powder
- Step 3: Cool the Mixture
Refrigerate the mixture until fully chilled to develop a smooth texture.
- Step 4: Churn the Ice Cream
No Ice Cream Maker? No Problem!
You can still enjoy creamy, homemade coffee ice cream without a machine—just follow these simple steps:
- Prepare and chill your ice cream base as directed.
- Pour the mixture into a shallow, freezer-safe container.
- Freeze for 45 minutes, then stir or whisk vigorously to break up ice crystals.
- Repeat stirring every 30 minutes for 3-4 hours.
- Once it reaches the perfect consistency, freeze for an additional 2 hours before serving.
While this method takes a bit more effort, it ensures you can enjoy rich, flavorful coffee ice cream—no special equipment needed!
Hints & Expert Coffee Ice Cream Tips
- Use good quality coffee: The coffee flavor is front and center, so use beans you'd enjoy drinking.
- Cold brew concentrate: For an even smoother coffee flavor without any bitterness, use ½ cup cold brew concentrate instead of steeping grounds.
- Don't rush the chilling: Properly chilled base makes for creamier ice cream with fewer ice crystals.
- Add coffee liqueur: For an adult version, add 2 tablespoons of Kahlúa or coffee liqueur before churning.
- Avoid over-churning: Stop when the ice cream reaches soft-serve consistency to prevent a grainy texture.
Creative Variations
Take your coffee ice cream to the next level with these delicious twists:
- Mocha Chip Coffee Ice Cream – Stir in ¼ cup cocoa powder to the base and add ½ cup chocolate chips during the final minutes of churning for a rich chocolate-coffee blend.
- Caramel Coffee Ice Cream – Swirl in ⅓ cup thick caramel sauce just before transferring the ice cream to a freezer-safe container for a sweet, buttery finish.
- Coffee Cookies and Cream – Fold in 1 cup crushed chocolate sandwich cookies after churning for a cookies-and-cream twist on classic coffee ice cream.
- Nutty Coffee Ice Cream – Add ½ cup toasted, chopped almonds or hazelnuts in the last minute of churning for a crunchy, nutty contrast.
Each variation enhances the bold coffee flavor, making your homemade coffee ice cream even more irresistible!
Equipment
- Ice cream maker: An electric ice cream maker makes the process much easier, but the no-churn method works well too.
- Fine-mesh strainer: Essential for removing coffee grounds from your cream base.
- Instant-read thermometer: Helps ensure you don't overheat your base (stay below 175°F).
- Airtight storage container: Glass or metal containers work better than plastic for preventing freezer burn.
For budget options, a hand mixer can help with the no-churn method, and a coffee filter can substitute for a fine-mesh strainer in a pinch.
Storage & Make-Ahead Tips
Refrigerator Storage
The ice cream base can be refrigerated for up to 2 days before churning, making this a great make-ahead dessert option.
Freezer Storage
- Homemade coffee ice cream keeps well in the freezer for up to 2 weeks when stored properly.
- To prevent freezer burn, press a piece of parchment paper or plastic wrap directly onto the ice cream's surface before putting on the lid.
- For best texture, let the ice cream sit at room temperature for 5-10 minutes before serving if it's very hard.
The Secret to the Best Coffee Ice Cream – A Hidden Flavor Boost
It all started when I visited a tiny gelato shop in Italy, tucked away in a quiet alley. I ordered their signature coffee ice cream, expecting the usual bold, creamy goodness. But the first spoonful stopped me in my tracks—it was rich, aromatic, and had an almost unplaceable warmth that made it utterly irresistible. I had to know their secret.
After some friendly coaxing, the owner finally shared a professional trick: a pinch of cinnamon and a tiny pinch of cardamom. These spices don’t overpower the coffee but subtly elevate its depth, creating a gourmet-level flavor that lingers on the palate. It’s the difference between homemade ice cream and a dessert that tastes like it came from a five-star café.
So, if you want your coffee ice cream to stand out, don’t skip this step. A small touch of spice makes all the difference—your friends and family will wonder what makes it so special, but only you will know the secret!
FAQ
Is coffee ice cream a thing?
Absolutely! Coffee ice cream is a popular frozen dessert that combines the bold, rich flavor of coffee with the creamy texture of traditional ice cream. It’s a favorite among coffee lovers and dessert enthusiasts alike, offering a perfect balance of bitterness and sweetness.
What is coffee and ice cream called?
When coffee ice cream is served on its own, it's simply called "coffee ice cream." However, if you pour a shot of hot espresso over a scoop of vanilla or coffee ice cream, it becomes an affogato—a classic Italian dessert that’s rich, bold, and irresistibly delicious!
Do any supermarkets sell coffee ice cream?
Yes! Many supermarkets carry coffee ice cream from popular brands like Häagen-Dazs, Ben & Jerry’s, and Talenti. Availability may vary depending on your location, but most large grocery stores stock at least one coffee-flavored ice cream option.
Does Starbucks still make coffee ice cream?
No, Starbucks discontinued its coffee ice cream line, which was once available through a partnership with Unilever. However, you can still enjoy Starbucks-inspired flavors by making homemade coffee ice cream with your favorite Starbucks coffee beans!
Savor Every Spoonful of Your Homemade Coffee Ice Cream!
You've mastered the art of making coffee ice cream, and now it’s time for the best part—digging in! Whether you enjoy it solo, melt it over a warm brownie, or take it up a notch with a shot of hot espresso for the ultimate affogato, every scoop is a celebration of bold coffee flavor and creamy perfection.
The beauty of homemade coffee ice cream is that you control every detail—from the richness of the coffee to the sweetness and texture. Want an extra-strong espresso kick? Go for it. Prefer a hint of cinnamon or caramel? The possibilities are endless!
But why stop at one frozen treat? If you love experimenting in the kitchen, check out my Frozen Fruit Salad Recipe for a refreshing twist or whip up a batch of Chocolate Truffles (Ready in 30 Minutes!) for the perfect indulgent pairing.
Tried this recipe? What coffee beans did you use? Let’s chat in the comments below! And don’t forget to save this one—you’ll definitely be making it again.
Related
Looking for other recipes like this? Try these:


Pairing
These are my favorite dishes to serve with this Homemade Coffee Ice Cream recipe:


Homemade Coffee Ice Cream
Equipment
- 1 Medium saucepan For heating the cream & coffee
- 1 Fine-mesh sieve For straining the coffee grounds
- 1 Mixing bowl To cool the ice cream base
- 1 Ice cream maker Optional, for churning
- 1 Airtight container For freezing the ice cream
- 1 Wooden spoon For stirring the mixture
Ingredients
- 2 cups Heavy cream Provides creaminess
- 1 cup Whole milk Adds smooth texture
- ¾ cup Granulated sugar Sweetens the base
- ¼ cup Brown sugar Deepens flavor
- 4 tablespoon Coffee grounds Medium-coarse grind for best infusion
- 1 tablespoon Instant espresso powder Enhances coffee flavor
- ½ teaspoon Salt Balances flavors
- 1 tablespoon Vanilla extract Adds depth
- ½ cup Chocolate chips Optional, for extra texture
Instructions
- Heat cream, milk, and coffee grounds in a saucepan over medium heat until simmering. Remove from heat and let steep for 45 minutes.
- Strain mixture through a fine-mesh sieve into a bowl. Press on coffee grounds to extract maximum flavor.
- Return the liquid to the saucepan, add sugars and salt, and stir over low heat until dissolved. Stir in instant espresso powder.
- Stir in vanilla extract, transfer to a bowl, and cover with plastic wrap. Refrigerate for at least 4 hours.
- Pour chilled mixture into an ice cream maker and churn until it reaches soft-serve consistency.
- Transfer to an airtight container, cover with parchment paper, and freeze for 4 hours before serving.

Leave a Reply