
Hey there, sweet tooth squad!
If you’ve ever wished for a quick, no-fuss treat that tastes like pure happiness, let me introduce you to your new obsession: the banana donut. Yep, you heard me — banana donut magic is real, and it’s about to change your snack game forever.
These banana donut holes are not just simple — they’re unbelievably easy, made with just two humble ingredients you probably already have sitting in your kitchen. Whether you need a cozy breakfast bite, a post-workout pick-me-up, or a fun after-school treat for the kids, this banana donut recipe delivers every time.
There’s no complicated process, no fancy mixers, and absolutely no strange ingredients. Just pure, wholesome banana goodness shaped into adorable, poppable donut holes that’ll leave you wondering how you ever lived without them. Trust me, once you’ve had a homemade banana donut, you’ll never look at store-bought treats the same way again.
Ready to whip up the easiest, tastiest banana donut of your life? Let’s make some magic happen!
Why You’ll Fall in Love With These 2-Ingredient Banana Donut Holes
Let’s be honest — there’s something downright magical about whipping up a treat that tastes bakery-worthy... without needing a culinary degree or a thousand ingredients. That’s exactly the kind of magic you’ll find with these irresistible banana donut holes. Trust me, once you experience the warm, sweet flavor of a fresh banana donut, you’ll wonder why you ever bothered with anything else!
The story behind these banana donut holes is a simple one: a couple of overripe bananas on the counter and a craving for something sweet but easy. No fancy mixers, no yeast, no hours of proofing — just pure, cozy comfort you can pull together in minutes. It’s the ultimate solution for anyone who loves the idea of fresh donuts but not the heavy lifting that usually comes with them.
What really makes these banana donuts shine (aside from their adorable poppable size) is their perfect texture — soft and tender on the inside, with a hint of crispness on the outside. And because they’re baked, not fried, you get all that donut shop joy without the oily aftermath. It's simplicity and flavor rolled into one, and honestly? Your oven has never been this powerful when it comes to crafting banana donut perfection.
Once you try these, you’ll be finding excuses to make banana donut holes all the time — and no one’s going to blame you.
Jump to:
The Only 2 Ingredients You Need
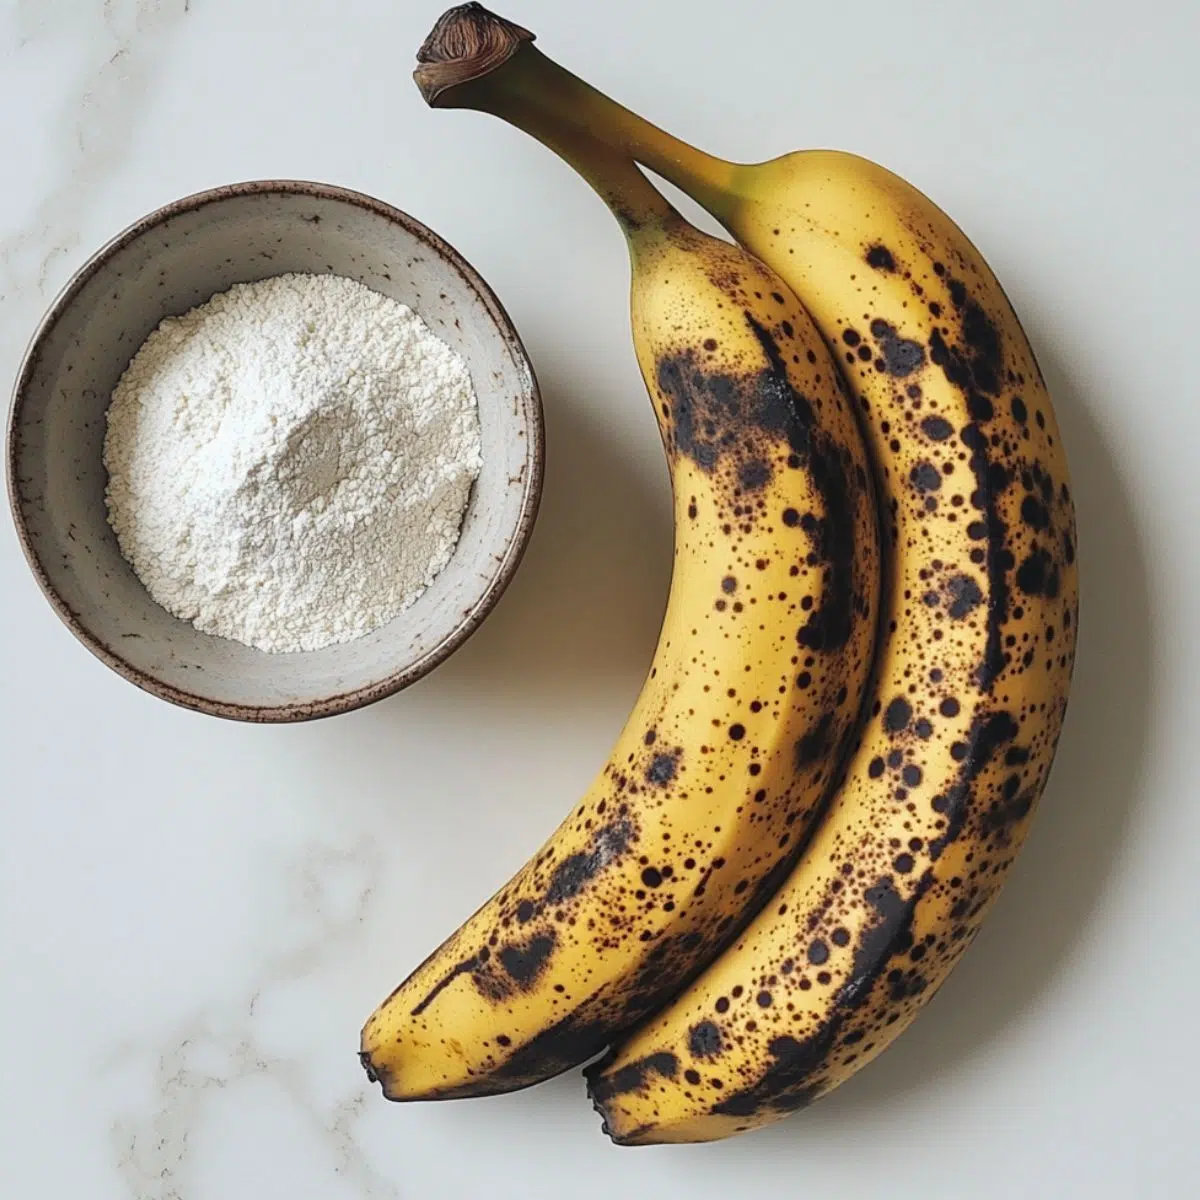
Yes, you read that right - just two ingredients stand between you and these delicious banana donut holes! Here's what you'll need:
- Self-rising flour - This is the secret weapon that makes this recipe possible. Self-rising flour contains baking powder and salt already mixed in, which gives our donut holes their rise without needing additional ingredients.
- Ripe bananas - The riper, the better! Those spotty, almost-too-far-gone bananas are perfect because they're sweeter and mash more easily. They provide natural sweetness and moisture to our donut holes.
See recipe card for quantities.
Optional Add-ins For Flavor Variations
While the basic recipe needs just two ingredients, here are some optional add-ins to create different variations of your banana donut holes:
- Cinnamon or vanilla extract - For extra warmth and flavor
- Chocolate chips - For banana chocolate chip donuts
- Chopped nuts - Perfect for banana nut donuts
- Sprinkle of sugar - For a sweeter finish
No Self-Rising Flour? Make Your Own!
If you don't have self-rising flour on hand, you can easily make your own with:
- All-purpose flour
- Baking powder
- Salt
Simply mix these together and use in place of 1 cup of self-rising flour.
Instructions
Prep Your Ingredients
- Preheat your oven to 350°F (175°C).
- Line a baking sheet with parchment paper or lightly grease it.
- Measure out your self-rising flour and set aside.
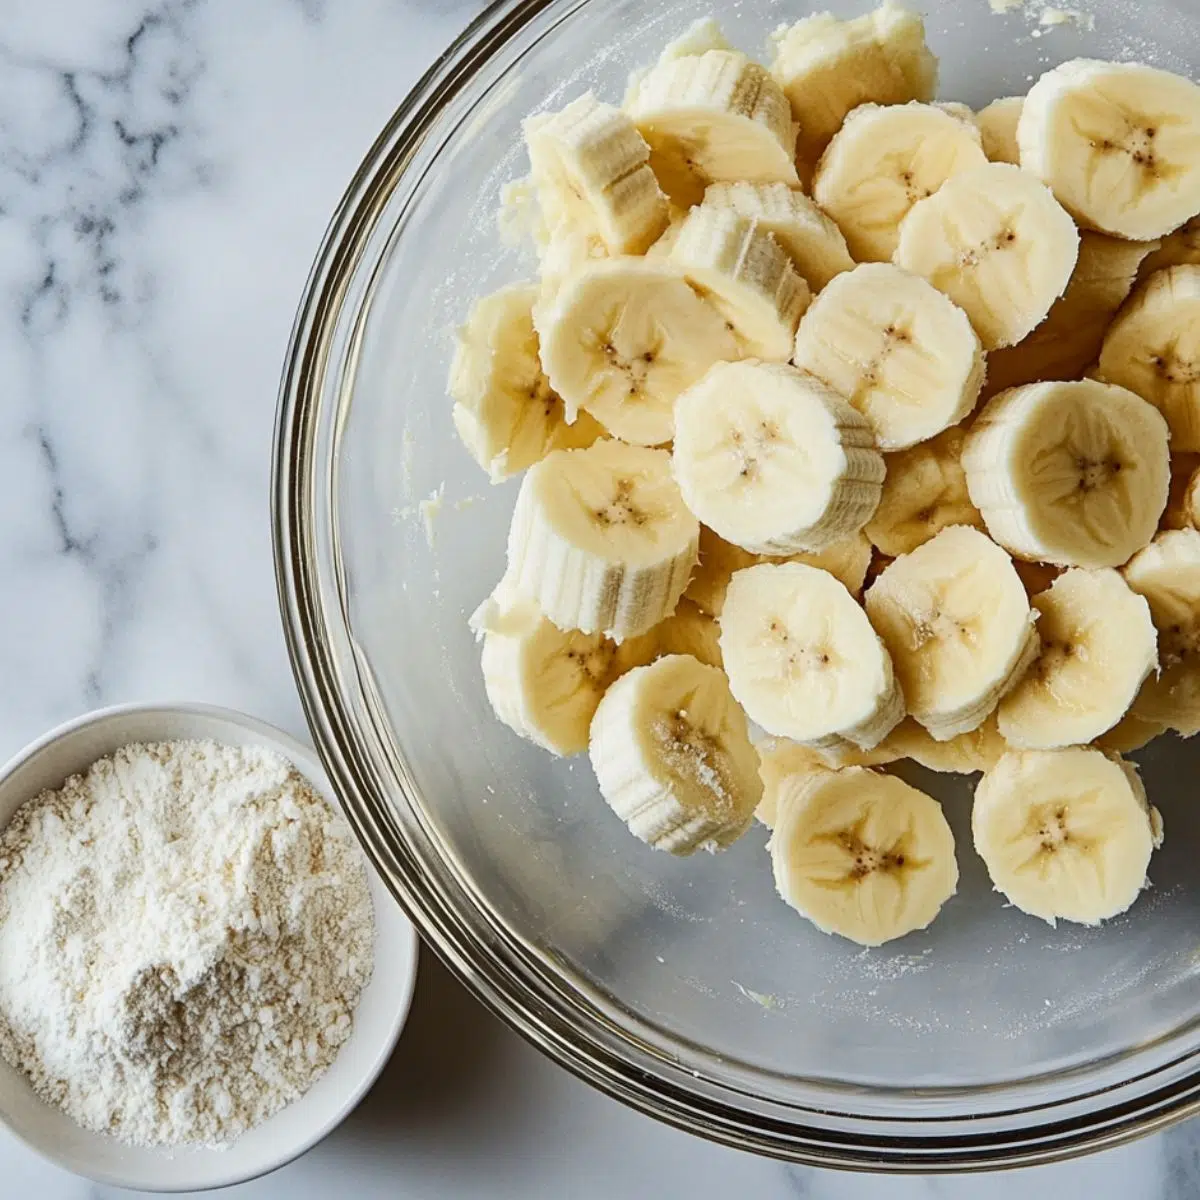
- Peel your ripe bananas and place them in a mixing bowl.
Make the Donut Dough
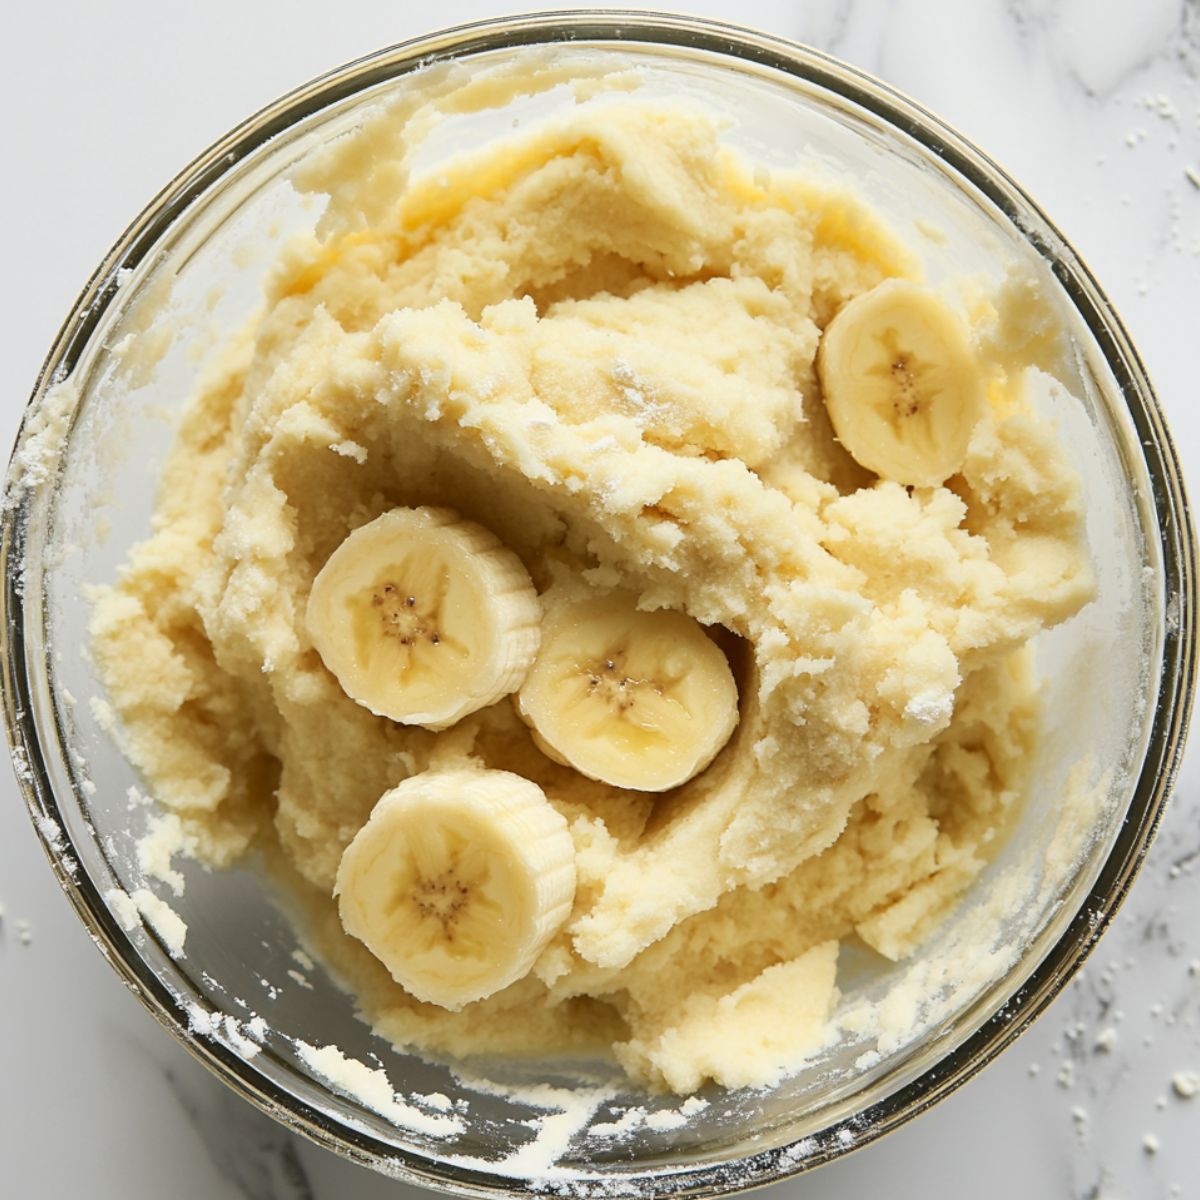
- Using a fork, mash the bananas thoroughly until smooth. The riper your bananas, the easier this will be.
- Gradually add the self-rising flour to the mashed bananas, stirring until well combined.
- The mixture should form a sticky dough. If it's too wet, add a little more flour, one tablespoon at a time.
Form Your Donut Holes
- Using a tablespoon or cookie scoop, portion the dough into small balls (about 1-inch diameter).
- Roll each portion between your palms to form a smooth ball.
- Place the balls on your prepared baking sheet, leaving about 1 inch between each one.
Bake to Perfection
- Place the baking sheet in the preheated oven.
- Bake for 10-12 minutes, or until the donut holes are lightly golden on top and cooked through.
- Remove from the oven and allow to cool slightly before serving.
- Step 1: Prep Your Ingredients
Gather and prep your bananas, flour, and baking tray
- Step 2: Make the Donut Dough
Mash bananas and stir in flour until a sticky dough forms.
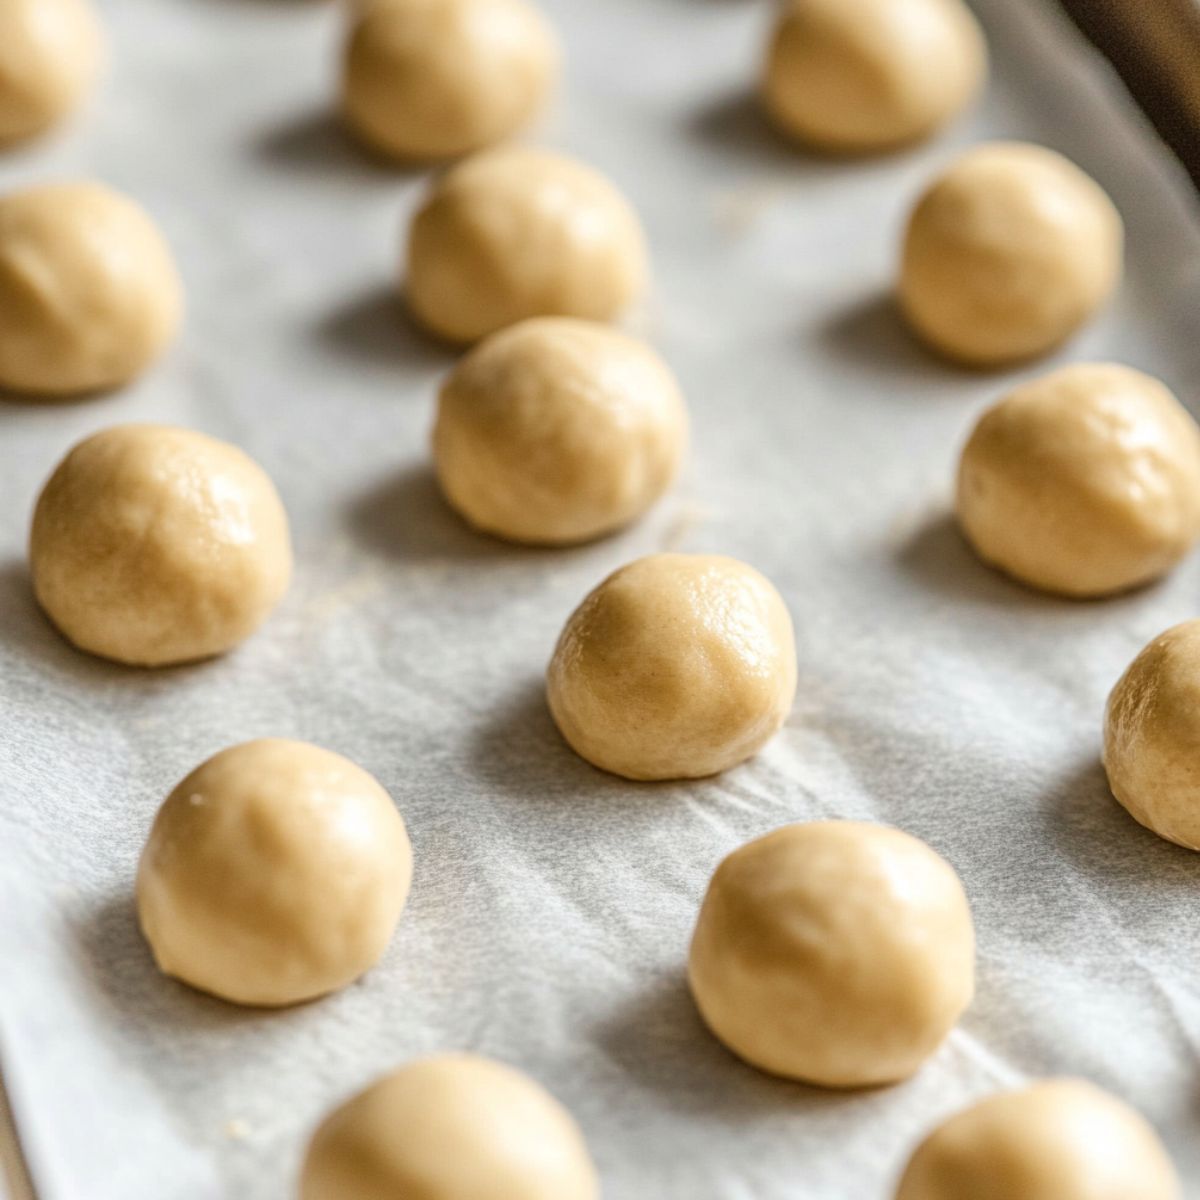
- Step 3: Form Your Donut Holes
Shape dough into small balls and place them onto the tray.
- Step 4: Bake to Perfection
Bake until golden and slightly springy to the touch.
Expert Cooking Tips for Perfect Banana Donut Holes
Want your banana donut holes to come out bakery-perfect every single time? I’ve got you covered! Here’s how to make sure your banana donut game stays strong, delicious, and dangerously addictive:
1. Choose Overripe Bananas (The Blacker, The Better!)
When it comes to a perfect banana donut, your bananas should be seriously spotty — think almost black peel. The riper they are, the sweeter and more flavorful your banana donut holes will turn out. Trust the bananas; they know what they’re doing.
2. Stir with Love, Not Aggression
Resist the urge to beat that batter into submission! Overmixing your banana donut batter can make the texture dense and chewy — and not in a good way. Stir gently, just until everything is combined, to keep your banana donut holes light and tender.
3. Uniform Size = Happy Baking
Try to scoop your banana donut holes as evenly as possible. A consistent size means they’ll bake at the same rate, ensuring you don’t end up with some burnt bites and some raw centers. Plus, they’ll look super cute and professional (bonus points!).
4. Don’t Panic Over Moist Centers
Because bananas bring natural moisture, your banana donut holes will always feel a little soft inside even when they’re fully baked. No need to overbake! Look for a golden exterior and a slightly firm touch to know they're done just right.
5. Let Them Chill (Just a Bit)
Fresh out of the oven, your banana donut holes might seem a little too delicate to handle. Give them a few minutes to cool and set up — it’s like giving them a moment to pull themselves together before they blow your mind with their flavor. also a great idea to link out to another blogger with a similar recipe that fits a different diet.
Tasty Variations to Try with Your Banana Donut Holes
Ready to take your banana donut game to the next level? These easy twists are perfect if you’re feeling a little extra (or just hungry for more deliciousness). Whether you’re in the mood for something classic, chocolatey, or cozy, there’s a banana donut variation here calling your name:
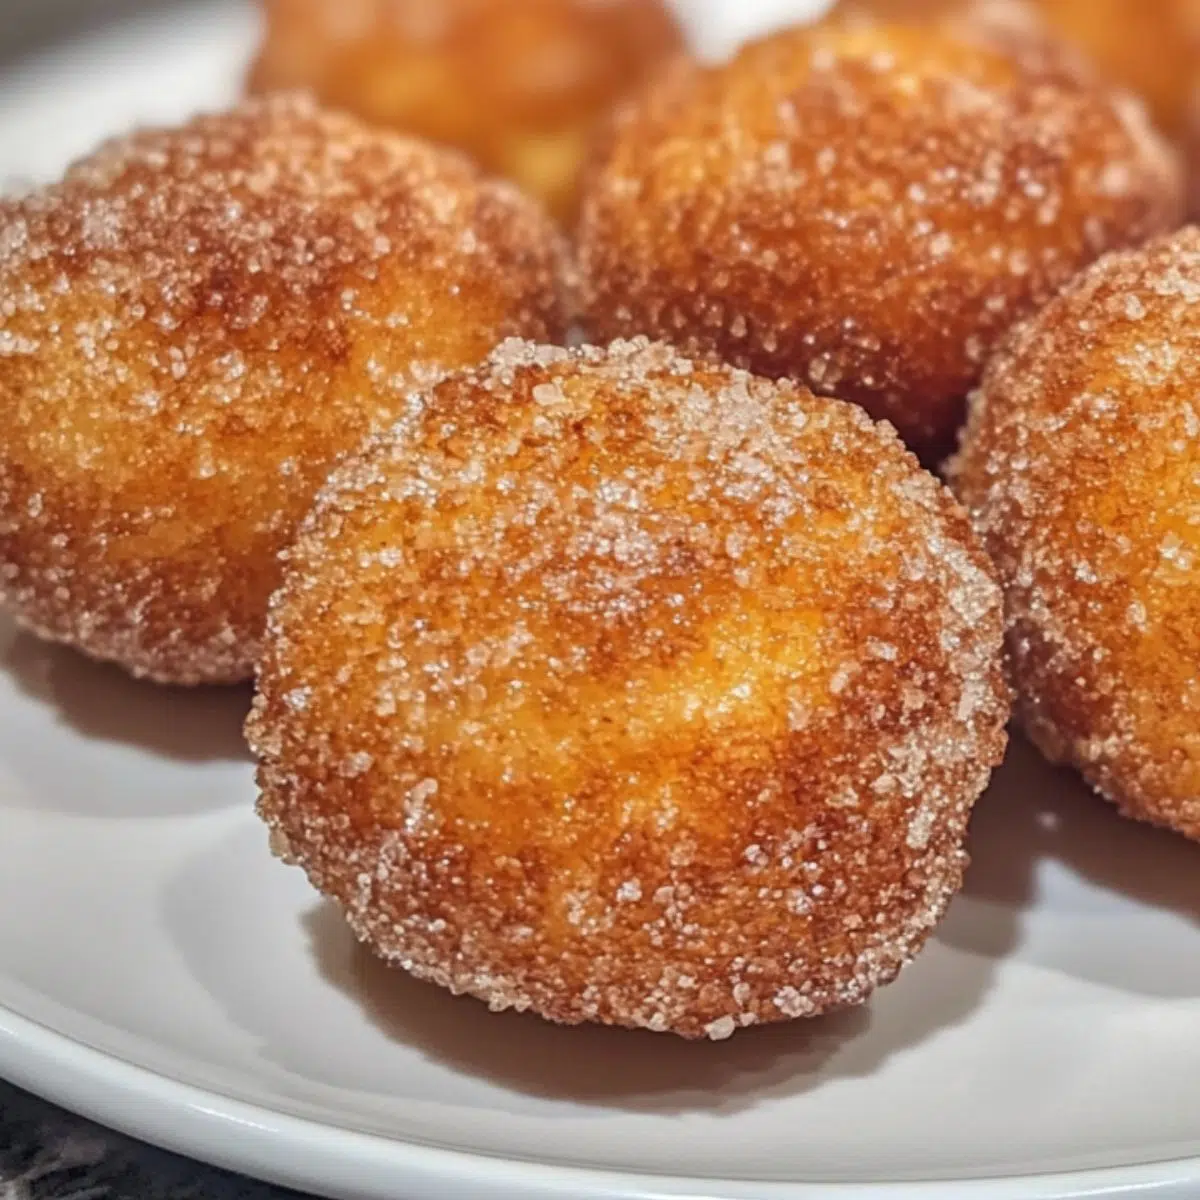
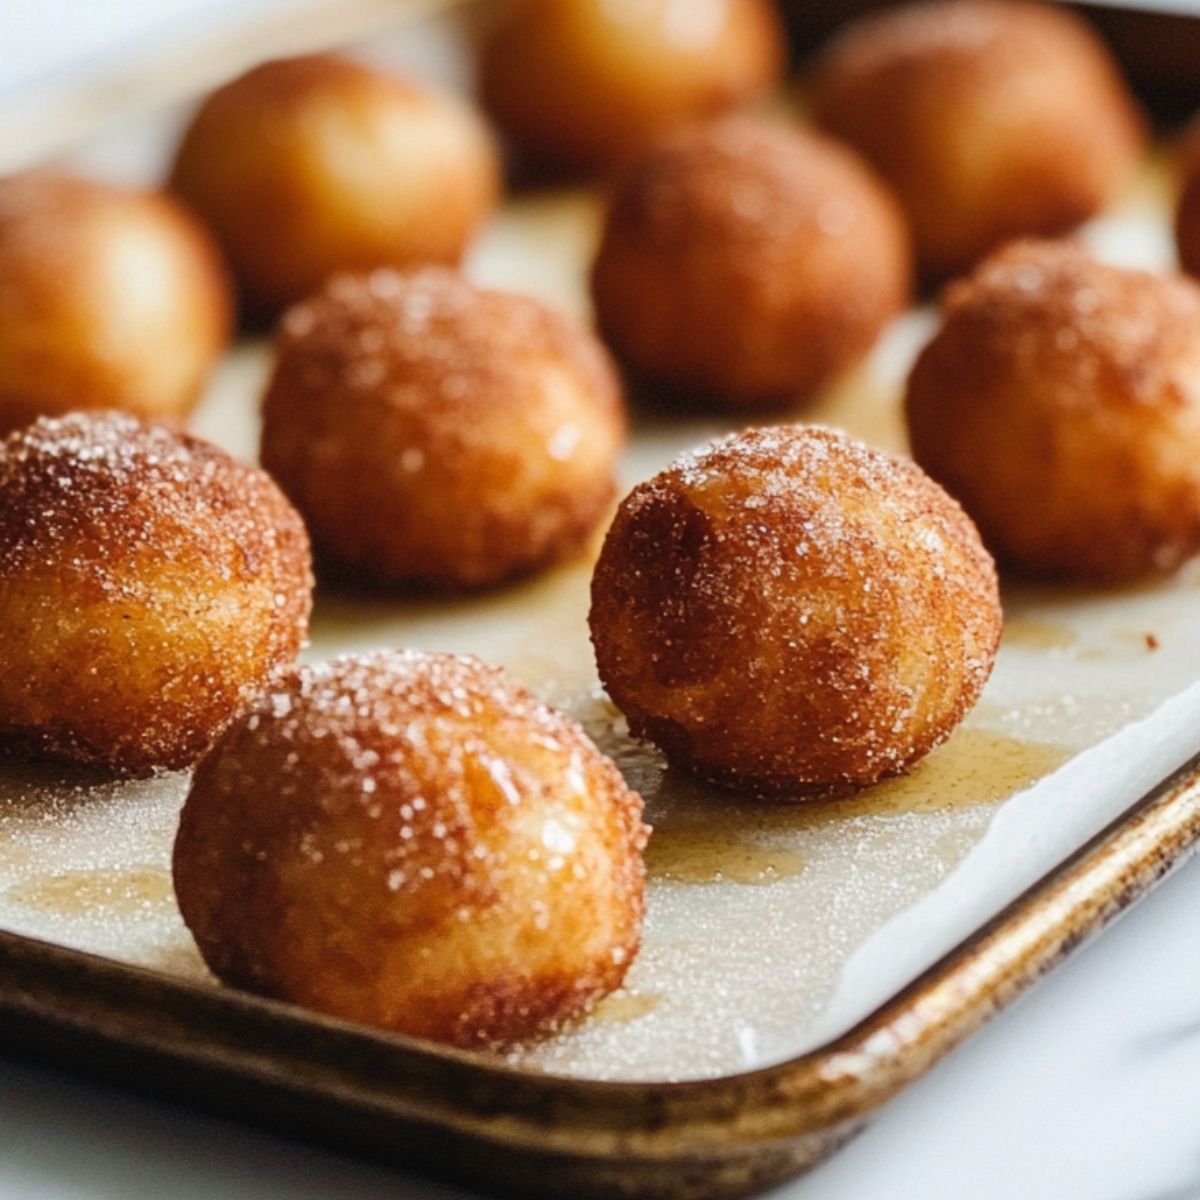
- Cinnamon Sugar Coated Banana Donut Holes
As soon as your banana donut holes come out of the oven — still warm but not piping hot — roll them in a simple cinnamon and sugar mix. It’s an instant throwback to that classic donut shop flavor we all secretly dream about. - Chocolate-Dipped Banana Donut Holes
Feeling fancy (or just craving chocolate)? Melt a handful of chocolate chips in the microwave, then dip the tops of your cooled banana donut holes. You’ll end up with dreamy banana chocolate chip donuts that are practically impossible to resist. - Banana Bread-Inspired Banana Donut Holes
Want that cozy banana bread flavor packed into a bite-sized treat? Just stir ½ teaspoon of cinnamon, a handful of chopped walnuts, and a splash of vanilla extract into your banana donut batter. The result? Banana donut holes that taste like little hugs from your grandma’s kitchen. - Gluten-Free Banana Donut Holes
No gluten? No problem! Simply swap out the self-rising flour for a good-quality gluten-free self-rising blend. You’ll still get that dreamy banana donut experience — soft, sweet, and packed with flavor — without missing a beat.t link)
No Special Equipment Needed
One of the best things about this banana donut recipe is that it requires minimal equipment:
- Mixing bowl
- Fork or potato masher (for mashing bananas)
- Measuring cups
- Tablespoon or cookie scoop (for portioning)
- Baking sheet
No deep fryer, no donut pans, no special tools needed!
Storage & Make-Ahead Tips
Fridge Storage
These banana donut holes will keep in an airtight container in the refrigerator for up to 3 days. The natural moisture from the bananas helps them stay fresh longer than typical donuts.
Freezer-Friendly
Make a big batch and freeze them for up to 2 months! Just place the cooled donut holes on a baking sheet, freeze until solid, then transfer to a freezer bag. Reheat in the microwave for 15-20 seconds when ready to enjoy.
Reheating Tip
For that fresh-from-the-oven taste, warm refrigerated donut holes in the microwave for 10 seconds or in a 300°F oven for about 5 minutes.
The Little Secret for Extra-Soft Donut Holes
Not many people realize it, but there’s a tiny trick that makes a world of difference when you're aiming for truly perfect donut holes. It’s the kind of secret you might find scribbled in the margins of a well-loved family cookbook.
Right after you mix your dough, don’t rush to start shaping — let it rest for just five minutes. That short pause allows the flour to fully hydrate, working a quiet magic that transforms your donut holes from simply good to unbelievably soft and tender.
It’s a small secret, but trust me: once you taste the difference, you’ll never skip it again. Sometimes, a little patience is all it takes to turn something simple into pure, pillowy perfection.
FAQ
What are the two ingredients in banana donut holes?
The magic behind these easy banana donut holes lies in just two simple ingredients: overripe bananas and self-rising flour. That’s it! The natural sweetness and moisture from the banana blend perfectly with the self-rising flour to create a soft, fluffy banana donut without needing eggs, butter, or yeast. It’s simplicity at its finest — and yes, it’s just as delicious as it sounds.
How to make banana holes?
Making banana donut holes couldn’t be easier! Start by mashing your overripe banana until smooth. Then, gently fold in the self-rising flour until just combined — remember, don’t overmix! Scoop the dough into small, even-sized balls and bake them in a preheated oven until golden brown. In about 10–12 minutes, you’ll have a batch of warm, soft banana donut holes ready to enjoy. For extra flavor, you can roll them in cinnamon sugar or drizzle with a glaze after baking.
How do you make banana donuts in the air fryer?
Good news: your air fryer is perfect for making banana donut holes even faster! Simply prepare your banana donut batter as usual. Form small balls and place them in a single layer in your air fryer basket, making sure they don’t touch. Air fry at 350°F (175°C) for about 7–9 minutes, shaking the basket halfway through for even cooking. You’ll get beautifully golden, slightly crisp banana donut holes without ever turning on your oven!
What are old fashioned donut holes?
Old-fashioned donut holes are the small, round bites made from the centers of classic old-fashioned donuts. These traditional donuts are typically made from a rich, slightly dense batter, flavored with nutmeg or vanilla, and deep-fried to create a crisp exterior with a tender inside. Unlike the soft, banana-based donut holes you make with overripe bananas, old-fashioned donut holes have a more cakey texture and often come with a simple sugar glaze. Think of banana donut holes as the fresher, fruitier, and way-easier cousin of the classic!
Save Those Bananas — Create Magic Instead!
There’s something incredibly rewarding about turning a few humble, overripe bananas into something downright irresistible. These banana donut holes are the perfect proof that a little creativity can go a long way — and save a few bananas from a sad, wasteful fate in the process.
With just two simple ingredients and barely any hands-on time, these banana donut holes are a dream for bakers of every skill level. Honestly, even the little ones can jump in and help (just prepare for a little extra flour on the counter!). Naturally sweet, freezer-friendly, and endlessly snackable, this is one recipe you’ll find yourself coming back to again and again.
And hey, if you find yourself with even more bananas hanging around, don’t stop at just banana donut holes! You can also whip up a quick batch of Pan Fried Cinnamon Bananas for a warm, caramelized treat, or dive into the fluffy goodness of Banana Chocolate Chip Pancakes for a cozy breakfast everyone will beg for.
So next time you spot those browning bananas on your counter, don’t even think about tossing them. Grab a bowl, mash those beauties up, and turn them into the easiest, tastiest banana donut holes you’ve ever had. Your taste buds — and your wallet — will seriously thank you.
Tried it out? Played with some fun add-ins or a creative twist? We’d love to hear all about your banana donut adventures. Drop a comment and share your sweet success story with us!
Related
Looking for other recipes like this? Try these:


Pairing
These are my favorite dishes to serve with this 2 Ingredient Banana Donut Holes recipe]


2-Ingredient Banana Donut Holes
Equipment
- 1 Mixing bowl
- 1 Fork or potato masher
- Measuring cups
- 1 Tablespoon or cookie scoop
- 1 Baking sheet
- 1 Parchment paper
Ingredients
- 2 large ripe bananas very ripe; spotted or black-skinned
- 1 cup self-rising flour add more if needed for dough consistency
Instructions
- Preheat oven to 350°F (175°C) and line a baking sheet.
- Peel and mash bananas thoroughly in a mixing bowl.
- Gradually stir in the self-rising flour until a sticky dough forms.
- Let the dough rest for 5 minutes.
- Scoop and roll dough into small balls (about 1 inch).
- Place on baking sheet with space between each.
- Bake for 10-12 minutes until lightly golden and set.
- Let cool slightly before serving.


Leave a Reply