

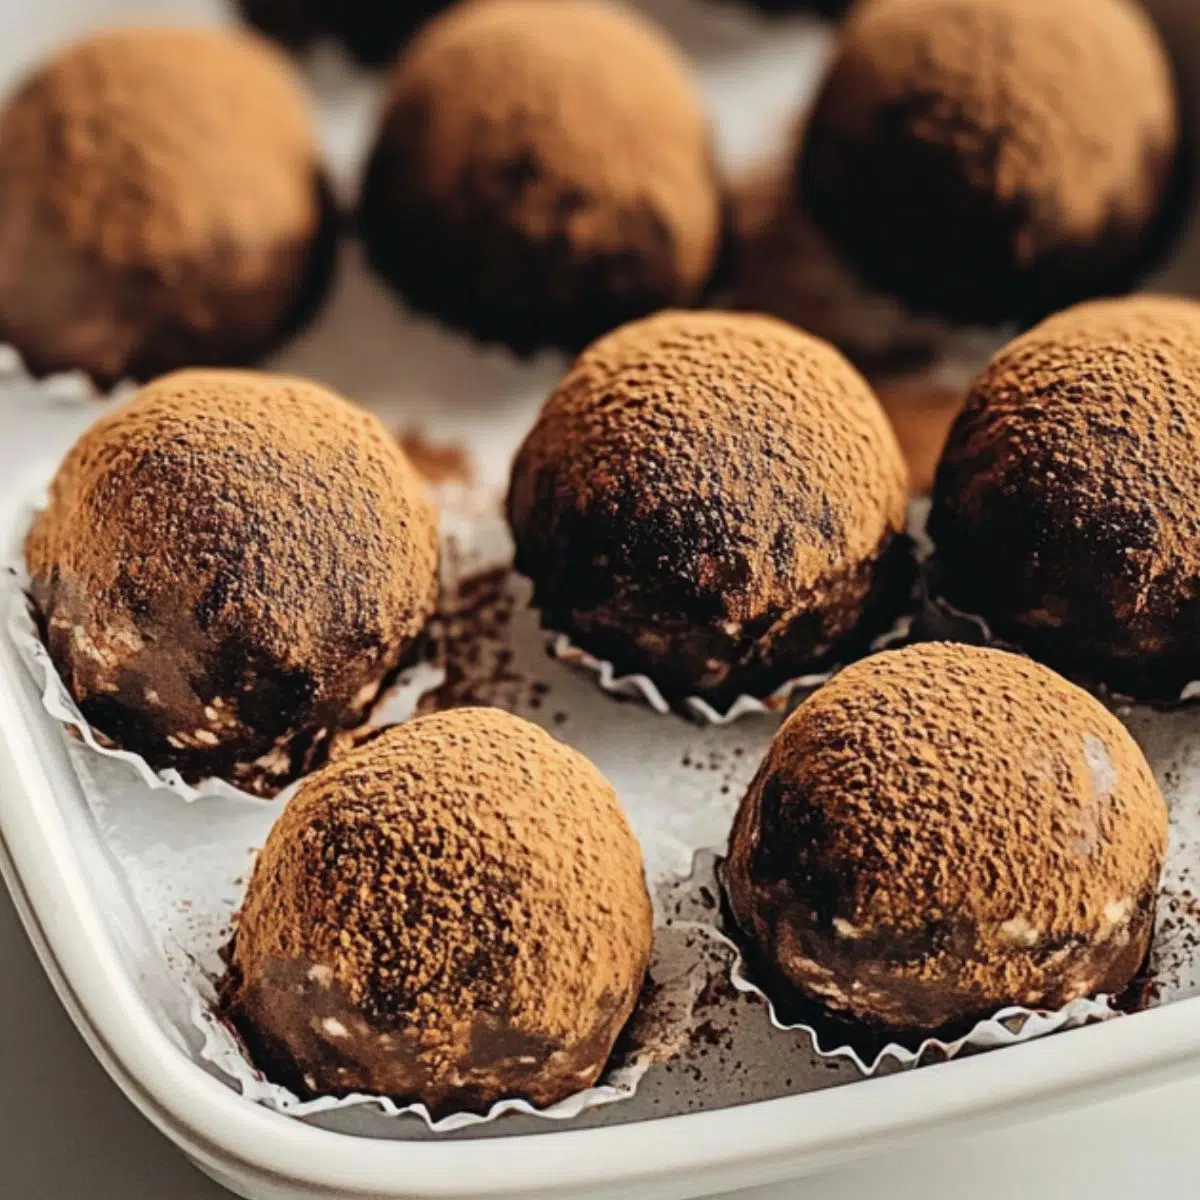
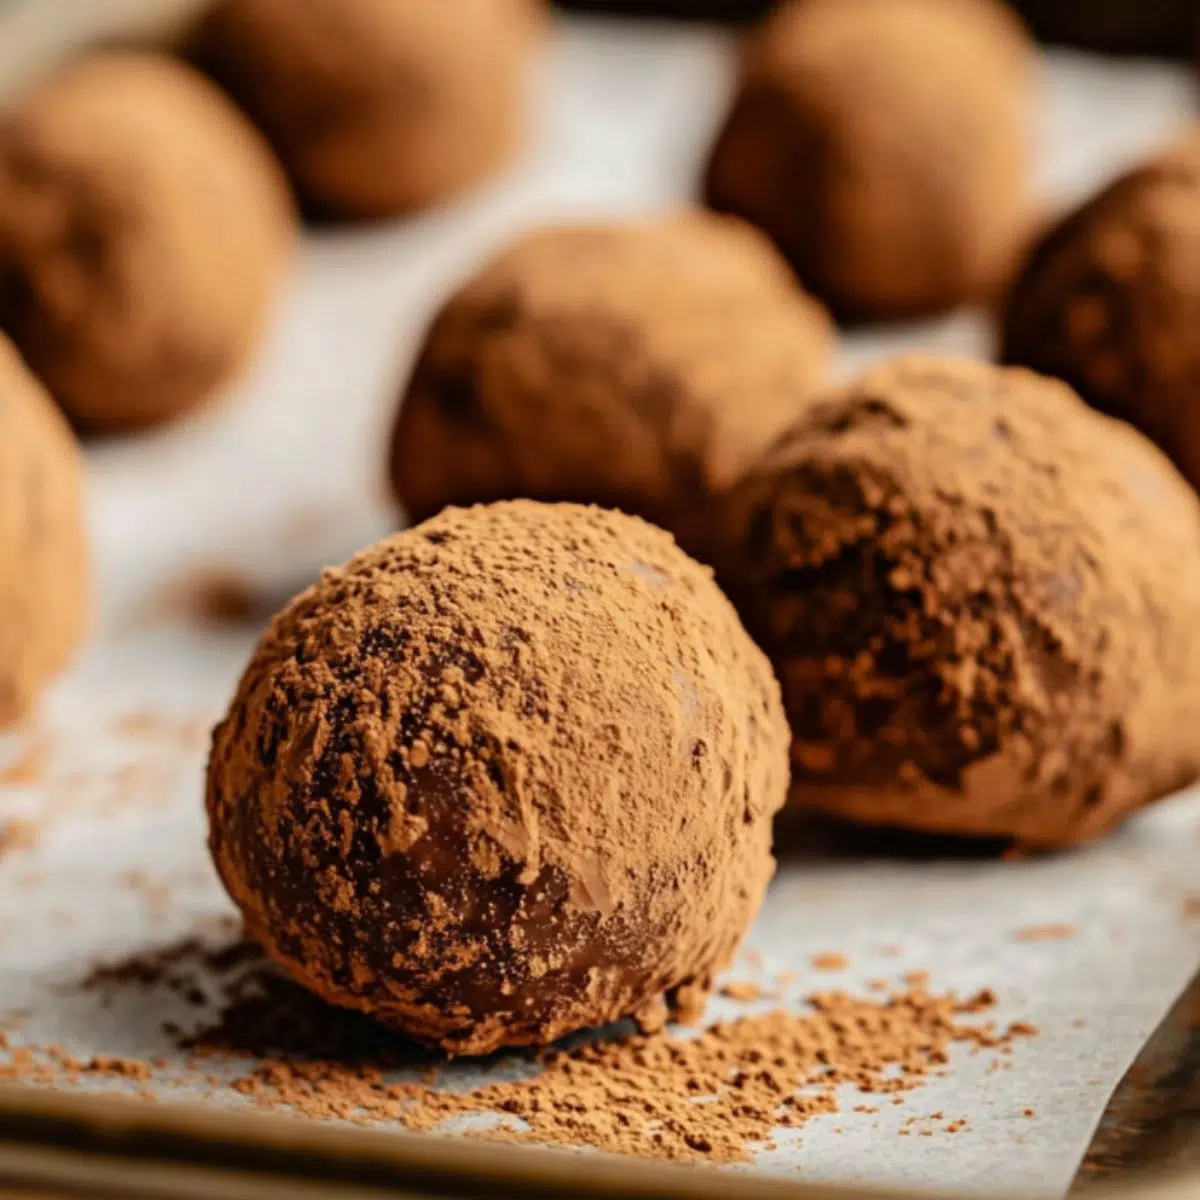
Intro paragraph for you to give a quick overview of this recipe, and entice the reader to continue reading because your recipe is fan-freaking-fantastic. Bold your keyword once here.If you've ever wished tiramisu came in a bite-sized, no-fuss version, these Tiramisu Truffles are your dream come true. With rich mascarpone, bold espresso, and a dusting of cocoa, they pack all the flavor of the classic Italian dessert into elegant little bites—no layering, baking, or chilling required.
Ready in just 30 minutes, these Tiramisu Truffles are perfect for dinner parties, holidays, or any time you're craving a creamy, coffee-infused treat. They’re effortless to make; yet taste like they came from a high-end pastry shop.
Simple, sophisticated, and totally addictive; these Tiramisu Truffles will become your new favorite no-bake dessert.
Background & Why This Recipe Stands Out
Tiramisu has long reigned as Italy’s most iconic dessert; known for its layers of coffee-soaked ladyfingers and luscious mascarpone cream. But what if you could enjoy all that luxurious flavor—without the assembly or wait time? That’s where these Tiramisu Truffles come in.
Inspired by the classic but designed for modern convenience, this recipe reimagines tiramisu as a set of elegant, handheld bites. These Tiramisu Truffles are everything we love about the original: creamy, coffee-infused, and indulgent; but wrapped in a rich chocolate shell that adds just the right amount of texture and depth.
What makes them truly stand out is their versatility. These mascarpone truffles shine on any dessert platter; they pair perfectly with a shot of espresso after dinner and elevate everything from casual gatherings to formal events. Whether you’re hosting or treating yourself midweek, Tiramisu Truffles deliver the same luxurious taste—with half the effort.
Jump to:
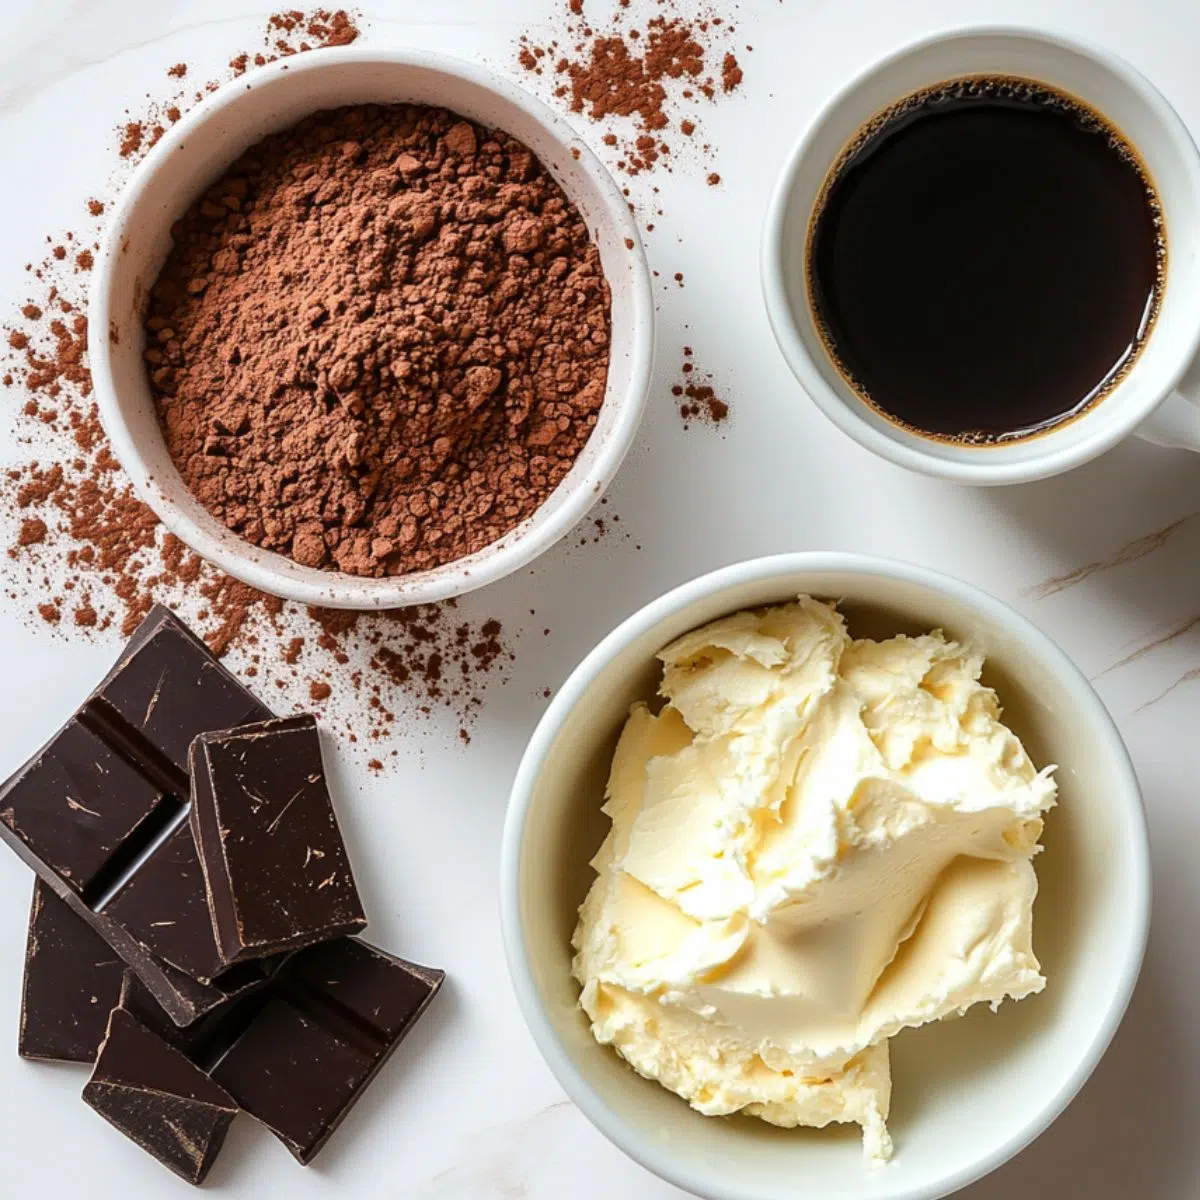
Ingredients
For the Truffle Filling:
- Mascarpone cheese
- Powdered sugar
- Strong espresso
- Rum or Kahlua (optional)
- Finely ground ladyfinger cookies
- Cocoa powder
For the Chocolate Coating:
- Dark chocolate
- Coconut oil
For Dusting:
- Cocoa powder
- Finely chopped pistachios (optional)
See recipe card for quantities.
Instructions
Preparing the Truffle Base
- Start by bringing your mascarpone cheese to room temperature – this prevents lumps and creates a smooth mixture.
- In a large mixing bowl, combine the mascarpone and powdered sugar, whisking until completely smooth and creamy. This should take about 2 minutes of gentle mixing.
- Add the cooled espresso and rum (if using), mixing until well incorporated. The mixture should have a lovely coffee aroma and light brown color.
- Fold in the ground ladyfinger cookies and cocoa powder until evenly distributed throughout.
Pro Tip: If your mixture seems too soft to shape, refrigerate for 15 minutes to firm up slightly.
Shaping the Tiramisu Truffle Balls
- Using a small cookie scoop or tablespoon, portion the mixture into 1-inch balls.
- Roll each portion between your palms to create smooth, round shapes.
- Place the shaped tiramisu balls on a parchment-lined baking sheet.
- Refrigerate the shaped truffles for 20 minutes while you prepare the chocolate coating. This chilling step is crucial for maintaining their shape during the coating process.
Expert Hint: Slightly damp hands prevent the mixture from sticking while rolling.
Creating the Perfect Chocolate Coating
- In a microwave-safe bowl, combine the chopped chocolate and coconut oil.
- Microwave in 30-second intervals, stirring between each, until completely melted and smooth. The coconut oil helps create a glossy finish and prevents the chocolate from becoming too thick.
- Allow the chocolate to cool for 2-3 minutes – it should be warm but not hot, which could melt the truffle centers.
Coating and Finishing
- Using a fork or dipping tool, carefully dip each chilled truffle into the chocolate coating, allowing excess to drip off.
- Place back on the parchment-lined sheet immediately.
- While the chocolate is still wet, dust with cocoa powder or sprinkle with chopped pistachios for decoration. Work quickly, as the chocolate sets fast.
Professional Tip: For extra-smooth coating, dip each truffle twice, allowing the first coat to set for 5 minutes before the second dip.
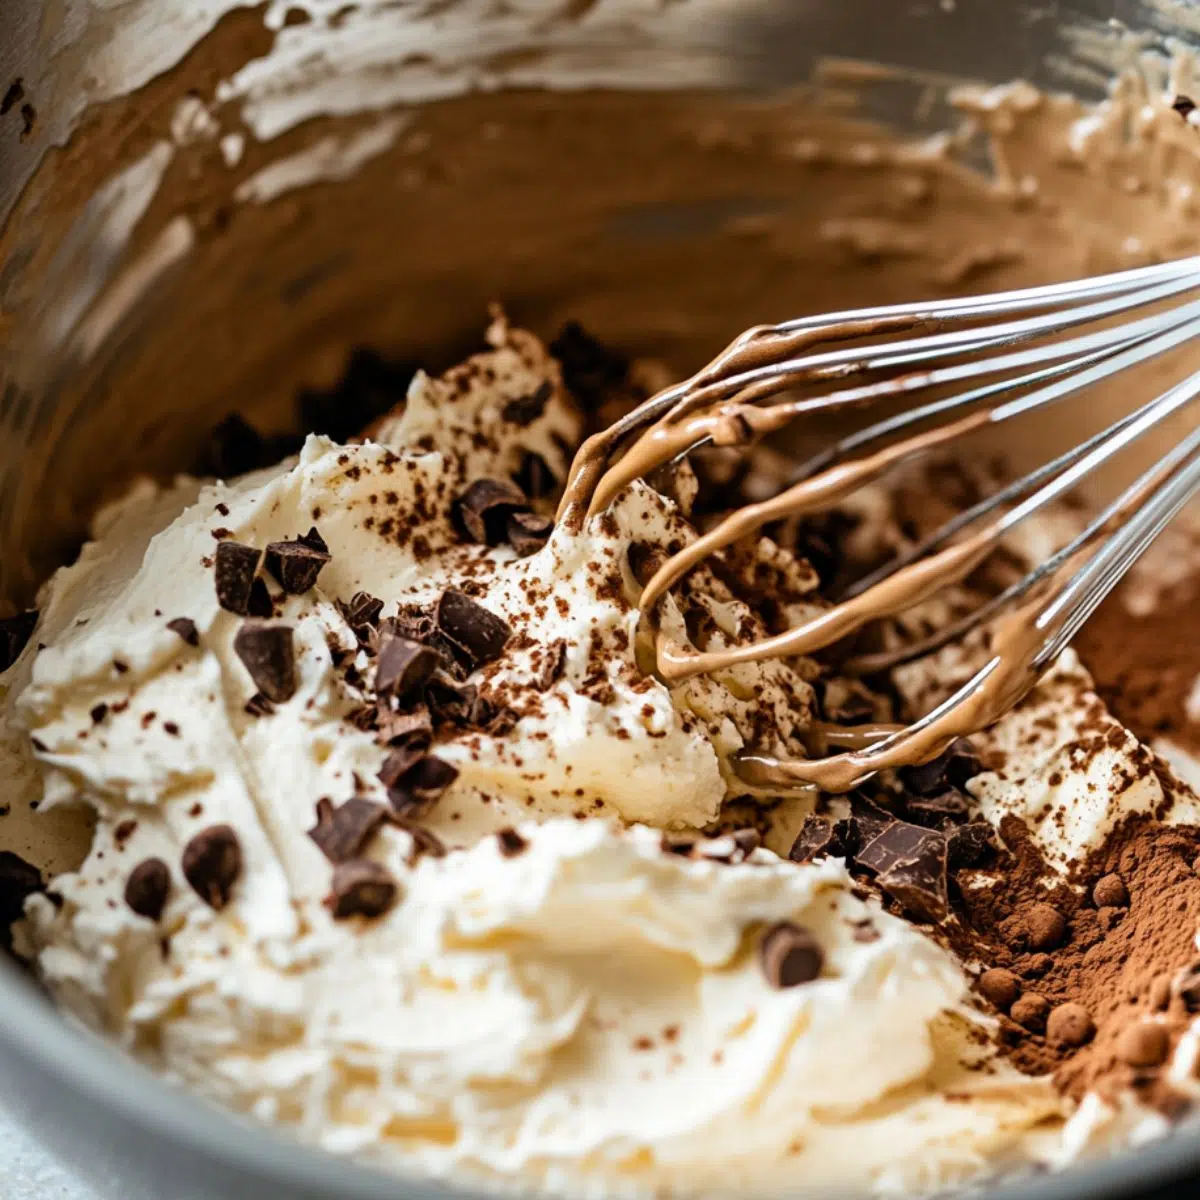
- Step 1: Preparing the Truffle Base
Mix mascarpone, espresso, and dry ingredients until smooth and well combined.

- Step 2: Shaping the Tiramisu Truffle Balls
Roll the mixture into small balls and chill them to set the shape.
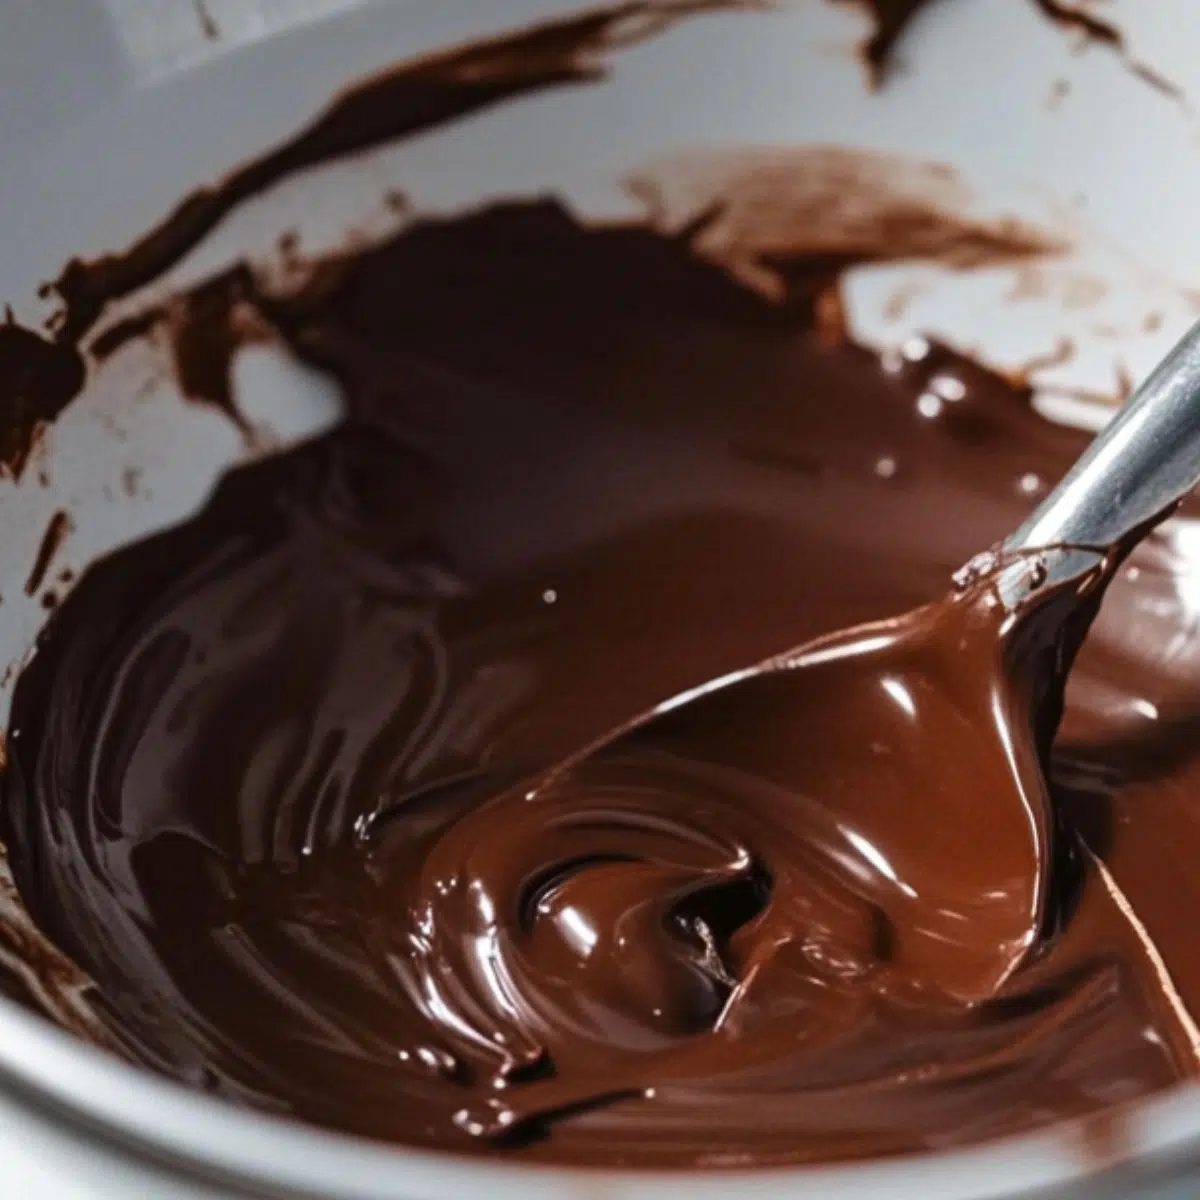
- Step 3: Creating the Perfect Chocolate Coating
Melt chocolate and coconut oil together until smooth and glossy.
- Step 4: Coating and Finishing
Dip chilled truffles in chocolate and finish with a dusting or topping.
Hints & Expert Cooking Tips
- Temperature Control: For smooth, creamy Tiramisu Truffles, always start with mascarpone at room temperature. Cold cheese can cause lumps in the filling; if you're short on time, a quick 10-15 seconds in the microwave will soften it up beautifully.
- Coffee Strength: The bold flavor of Tiramisu Truffles depends on using strong espresso or double-strength instant coffee. A weak brew just won’t cut through the richness of the mascarpone and chocolate.
- Texture Perfect: To give your Tiramisu Truffles that satisfying bite, grind the ladyfinger cookies until fine ; but not too fine. A few small crumbs add texture and stay true to the dessert’s traditional roots.
- Coating Success: Dipping Tiramisu Truffles in melted chocolate should be smooth and easy. If your chocolate thickens, gently reheat it and stir in a touch more coconut oil to keep the coating silky and glossy.
Recipe Variations & Dietary Modifications
Flavor Variations:
There’s more than one way to enjoy Tiramisu Truffles; try these creative twists for something unique:
- Amaretto Tiramisu Truffles: Swap the rum for amaretto liqueur to add a warm almond note
- Chocolate Tiramisu Truffles: Stir in melted chocolate for a richer, fudgier version
- Orange Tiramisu Truffles: Add a touch of orange zest for a fresh, citrusy contrast
Dietary Adaptations:
Whether you’re cutting carbs or avoiding dairy, Tiramisu Truffles are easy to adjust:
- Keto-Friendly: Use sugar-free powdered sweetener and low-carb chocolate
- Lighter Version: Blend mascarpone with Greek yogurt to lighten the texture
- Vegan Option: Choose a plant-based mascarpone alternative and dairy-free chocolate
Creative Presentations:
- Elevate the look of your Tiramisu Truffles with simple, stylish upgrades:
- Shape into squares or bars for a modern dessert board addition
- Roll in chopped hazelnuts instead of coating in chocolate
- Drizzle with white chocolate for a refined touch
Equipment
Essential Tools:
- Large mixing bowl – Glass or stainless steel works best for easy mixing
- Wire whisk – Creates smooth, lump-free mascarpone mixture
- Small cookie scoop – Ensures uniform truffle sizes (1-tablespoon capacity ideal)
- Parchment paper – Prevents sticking and makes cleanup easy
Nice-to-Have Tools:
- Food processor – Perfect for grinding ladyfinger cookies evenly
- Chocolate dipping fork – Creates professional-looking coated truffles
- Fine-mesh sifter – For perfectly smooth cocoa powder dusting
Budget-Friendly Alternatives:
- A rolling pin in a plastic bag can crush cookies if you lack a food processor
- Use a regular tablespoon instead of a cookie scoop
- A regular fork works fine for dipping if you don't have specialized tools
Storage & Meal Prep Tips
Refrigerator Storage:
- Store finished tiramisu truffles in an airtight container in the refrigerator for up to 5 days.
- Layer between parchment paper to prevent sticking.
- Bring to room temperature 10 minutes before serving for the best texture and flavor.
Freezing Instructions:
- These truffle desserts freeze beautifully for up to 1 month.
- Freeze on a baking sheet first, then transfer to freezer bags.
- Thaw in the refrigerator for 2 hours before serving.
Make-Ahead Strategy:
- Prepare the truffle centers up to 2 days ahead and store covered in the refrigerator.
- Dip in chocolate coating the day you plan to serve for the freshest taste and best appearance.
The Chilling Secret Behind Perfect Tiramisu Truffles
You’d never guess it, but the secret to flawless Tiramisu Truffles isn’t in the mixing or the ingredients; it’s in the wait. A seasoned pastry chef once told me this little trick during a workshop in Florence: after shaping your truffle balls, leave them uncovered in the fridge for 30 minutes. Not rushed. Not sealed. Just chilling like they're on vacation.
Why? That short rest forms a delicate “skin” that makes the chocolate coating glide on like silk; no mess, no cracking. Even better, the brief air exposure deepens the espresso notes in the center, giving each bite of your Tiramisu Truffles that luxurious, coffee-kissed intensity. It’s the kind of detail that transforms homemade into truly unforgettable.
FAQ
What is traditional tiramisu made of?
Classic tiramisu is made with layers of coffee-soaked ladyfinger cookies (savoiardi), a creamy mixture of mascarpone cheese, eggs (or whipped cream), and sugar, topped with a dusting of cocoa powder. It's rich, indulgent, and typically chilled overnight to allow the flavors to meld. Tiramisu Truffles capture those same iconic flavors—just in bite-sized form.
What are truffles filled with?
Traditional chocolate truffles are filled with ganache (a mix of chocolate and cream), but Tiramisu Truffles are a bit different. They're filled with a luscious blend of mascarpone, espresso, cocoa powder, and crushed ladyfingers—designed to mimic the heart of a tiramisu without the layers. It’s creamy, coffee-infused, and incredibly satisfying.
What not to do when making tiramisu?
Avoid using weak coffee; it won’t stand up to the rich mascarpone base. Also, never skip chilling time; tiramisu (and Tiramisu Truffles) need time for the flavors to develop. For truffles specifically, don’t coat them too soon; let them rest in the fridge uncovered first so the chocolate adheres properly and finishes with a smooth, professional look.
Is tiramisu better the longer it sits?
Yes; classic tiramisu absolutely improves with time as the flavors meld and intensify. For Tiramisu Truffles, a short chilling time (especially before coating) helps with texture and flavor concentration. While they don’t need to sit overnight like the traditional dessert, a little patience goes a long way in boosting their taste and finish.
Big Flavor, No Fuss
These Tiramisu Truffles prove you don’t need hours or fancy tools to create a dessert that looks stunning and tastes even better. With bold espresso, creamy mascarpone, and rich chocolate in every bite, they’re perfect for parties or a quiet treat-yourself moment—no oven, no stress.
Craving more easy elegance? Try my 6-Inch Tiramisu Layer Cake for a dreamy layered showstopper or these No-Bake Lemon Truffles for a fresh citrus twist. Go ahead, make a batch, snap a photo, and share your take; I’d love to see how your Tiramisu Truffles turn out!
Related
Looking for other recipes like this? Try these:


Pairing
These are my favorite dishes to serve with this Tiramisu Truffles recipe:


No-Bake Tiramisu Truffles
Equipment
- 1 Large mixing bowl
- 1 Whisk or spatula
- 1 Small cookie scoop
- 1 Microwave-safe bowl
- 1 Parchment paper
- 1 Fork or dipping tool
Ingredients
Truffle Filling
- 8 oz mascarpone cheese room temperature
- 0.5 cup powdered sugar sifted
- 2 tablespoon strong espresso cooled
- 1 tablespoon rum or Kahlua optional
- 0.5 cup ground ladyfinger cookies fine, with some texture
- 2 tablespoon cocoa powder unsweetened
Chocolate Coating
- 8 oz dark chocolate chopped
- 2 tablespoon coconut oil
Toppings
- cocoa powder for dusting
- chopped pistachios optional topping
Instructions
- Combine mascarpone and sugar until smooth; add espresso and rum.
- Fold in crushed ladyfingers and cocoa powder.
- Roll into 1-inch balls; place on parchment-lined tray.
- Refrigerate balls uncovered for 30 minutes.
- Combine chocolate and oil; melt until smooth.
- Coat balls in chocolate; place back on tray.
- Sprinkle with cocoa or pistachios while wet.
- Let chocolate set fully before serving.
Leave a Reply