
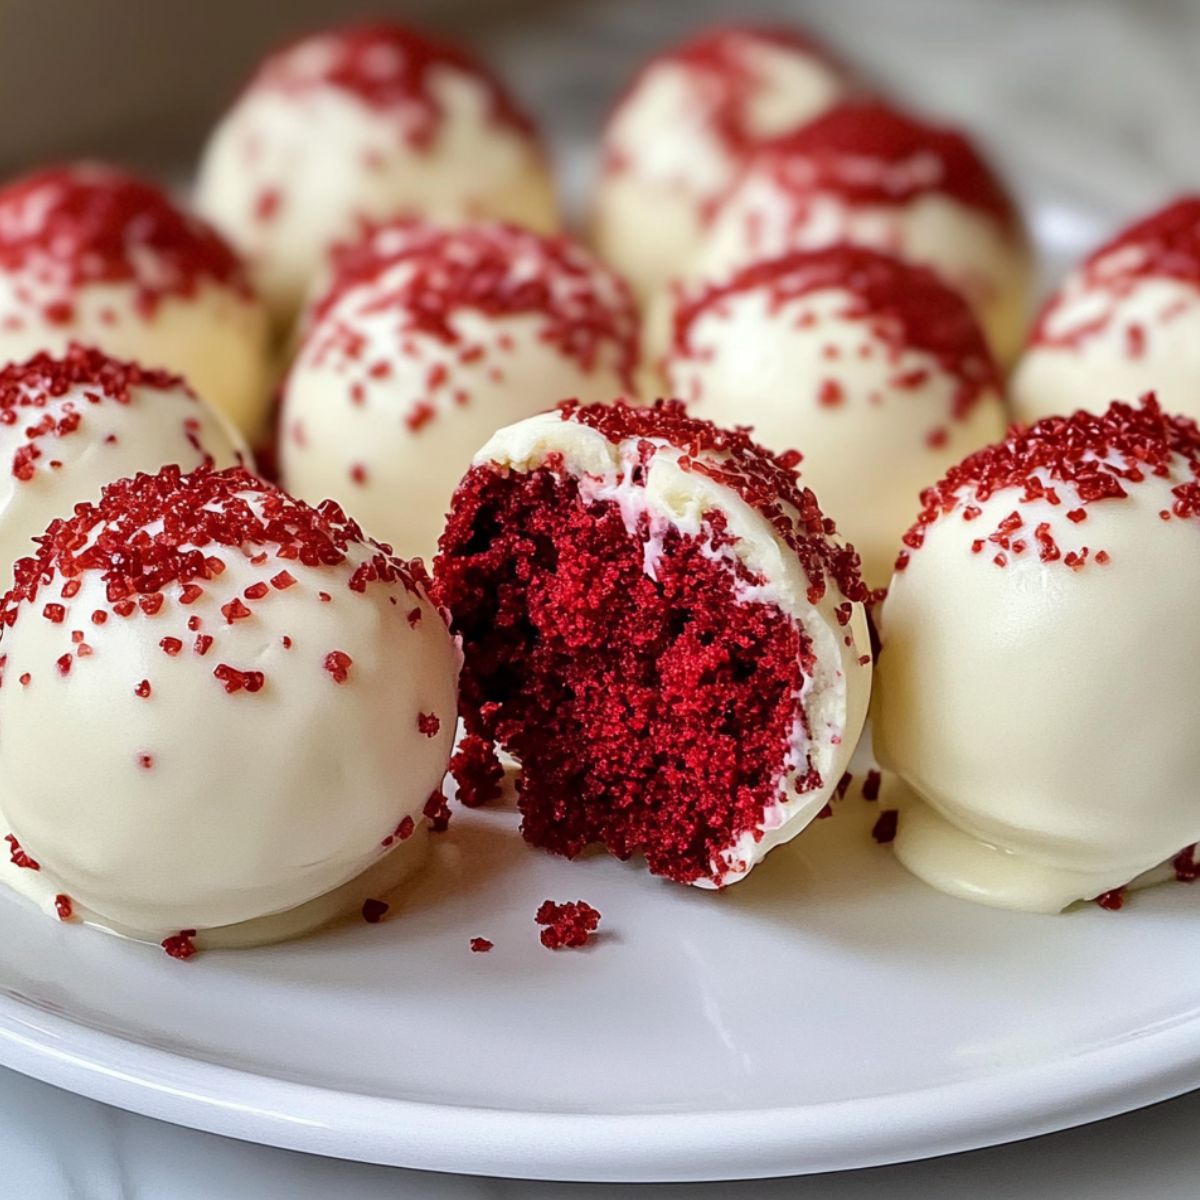
Ever wished you could whip up a dessert that looks bakery-worthy, tastes like pure indulgence, and doesn't leave you buried under a pile of dishes? Let me introduce you to your new secret weapon; Red Velvet Cheesecake Bites. These little beauties strike the perfect balance between rich, chocolatey red velvet cake and smooth, tangy cheesecake—rolled up into heavenly, bite-sized perfection.
Whether you're planning a romantic Valentine's Day dinner, pulling together a dessert table for the holidays, or just craving a sweet treat after dinner, Red Velvet Cheesecake Bites check all the boxes; delicious, eye-catching, and easy to make even if you're short on time.
What makes Red Velvet Cheesecake Bites truly irresistible is their versatility; they're just as welcome at a classy party as they are in a midnight snack stash. And let’s be honest; when something tastes this good and comes together without a fuss, it’s worth making on repeat.
Why You’ll Fall in Love with These Mini Red Velvet Cheesecake Bites
There’s just something undeniably magical about the union of silky cream cheese and that unmistakable cocoa-kissed red velvet flavor. These Red Velvet Cheesecake Bites capture that beloved pairing in a perfectly poppable, party-friendly form. They’re a crowd-pleaser at any gathering, but also quietly steal the show when you sneak one from the fridge at midnight (no judgment here).
One of the things that makes this recipe so special? Simplicity. The cheesecake filling is completely no-bake, meaning less oven time and more “where have these been all my life?” moments. The soft, melt-in-your-mouth cake interior wrapped in a snappy chocolate shell creates a texture contrast that’s both elegant and addictive. Trust me; once you’ve had one, Red Velvet Cheesecake Bites are going to be a permanent fixture in your dessert rotation.
A Sweet Backstory: The Legacy of Red Velvet Cheesecake
To truly appreciate these bites, it’s worth savoring the history behind their flavors. Red velvet cake is steeped in Southern charm, with roots reaching back to the Victorian era when cocoa interacted with acidic ingredients to create its naturally reddish hue. But it wasn’t until the Great Depression that red velvet as we know it began making waves; thanks to the clever folks at the Adams Extract company, who promoted red food coloring as a way to turn humble cakes into show-stoppers during tough times.
Cheesecake, on the other hand, predates red velvet by centuries; think ancient Greece, where it was served to Olympians as an energy-boosting treat. Fast forward to today, and you’ve got Red Velvet Cheesecake Bites—a delicious fusion of time-honored classics, reinvented for the modern sweet tooth.
So whether you’re diving into a bit of nostalgia or just chasing the perfect bite-sized indulgence, these Red Velvet Cheesecake Bites are proof that some dessert combos are simply meant to be.
Jump to:
Ingredients
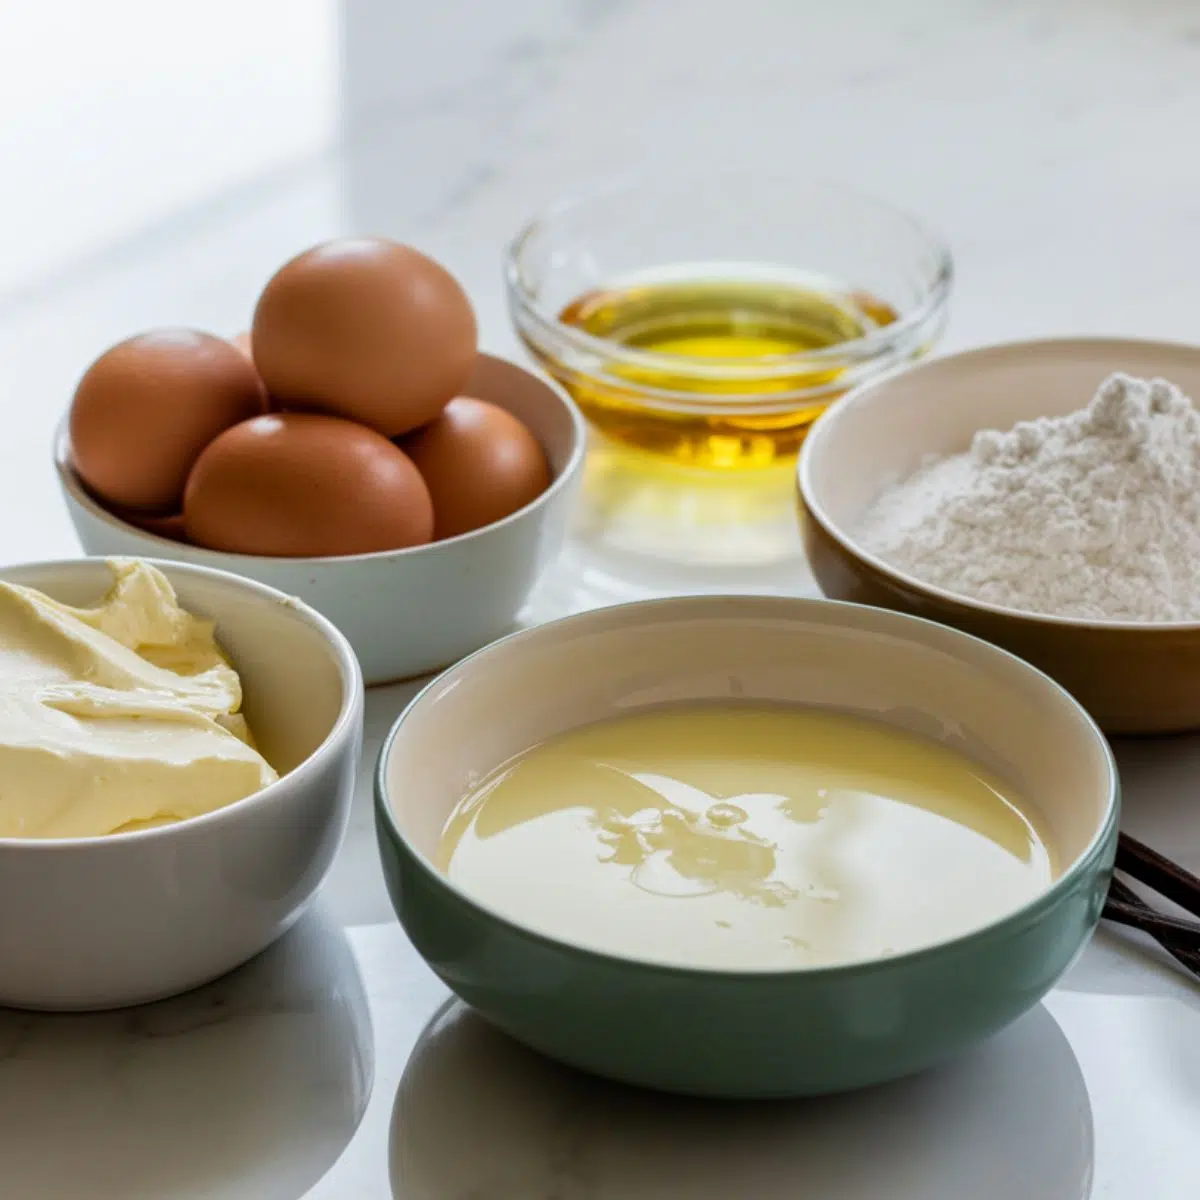
For the Red Velvet Base:
- 1 box red velvet cake mix (15.25 oz)
- 3 large eggs
- ⅓ cup vegetable oil
- 1 cup water
- 1 teaspoon vanilla extract (enhances the chocolate notes)
For the Cheesecake Filling:
- 8 oz cream cheese, softened (provides that signature tang)
- ¼ cup powdered sugar (for smooth sweetness without graininess)
- 1 teaspoon vanilla extract
- Pinch of salt (balances the sweetness)
For the Coating
- 16 oz white chocolate or candy melts (creates the perfect shell)
- 2 tablespoons shortening or coconut oil (helps thin the chocolate for dipping)
- Red food coloring (optional, for decorative drizzle)
- Sprinkles or crushed cookies (optional, for garnish)
See recipe card for quantities.
Instructions
Bake and Cool the Red Velvet Cake
- Preheat your oven to 350°F and grease a 9x13 baking pan.
- Mix the red velvet cake mix with eggs, oil, water, and vanilla extract for about 2 minutes until well combined.
- Bake for 25-30 minutes until a toothpick comes out clean, then cool completely (speed up cooling in the refrigerator if needed).
- While the cake cools, beat the softened cream cheese until smooth, then add powdered sugar, vanilla extract, and salt. Refrigerate this cheesecake mixture for 30 minutes.
Form the Cheesecake Bites
- Crumble the cooled cake into fine crumbs in a large bowl using your hands or a fork.
- Add about ¾ of the cheesecake mixture to the cake crumbs and combine thoroughly.
- Use a 1-inch cookie scoop to portion the mixture, then roll between your palms to form smooth balls.
- Optional: For extra cheesecake flavor, make an indentation in each ball, fill with reserved cheesecake mixture, then reseal and re-roll.
Chill the Cake Balls
- Place the formed balls on a parchment-lined baking sheet.
- Freeze for 20-30 minutes until firm.
- This chilling step is crucial - cold balls are much easier to dip without falling apart.
Dip and Decorate
- Melt the white chocolate or candy melts with shortening in 30-second microwave intervals.
- Working with a few balls at a time (keeping the rest chilled), dip each into the melted chocolate.
- Place coated balls back on parchment paper and immediately add sprinkles if desired.
- For extra flair, drizzle with red-tinted melted chocolate using a plastic bag with the corner snipped off.
- Allow to set completely before serving or storing.
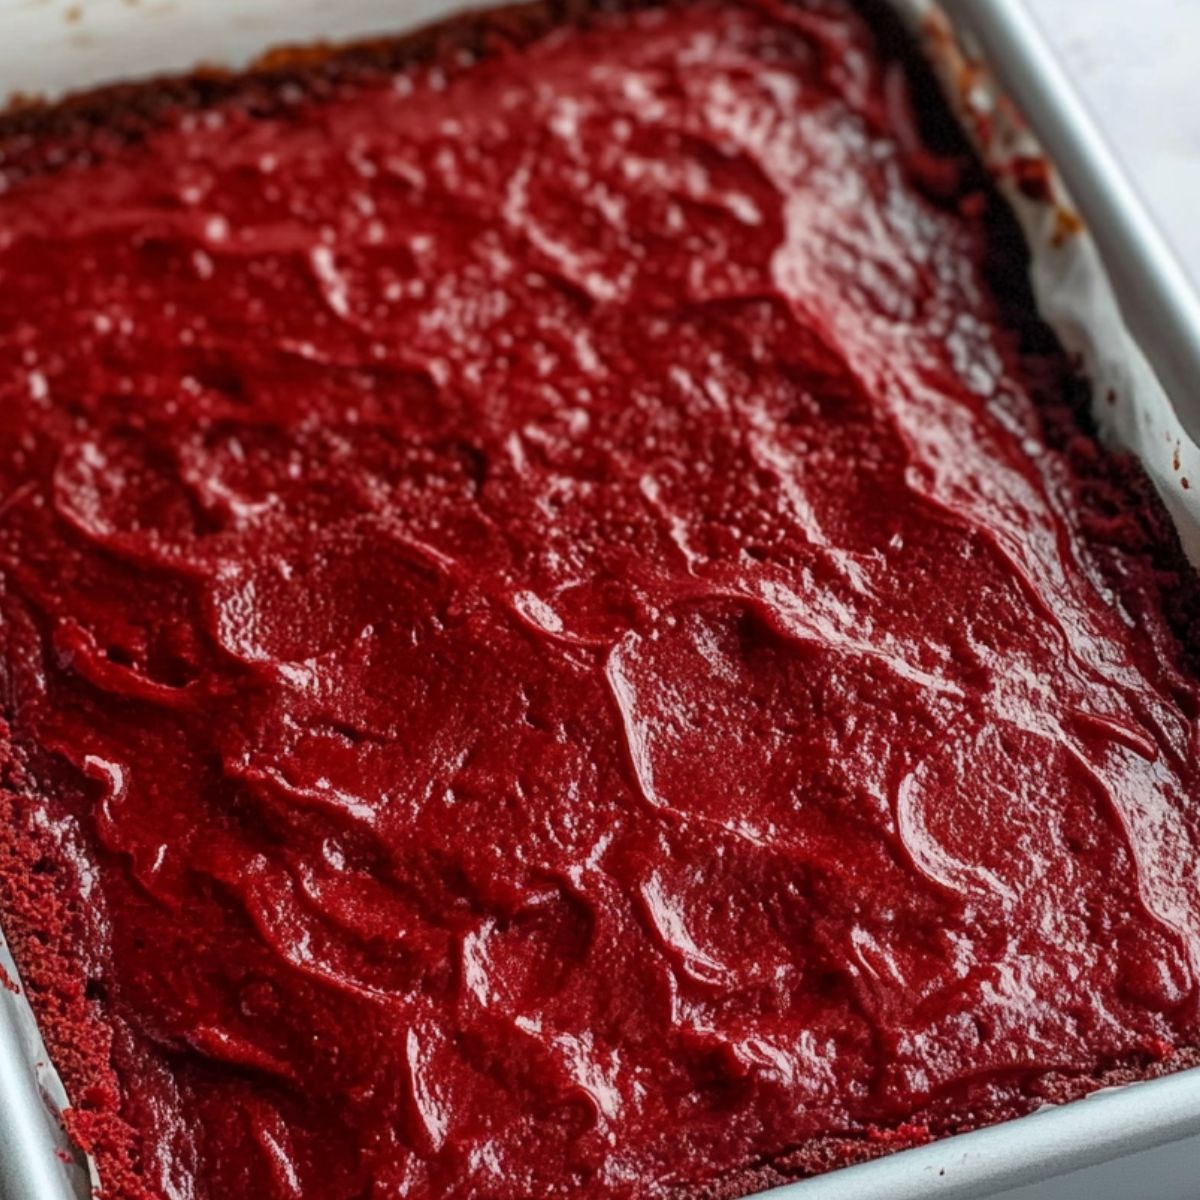
- Step 1: Bake and Cool the Red Velvet Cake
Bake the cake and let it cool before crumbling
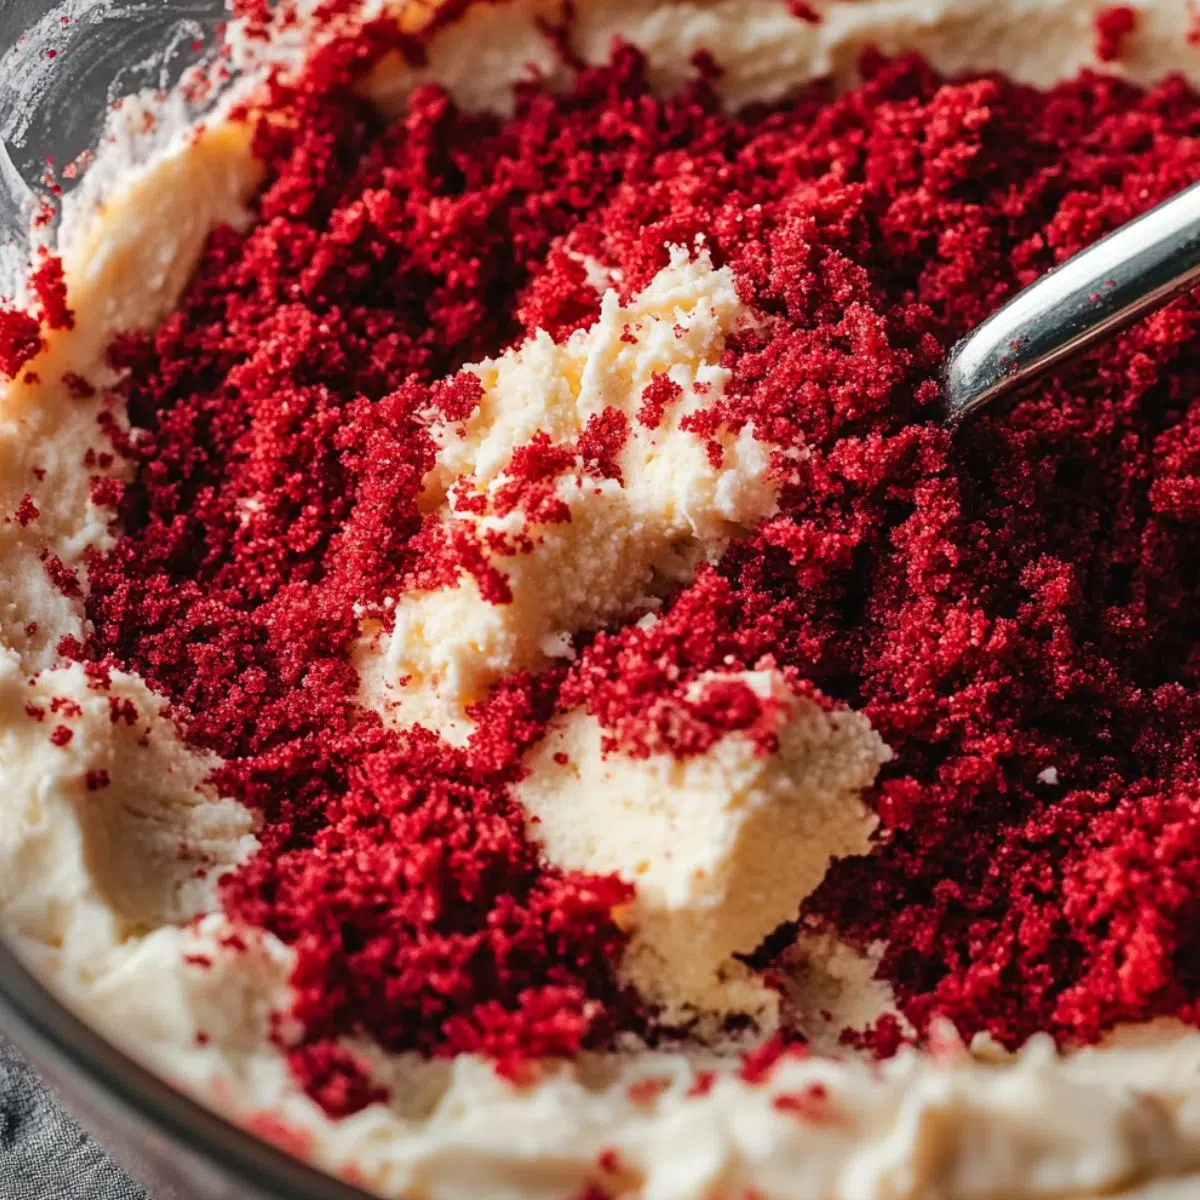
- Step 2: Form the Cheesecake Bites
Mix cake crumbs and cheesecake, then roll into smooth balls
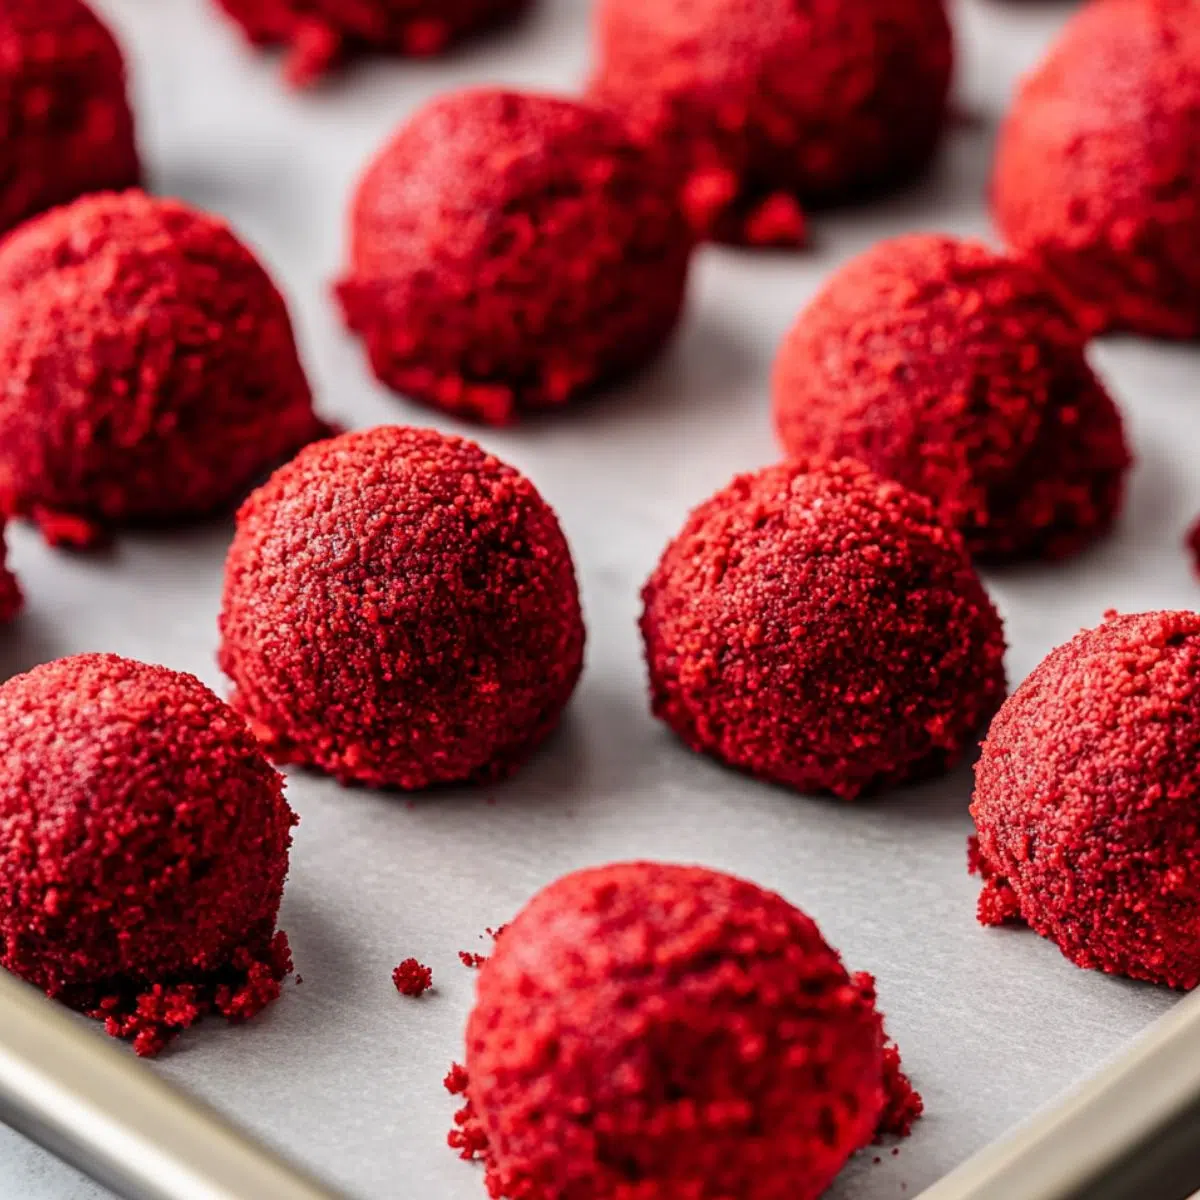
- Step 3: Chill the Cake Balls
Freeze the rolled bites until firm for easier coating
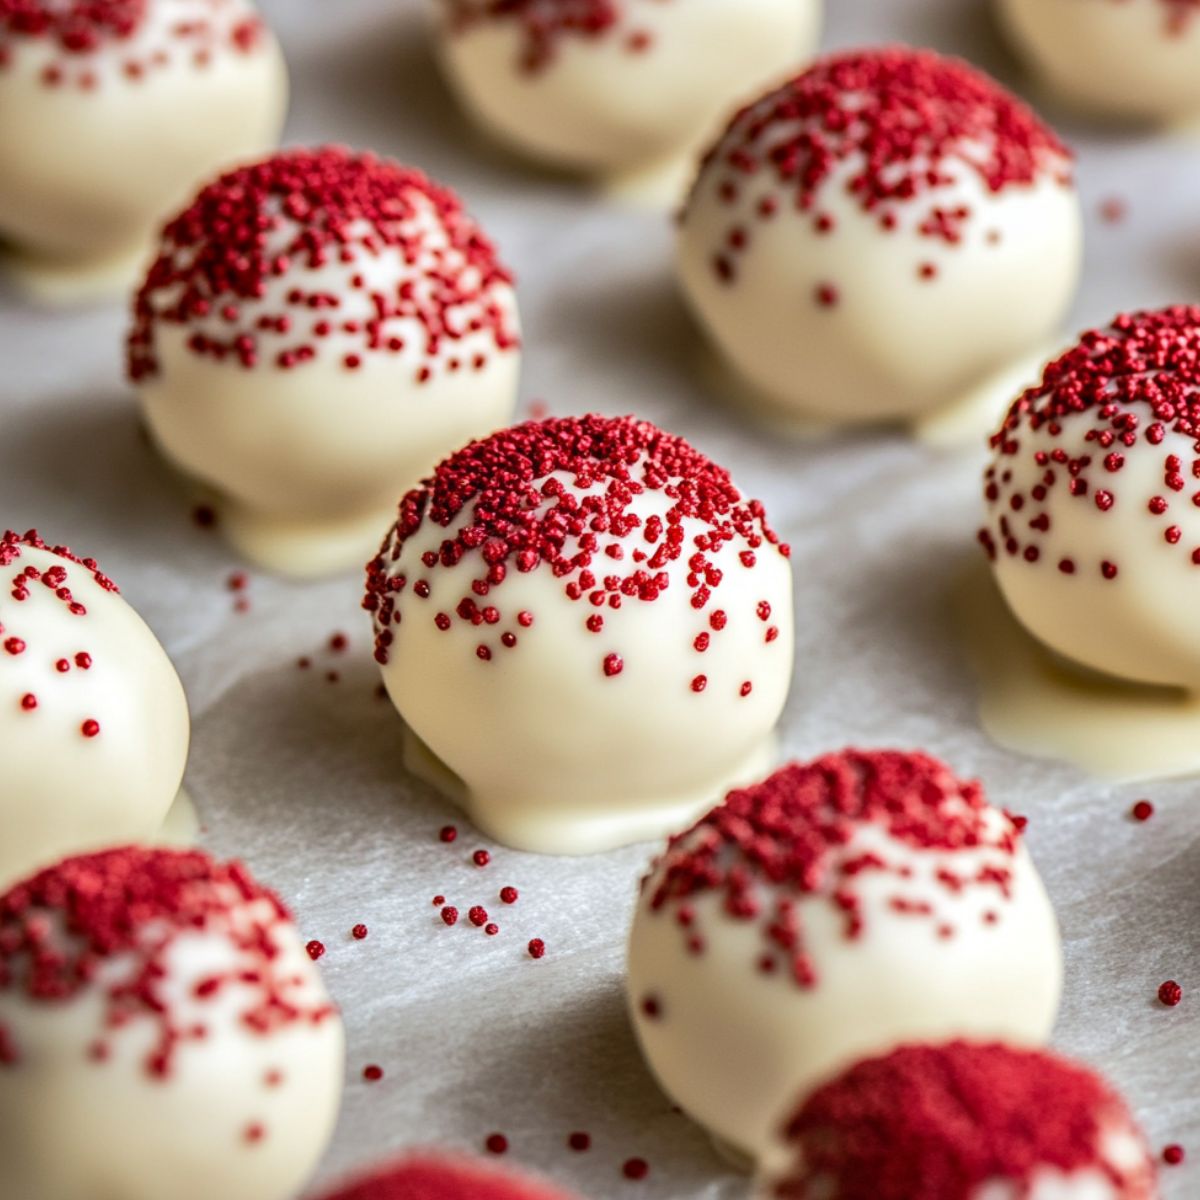
- Step 4: Dip and Decorate
Dip chilled bites in chocolate, then decorate with drizzle or sprinkles
Expert Tips for Perfect Red Velvet Cheesecake Bites
1. Master the Cake Texture
Resist the urge to overbake. A slightly underdone red velvet cake (still fully safe to eat) stays tender and moist, which makes it easier to crumble and shape into smooth, cohesive bites. Think rich and pliable—not dry and crumbly.
2. Chill Like a Pro
Freezing isn’t optional; it’s essential. Cold cake balls hold their shape beautifully when dipped, so give them time to firm up before you start working with the chocolate. Warm bites = messy meltdown.
3. Dipping Done Right
For that sleek, bakery-style coating, stir in a touch of shortening or coconut oil while melting your chocolate. It creates a thinner consistency that glides over the bites and sets with a gorgeous, even finish.
4. Work Smart, Not All at Once
Only take a few bites out of the freezer at a time. The rest should stay chilled until you're ready for them. If they start to soften too much, the coating becomes trickier, and you risk ending up with cake on a stick... but not the good kind.
5. Clean Finish, Happy Fingers
Skip the chocolate-covered fingers and go for finesse. A toothpick or fork makes dipping cleaner, neater, and far more professional-looking. Plus, you get to feel like a chocolatier for a moment—and that’s always a win.
Smart Swaps: Ingredient Substitutions
Need to tweak the recipe to fit your pantry or your lifestyle? No problem. One of the best things about these Red Velvet Cheesecake Bites is how flexible they are. Here are some easy ingredient swaps that keep the flavor and texture spot-on:
Cream Cheese
Looking for something lighter? Swap in Neufchâtel cheese, it has a similar taste but with less fat. Going dairy-free? Use a vegan cream cheese alternative for a plant-based version that still delivers that signature tang.
Red Velvet Cake Mix
Out of red velvet cake mix? No stress. You can use chocolate cake mix and stir in 1–2 tablespoons of red food coloring. Want to go all-natural? Add about 3 tablespoons of beet powder for that deep red hue with a healthy twist.
White Chocolate
No white chocolate? Dark or milk chocolate also work beautifully as a coating and offer a richer flavor profile. If you need a dairy-free option, melt vegan chocolate chips with a little coconut oil (about 1 tablespoon) to get that smooth, dippable consistency.
Vegetable Oil
You can easily replace vegetable oil with melted butter for a richer flavor, applesauce if you’re watching fat content, or coconut oil for a subtle tropical note. All will get the job done deliciously.
Powdered Sugar
In a pinch, you can blend granulated sugar in a food processor until it’s fine and powdery. Want a sugar-free option? Monk fruit sweetener (the powdered kind) works wonderfully and keeps things sweet without the spike.
Recipe Variations & Dietary Modifications
Make It Truly No-Bake
Want to skip the oven entirely? You can easily make Red Velvet Cheesecake Bites without baking a cake from scratch. Just use store-bought red velvet cake or even crumbled red velvet cookies as your base. It’s fast, convenient, and still delivers that indulgent flavor.
Go Gluten-Free
With one simple swap, these bites become gluten-friendly. Just use a gluten-free red velvet cake mix in place of the regular one. The cheesecake filling is already gluten-free, so you’re good to go with minimal effort.
Tone Down the Sweetness
If you're not into overly sweet desserts, there’s an easy fix. Reduce the powdered sugar in the cheesecake mixture to taste, and opt for a dark chocolate coating instead of white chocolate. The result? A deeper, richer, and more balanced treat that still satisfies.
Flavor Twists to Try
- Double Chocolate Indulgence: Stir in ½ cup of mini chocolate chips for an extra dose of chocolate goodness in every bite.
- Peppermint Pop: Add ½ teaspoon of peppermint extract to the cheesecake mixture for a refreshing, holiday-inspired version of Red Velvet Cheesecake Bites.
- Cookies & Cream Dream: Mix in ¼ cup of crushed Oreos to the red velvet cake base for a decadent, cookies-and-cream vibe.
Kitchen Tools You'll Need
- Microwave-safe bowl for melting chocolate
- 9x13 baking pan
- Mixing bowls
- Electric mixer
- Cookie scoop (1-inch size works well)
- Baking sheets
- Parchment paper
Storage & Make-Ahead Tips
Refrigerator Storage
Once your Red Velvet Cheesecake Bites are fully assembled and coated, store them in an airtight container in the refrigerator. They'll stay fresh and delicious for up to 5 days. The cool temperature keeps the cheesecake filling firm and flavorful, giving each bite that perfect chilled texture.
Freezer Instructions
- Uncoated Cake Balls: Planning ahead? Roll your cake and cheesecake mixture into balls and freeze them—uncoated—for up to 3 months. When you're ready to finish them, just thaw in the refrigerator before dipping in chocolate.
- Fully Assembled Cheesecake Bites: Yes, you can freeze the finished treats too. Arrange them in a single layer on a baking sheet and freeze until solid. Then, transfer them to a freezer-safe bag or container. They’ll keep beautifully for up to 1 month. Be sure to thaw in the fridge before serving to maintain their texture and flavor.
Make-Ahead Party Tip
These Red Velvet Cheesecake Bites are practically made for early prep. In fact, they often taste even better when made 1 to 2 days in advance. A little rest time in the fridge lets the red velvet and cheesecake flavors marry perfectly, making each bite even more satisfying.
The Secret That Transformed My Red Velvet Cheesecake Bites
It wasn’t until my third batch of Red Velvet Cheesecake Bites that I stumbled upon a game-changing secret completely by accident. I had run out of candy melts and, in a pinch, reached for the good stuff: real white chocolate.
What happened next? Total transformation. The velvety richness and subtle vanilla notes of the high-quality white chocolate elevated my Red Velvet Cheesecake Bites to a whole new level. The flavor blended seamlessly with the tangy cheesecake center, and suddenly, everything just worked. It was like the bites had found their final form.
And here’s another gem I picked up along the way, when rolling your Red Velvet Cheesecake Bites, slightly damp hands are your best friend. It keeps the mixture from sticking and helps you shape those little red gems without the mess.
So trust me on this one; if you want your Red Velvet Cheesecake Bites to truly shine, these small tweaks make a big difference.
FAQ
Do cheesecake bites need to be refrigerated?
Yes, definitely. Because they contain a cream cheese filling, Red Velvet Cheesecake Bites must be kept in the refrigerator to stay fresh and safe to eat. The cool temperature helps preserve their flavor and texture, keeping the cheesecake center firm and delicious.
Does red velvet cheesecake have to be refrigerated?
Absolutely. Whether it’s a full cake or mini bites, anything made with cream cheese needs refrigeration. Red Velvet Cheesecake Bites should be stored in an airtight container in the fridge and can be enjoyed chilled for up to 5 days.
How long do cheesecake bites take to thaw?
If you've frozen your Red Velvet Cheesecake Bites, simply move them from the freezer to the refrigerator and let them thaw slowly for a few hours or overnight. For best texture and taste, avoid thawing them at room temperature, as this can cause the coating to sweat or soften unevenly.
Can I freeze cheesecake bites?
Yes! Red Velvet Cheesecake Bites freeze beautifully. You can freeze them uncoated for up to 3 months or fully assembled for up to 1 month. Just be sure to freeze them in a single layer first to avoid sticking, then transfer to a freezer-safe container. Thaw in the refrigerator before serving for the best results.
One Bite, Total Showstopper
If there's one thing I’ve learned, it’s this; never underestimate the power of a bite-sized dessert that looks fancy but is secretly easy to make. These Red Velvet Cheesecake Bites bring together two of the most beloved sweets—red velvet cake and creamy cheesecake—into one delightfully poppable treat that’s perfect for holidays, baby showers, birthdays... or let’s be real, a random Tuesday night.
What I love most? This recipe is wonderfully forgiving. Want it a little less sweet? Dial down the sugar. Want to change the coating? Go for dark chocolate or even drizzle them with a hint of lemon glaze if you're feeling bold. You can prep them ahead of time, freeze them for later, and still impress guests like you’ve been slaving away in a pastry kitchen.
And if you're into easy, elegant desserts that wow, you have to try my Cheesecake Red Velvet Brownie—a fudgy, creamy masterpiece—and the ultra-refreshing Lemon Truffles Recipe, which is basically sunshine in dessert form. They’re all part of my little arsenal of go-to crowd-pleasers.
So next time you need a show-stopping treat, let these mini Red Velvet Cheesecake Bites work their magic. Just don’t forget to take a photo before they vanish—they have a way of disappearing fast!
Tried them? Got your own twist? Drop your favorite version in the comments—I’d love to hear how you made them your own.
Related
Looking for other recipes like this? Try these:


Pairing
These are my favorite dishes to serve with this Red Velvet Cheesecake Bites Recipe:

Red Velvet Cheesecake Bites Recipe
Equipment
- 1 9x13 baking pan
- 2 Mixing bowls
- 1 Electric mixer
- 1 Cookie scoop 1-inch
- 1 Baking sheets
- 1 Parchment paper
- 1 Microwave-safe bowl
Ingredients
Cake Base
- 1 box Red velvet cake mix
- 3 eggs
- ⅓ cup vegetable oil
- 1 cup water
- 1 teaspoon vanilla extract enhances chocolate notes
Cheesecake Filling
- 8 oz cream cheese softened
- ¼ cup powdered sugar
- 1 teaspoon vanilla extract
- pinch salt
Coating
- 16 oz white chocolate or candy melts
- 2 tablespoon shortening or coconut oil
- red food coloring optional for decorative drizzle
- sprinkles or crushed cookies optional garnish
Instructions
- Bake red velvet cake as instructed and cool completely.
- Beat cream cheese, sugar, vanilla, and salt until smooth. Chill.
- Mix crumbled cake with cheesecake filling; roll into 1-inch balls.
- Freeze balls for 20–30 minutes until firm.
- Melt chocolate with shortening; dip and coat each ball.
- Add sprinkles or drizzle with colored chocolate before setting.

Leave a Reply